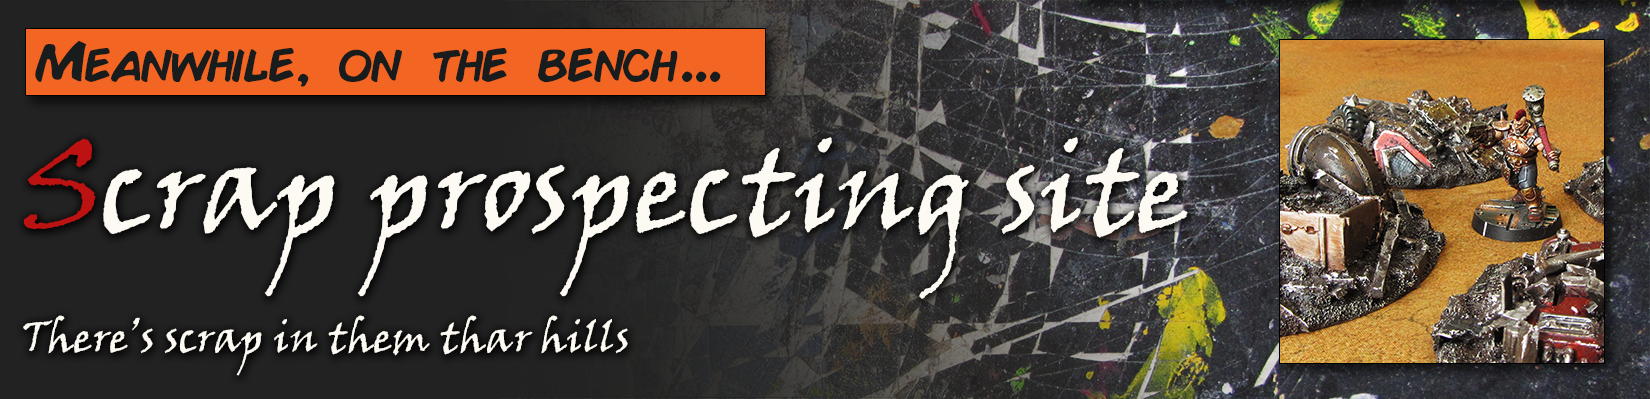
I’m running an Ash Wastes campaign for Necromunda later this year, and playing some tester games has made me realise I need some serious verticality. I needed some serious old school gamer tech. I needed some modular hills.
Building some Ash Waste hills terrain for Necromunda was a daunting task – is making rocks out of wood inspired or insane?
The time dilation effect of lockdown(s) has lead me to believe the Ash Waste starter set came out a year or two ago. It was crushingly revealed about four years ago at Adepticon and I could feel more grey hair appearing.
After running a successful Zone Mortalis-style Uprising campaign ‘Emperor Falls’ last year, it was finally time to leave the metal caves of the underhive and enjoy the rocky caves of the Ash Wastes.
Oops it’s been two full years since Necromunda Ash Wastes was released and I have yet to play a single Ash Wastes game. I have, however, played dozens of games on ashen, wasted environments thanks to a bunch of terrain I created over lockdown.
A scenario in an old Inquisitor campaign, Crown of Bones, called for the infiltration of a secret genetics lab deep beneath a Navis Nobilite estate. I planned to use my Necromunda walls and tiles to create the winding catacombs, but I didn’t have anything I could use as set dressing. Just what is in a horrible genetics lab?
I hit the internet and scrolled through the usual scenery vendor fares, but nobody offered anything like what I was looking for. You might find the odd cryo chamber or tesla coil on some independent retailers but I needed enough props to fill a table, not just one or two small pieces barely enough for cover. It was time to hit the bits box.
I was working in the lab late one night
The most consistent problem I butted up against was what to actually build. We’ve all got a pretty strong mental picture of a mad science lab, but trying to pick out individual components to enlarge and duplicate was surprisingly tough. I had a limited amount of time before the game I’d need them for, so I couldn’t do anything overly complicated either.
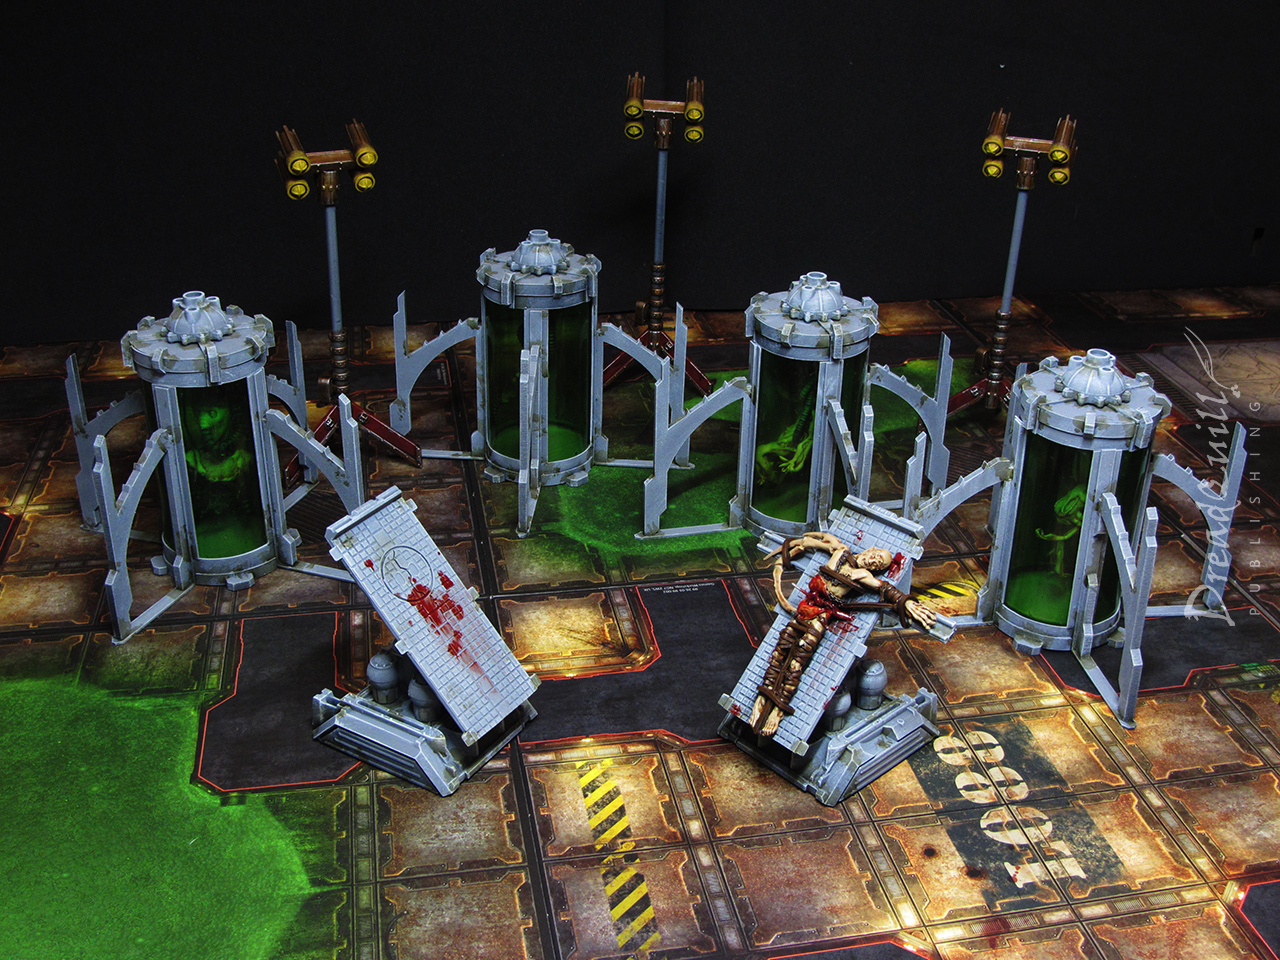
I needed floor-fillers that were visual shorthand for ‘bad things happen here’, and that could be reasonably re-used in other games or settings without any effort. I wanted to do the classics like rows of bubbling beakers, tesla coils, or cogitator stacks, but nowhere sold anything large or detailed enough to use as a conversion base I didn’t have the time, money, or inclination to scratch build my own. I boiled it down to three key features:
Cloning vats – it was a genetics lab filled with failed clones, so this was a must.
Surgery/autopsy tables – a sci fi horror staple, and can easily be repurposed into a dozen other Inquisitor scenarios.
Floodlights – I originally planned for multi-limbed auto-surgeons with lamps on them, but settled on floodlights for their versatility. They could be used in any number of outdoor situations, and provide an extra dynamic to the board. Not only can you play with lighting condition modifiers, but you can strategically place them around your plot maguffin to signpost to your players what they should be looking at. A literal metaphorical spotlight!
Cloning vats
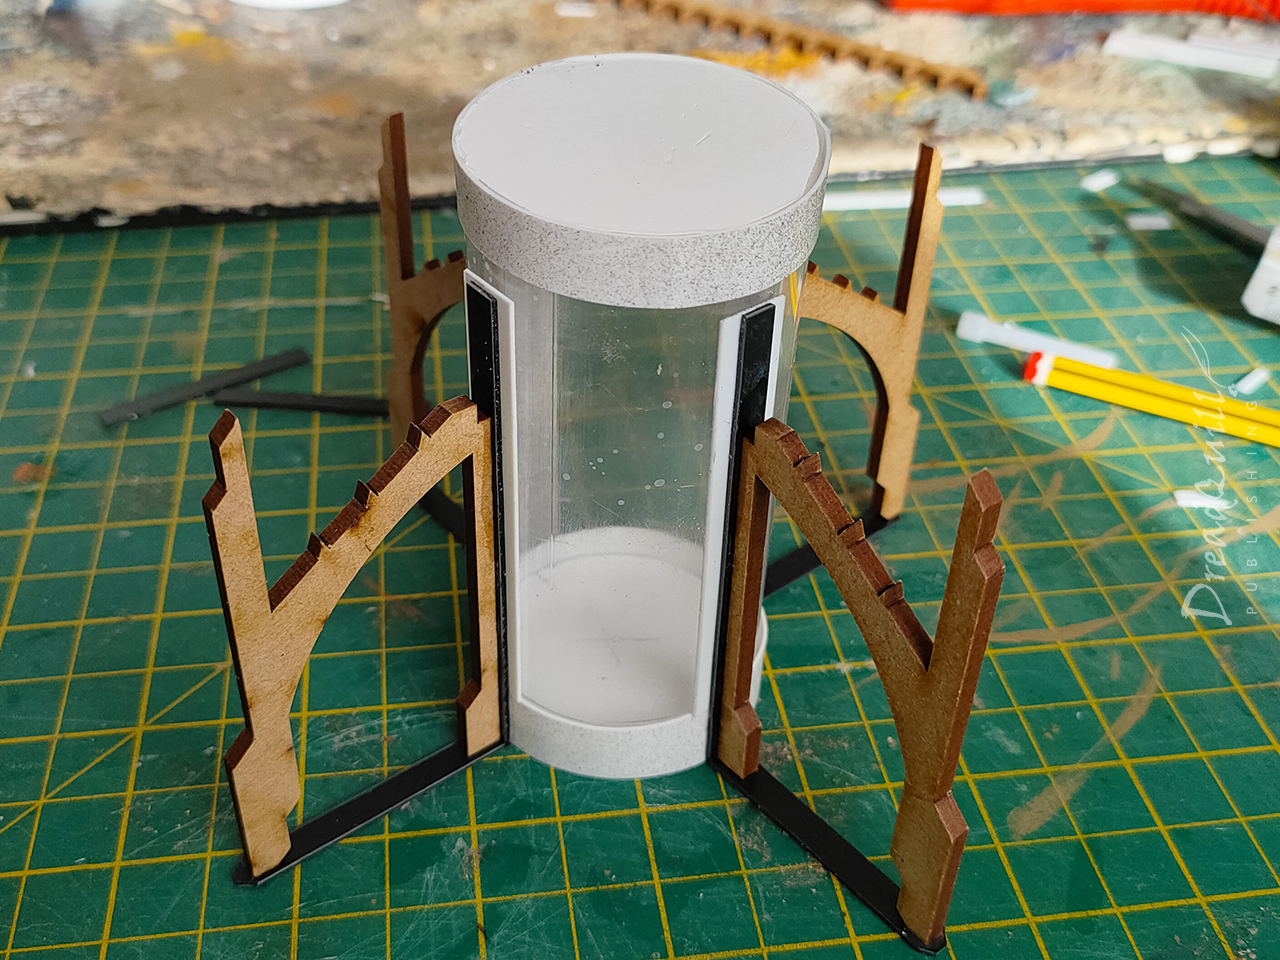
These were the bits I needed to get right, so they took most of my energy. I already had a rough idea of how I wanted it to look – I had a lot of MDF gothic buttresses lying around from my hab block project that would be perfect around a central pillar, but what to use for the vat itself?
I played with the idea of doing the vat in clear resin and illuminating it with an LED, but that involved more experimentation time than I had available to me. I eventually found some clear plastic tube packaging that came with some washi tape, so snatched up a couple packs of that and set to work carving them into more appropriate sizes.
The casing was made from strips of plasticard cut to length, with circles of foamboard at the top and bottom for structural integrity. I detailed it with little plastic and mdf gubbins to give it more interesting shapes when it came to painting.
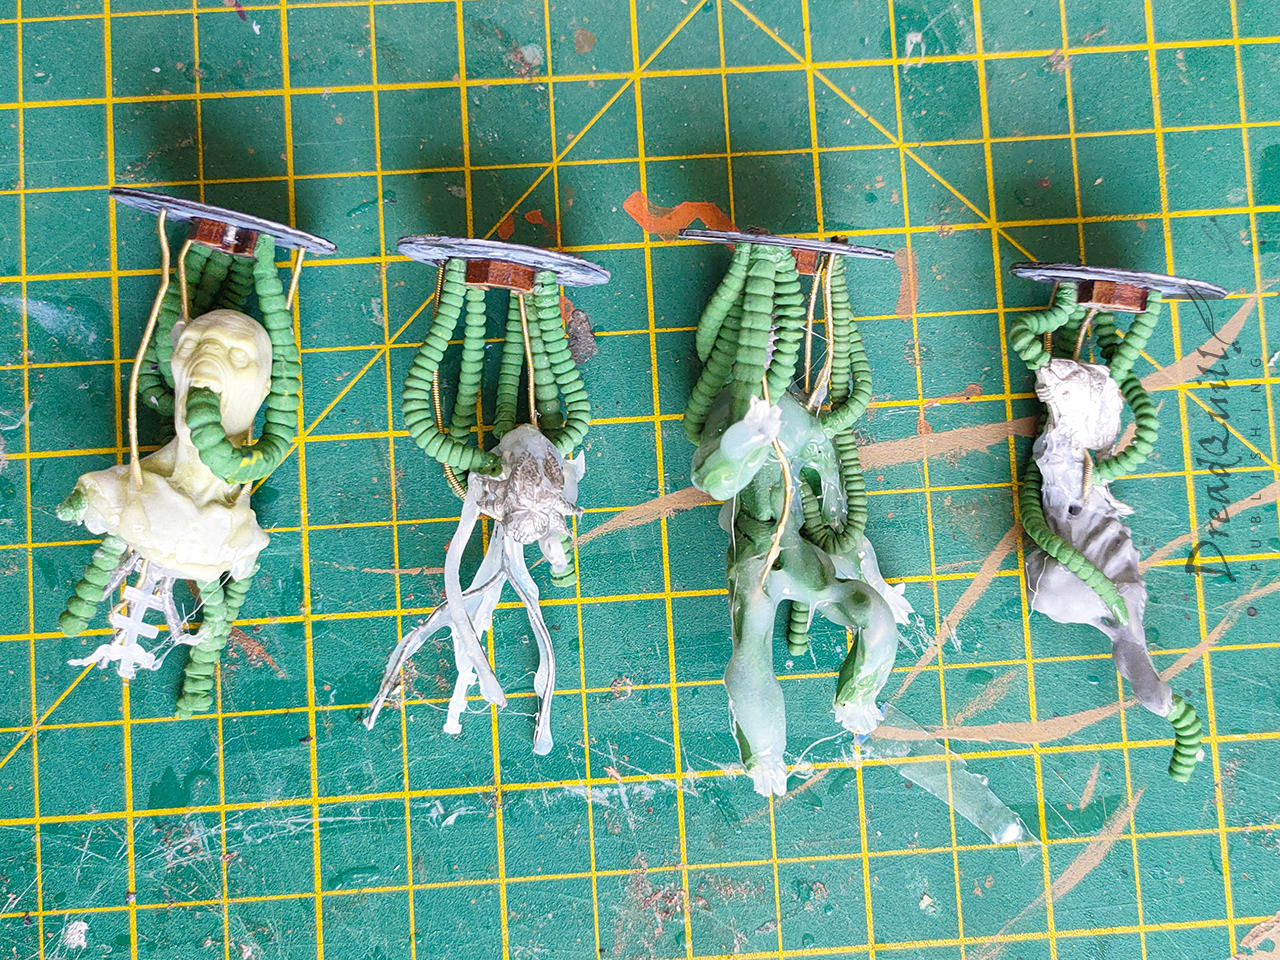
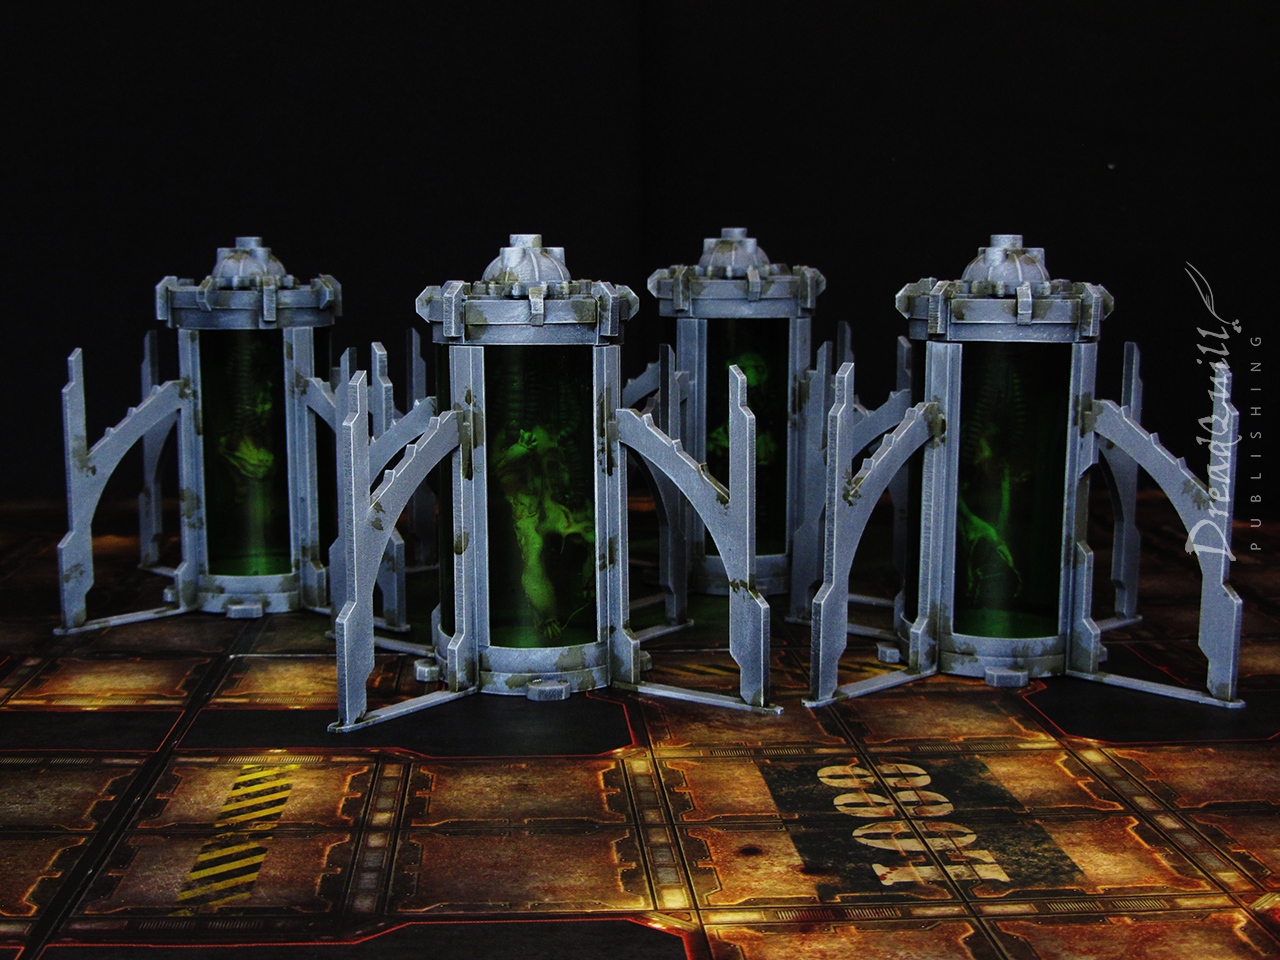
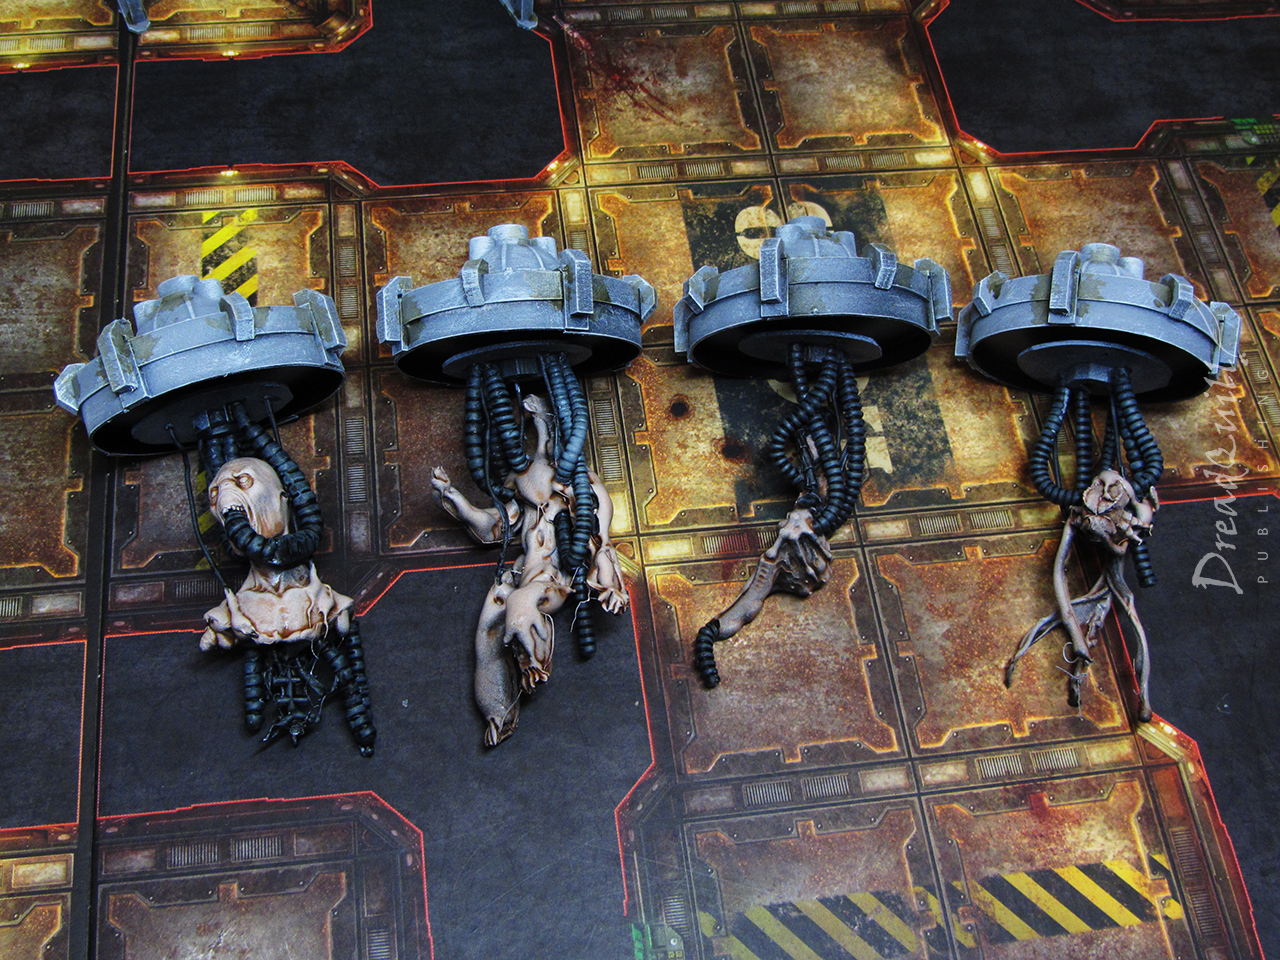
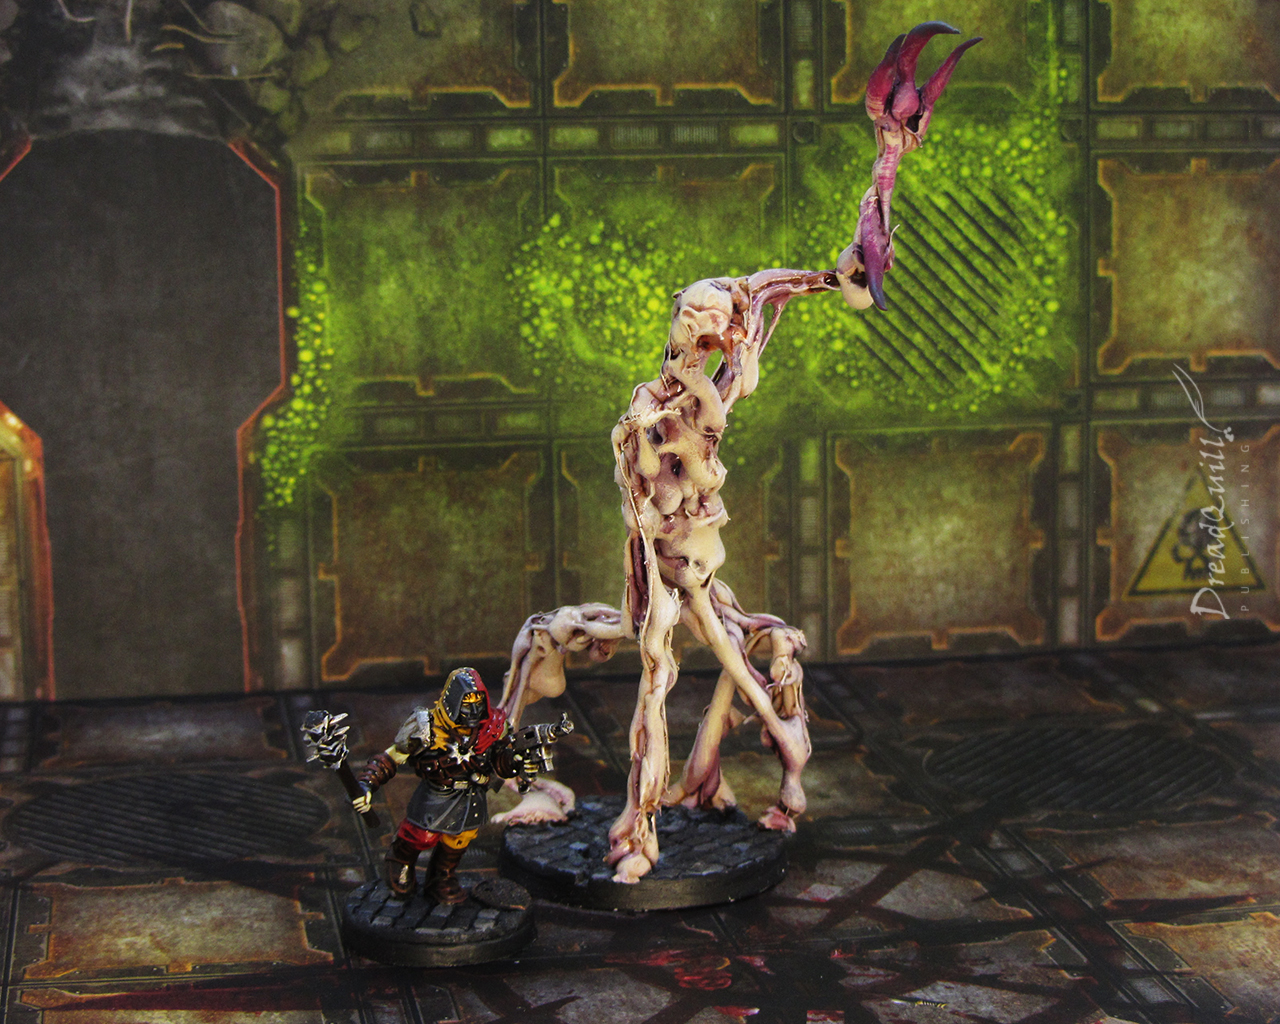
I wanted the interiors to be removable so I had a choice of inhabitant for future usage. I made up a few horrible little guys out of random odds and ends from the bits box, some wire, green stuff tentacles, and hot glue (inspired by the suitably horrible Widower project). They didn’t need to be anything specific, just representative of something organic and questionably alive floating around inside a vat of mystery liquid
They were attached to magnetised ceilings so they dangled inside the vats and could be removed or changed by taking the lids off.
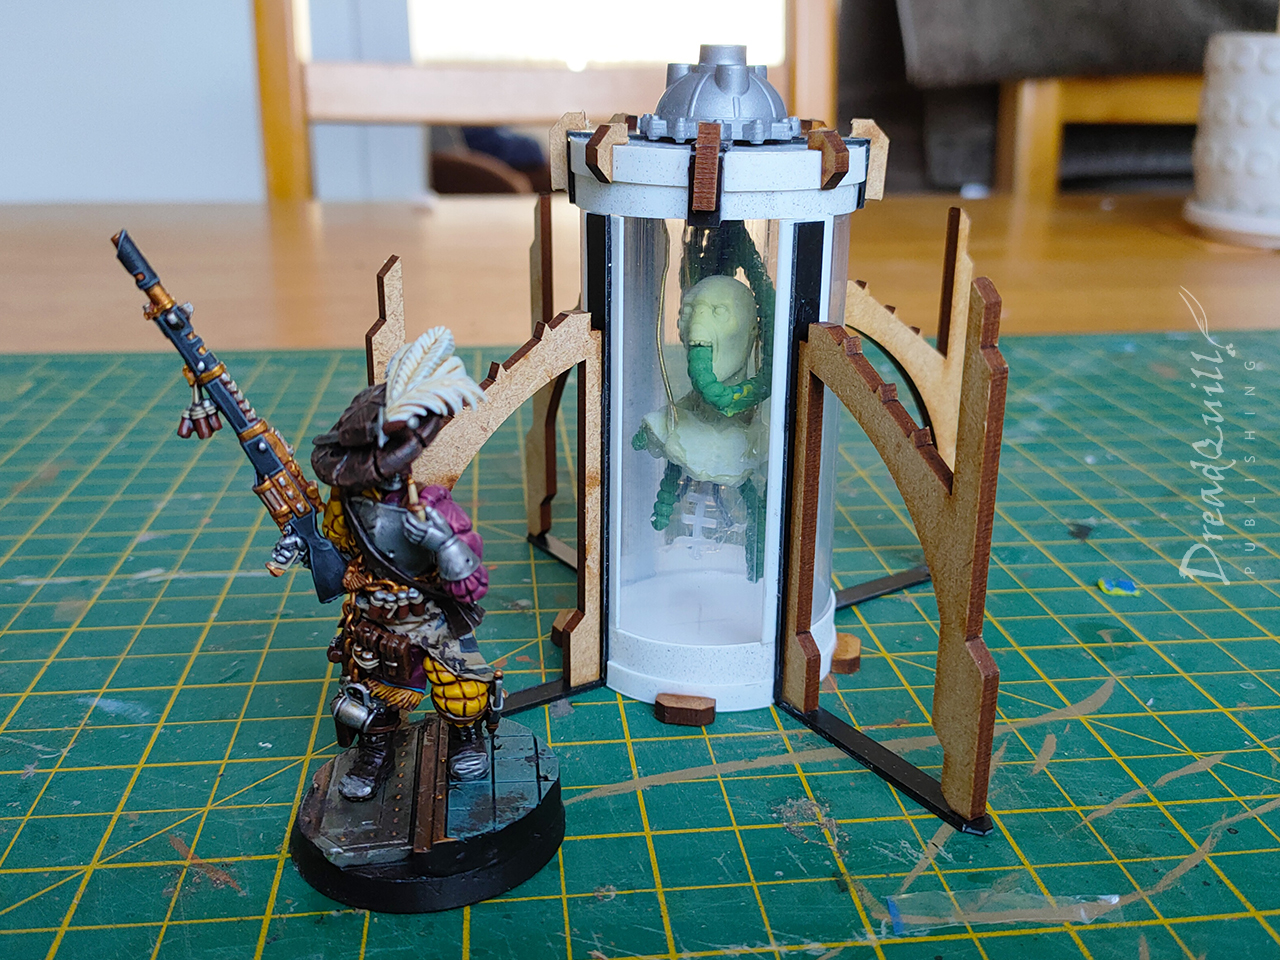
I didn’t glue the transparent tube into the base as I wanted some way of representing a broken vat when someone inevitably goes Hans Gruber on the glassware. I toyed with the idea of creating a broken insert but it was very complicated and I didn’t have enough plastic tubing to do it justice. Finished, not perfect!
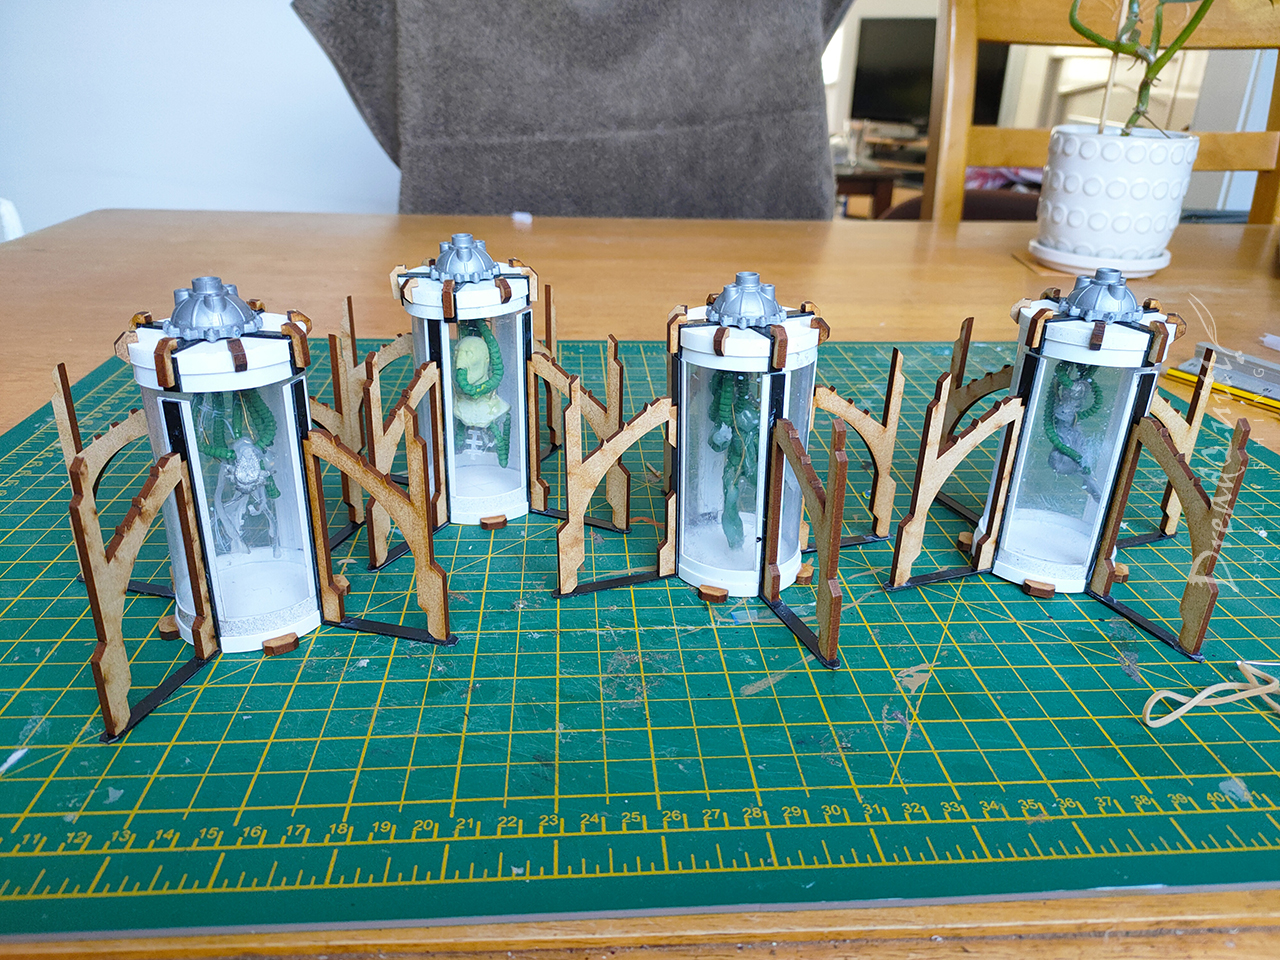
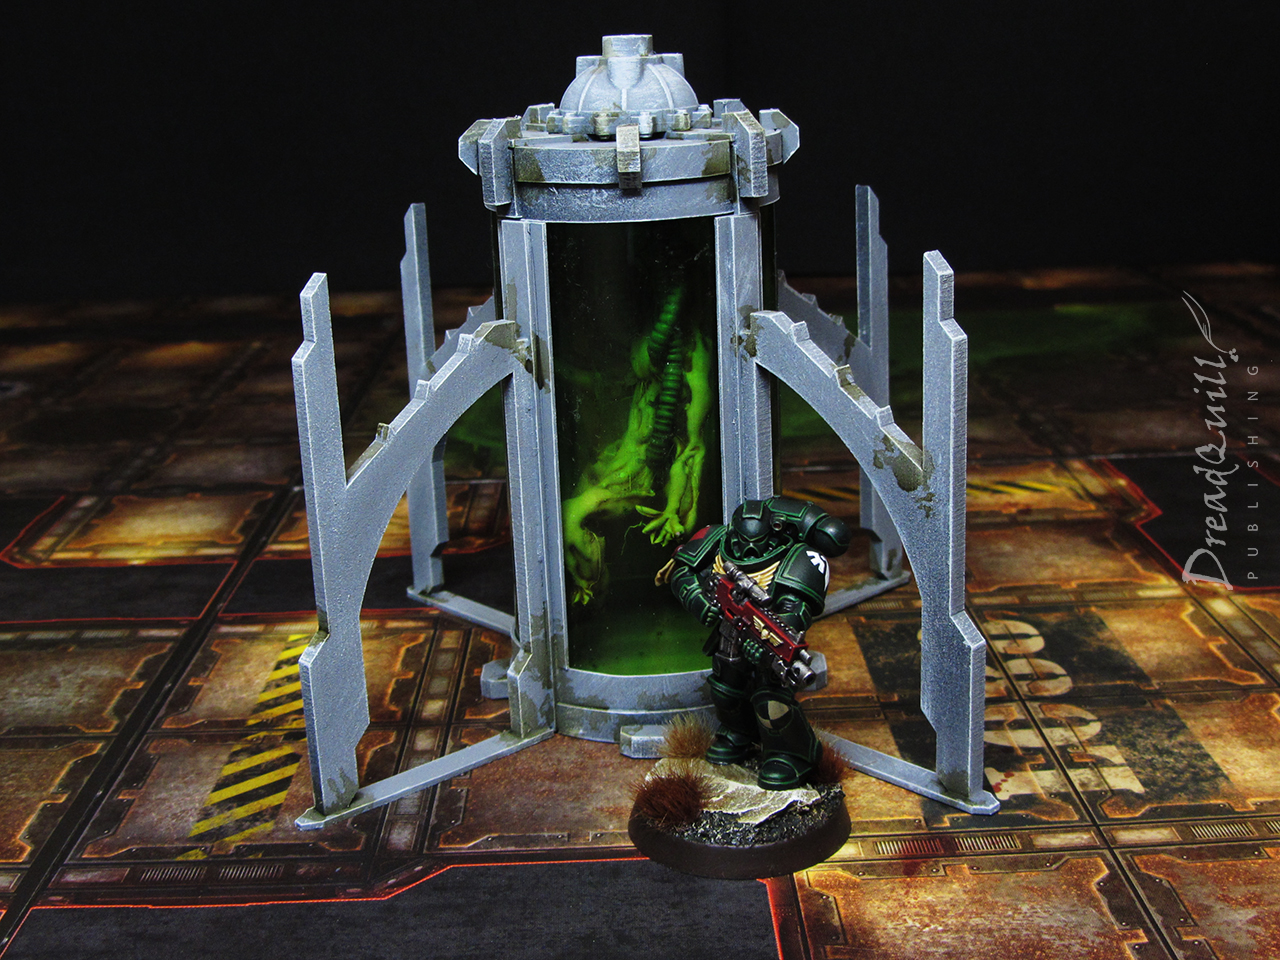
The finished vats are pleasingly imposing. They take up a decent footprint with the gothic leggies and they’re wide enough that they could reasonably be used as cover (maybe not more than once), so that ticked my boxes for playability.
The inhabitants themselves were fun and quick to build, and the modular design means I can always add extras down the line if I need something scenario specific. A quick paint job and they’d be ready to go!
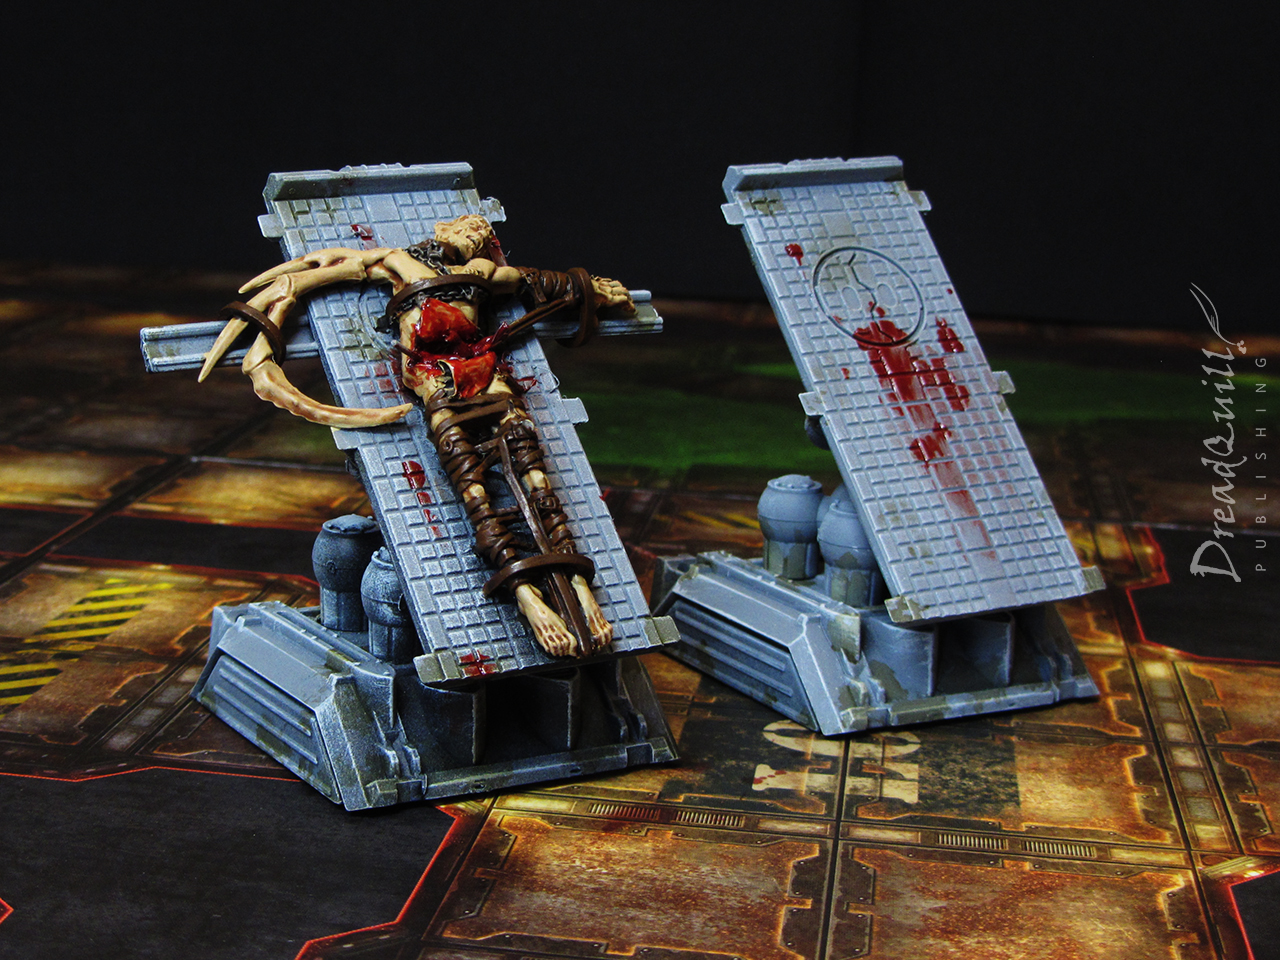
Autopsy tables
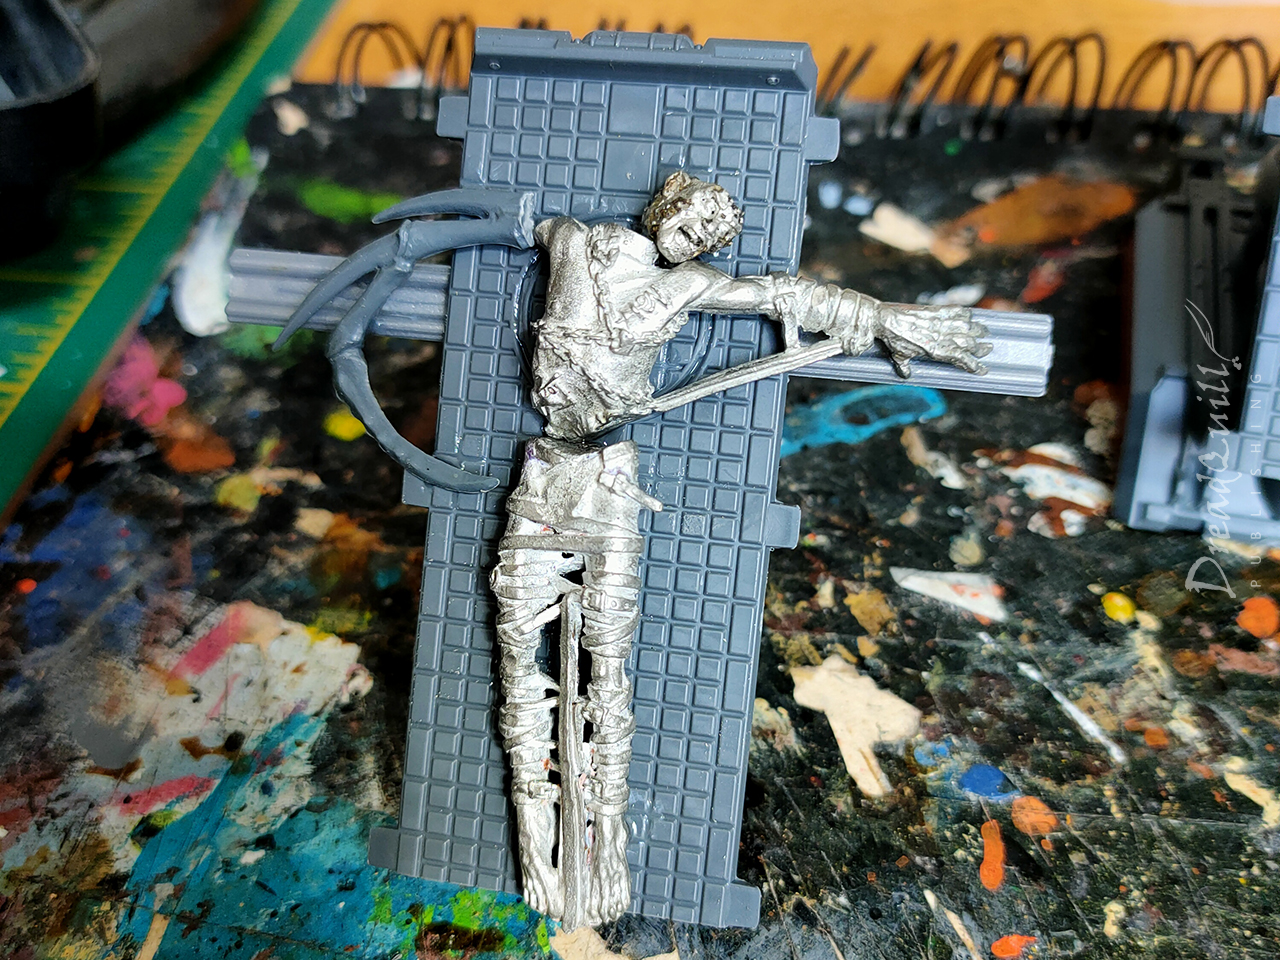
This idea was borne of the knackered Cherubael I had in my bits box, missing enough parts to render it unusuable as a miniature without a tedious amount of work. When flattened out though, it looked like a poor soul strapped to something with its abdomen opened up.
Cue strapping it to something!
I had plenty of munitorum container parts left over from my freight wagons, and the roof/floor made a perfect back board to hold the guy up. I added some extra plastic widgets to secure the arms to, a weird bug arm (probably from the classic chaos spawn sprue) to build some visual narrative as to why this lad has been chopped open, and gave him Sergeant Stone’s shouting head that had the top removed. I think I envisioned modelling some kind of brain, but I just didn’t have time in the end. Just ship it!
I used an old rubber band to tie him to the table, and created some skkin flaps out of green stuff for the belly. I filled the cavity with globs of hot glue to create some organ-like shapes and added some spiky bits of metal to look like tools.
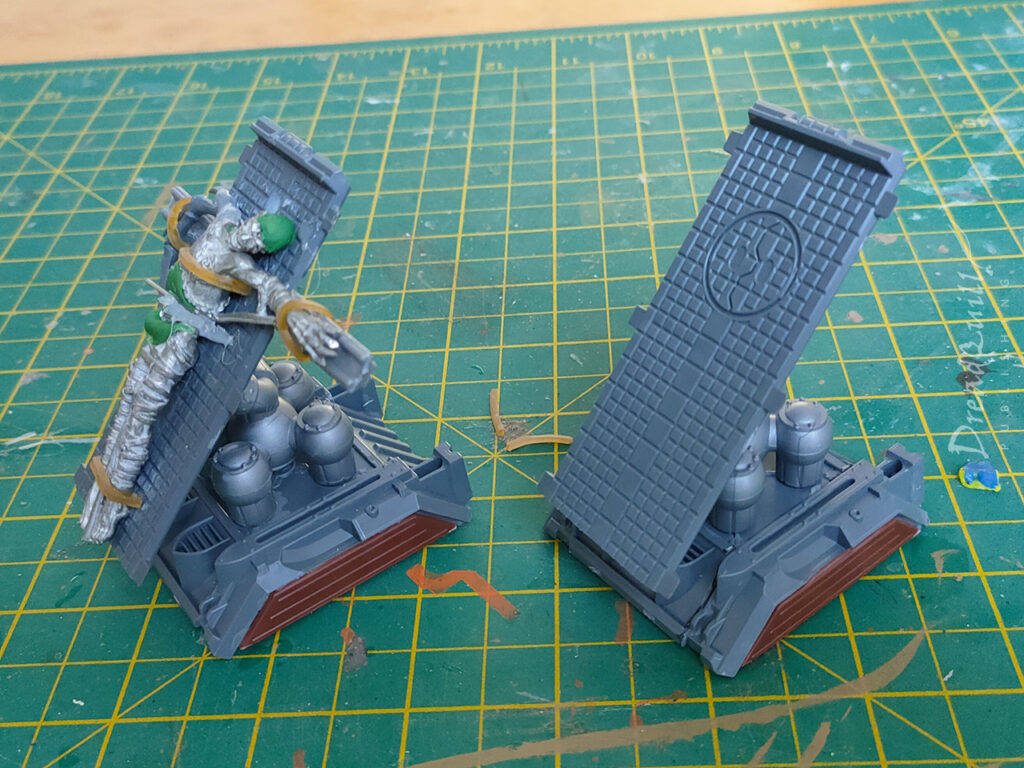
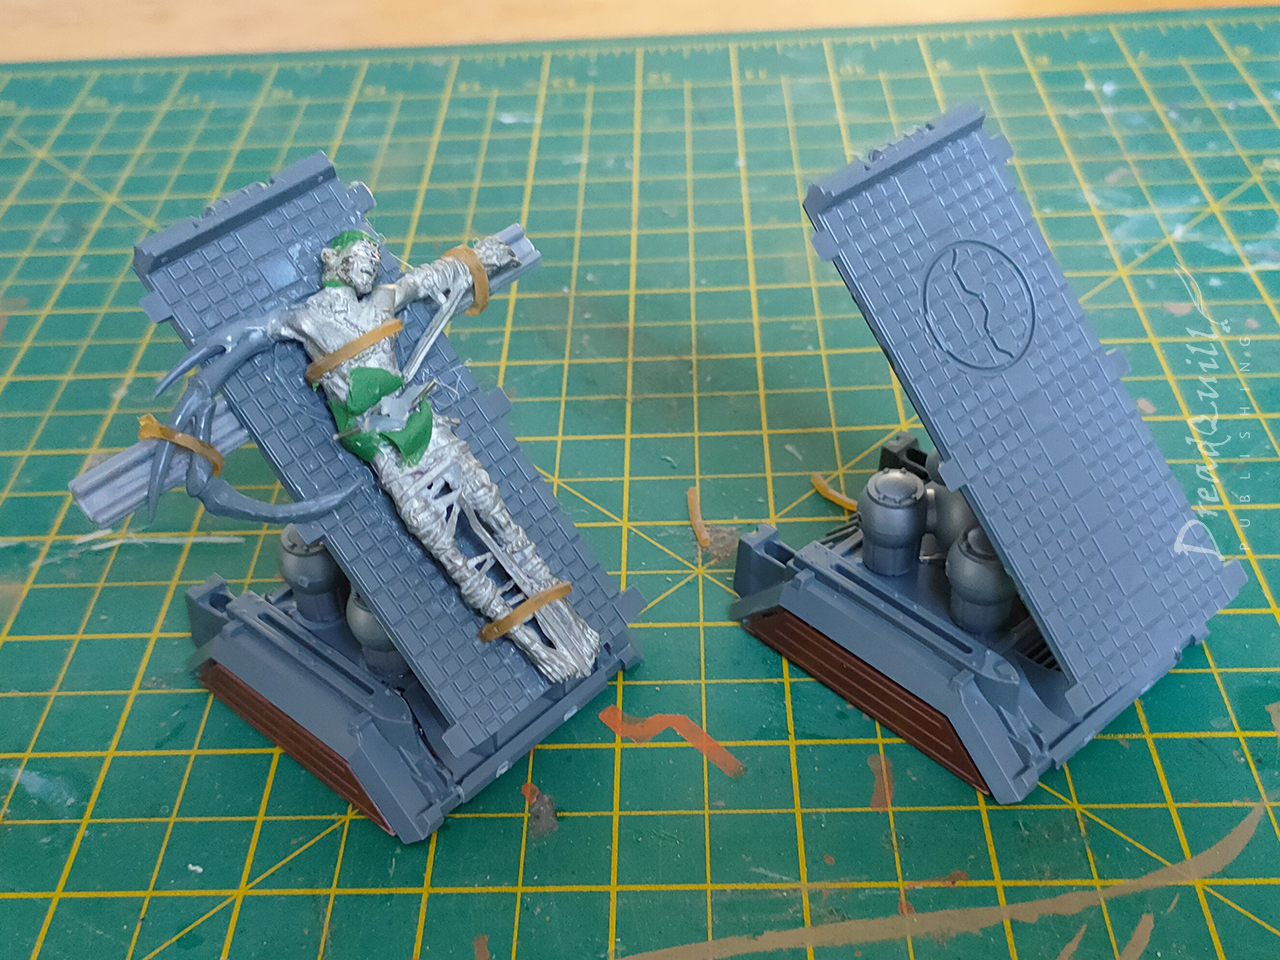
The whole thing was mounted on a raised base made from a side panel of munitorum container. It came out so well I made a second one, but this time without the test subject. More props are always better, and gives you more narrative options for creating scenarios down the line. What’s scarier than finding a body on the autopsy slab? Not finding a body on the autopsy slab…
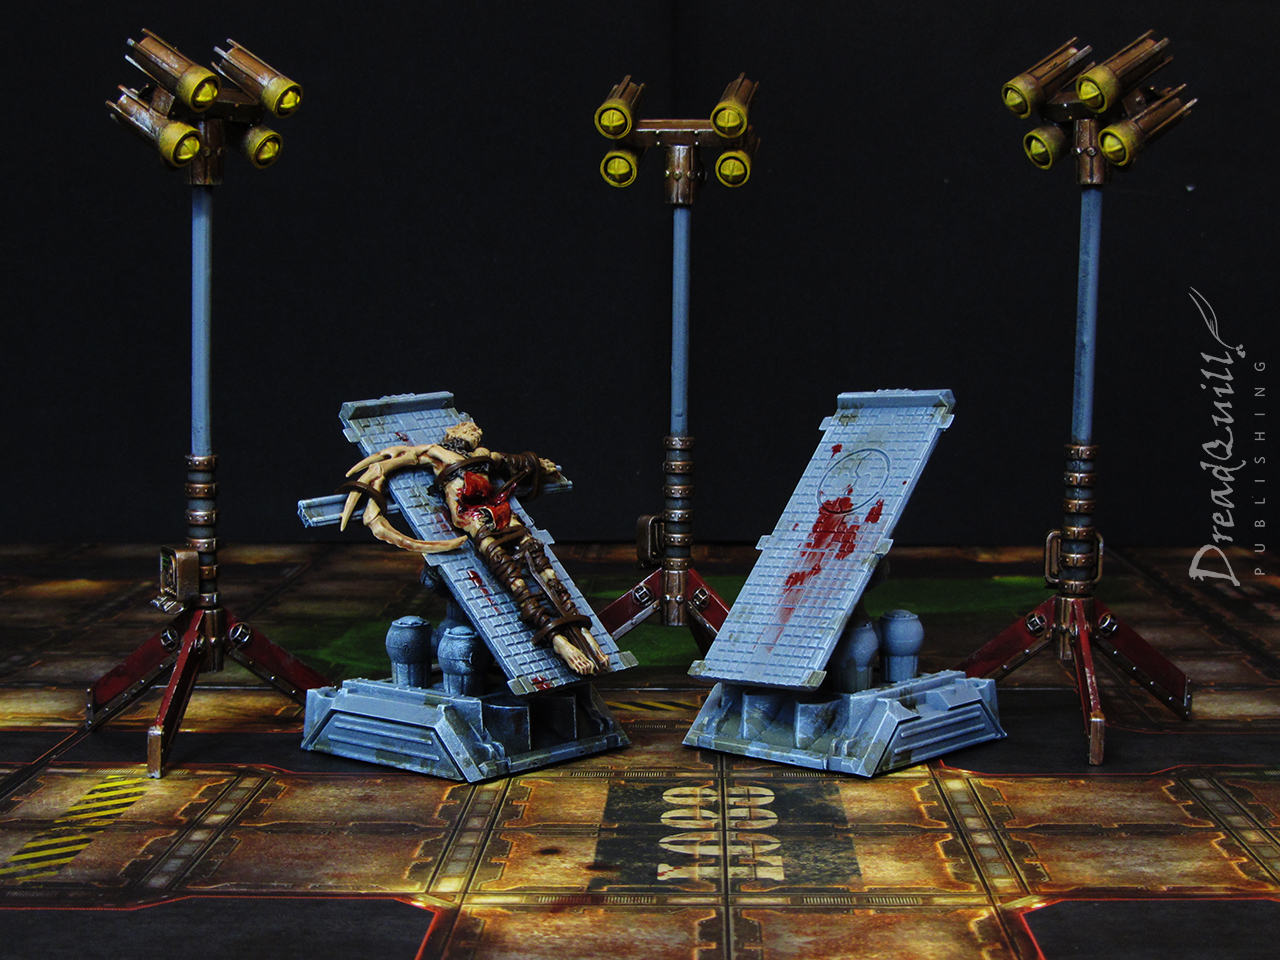
Floodlights
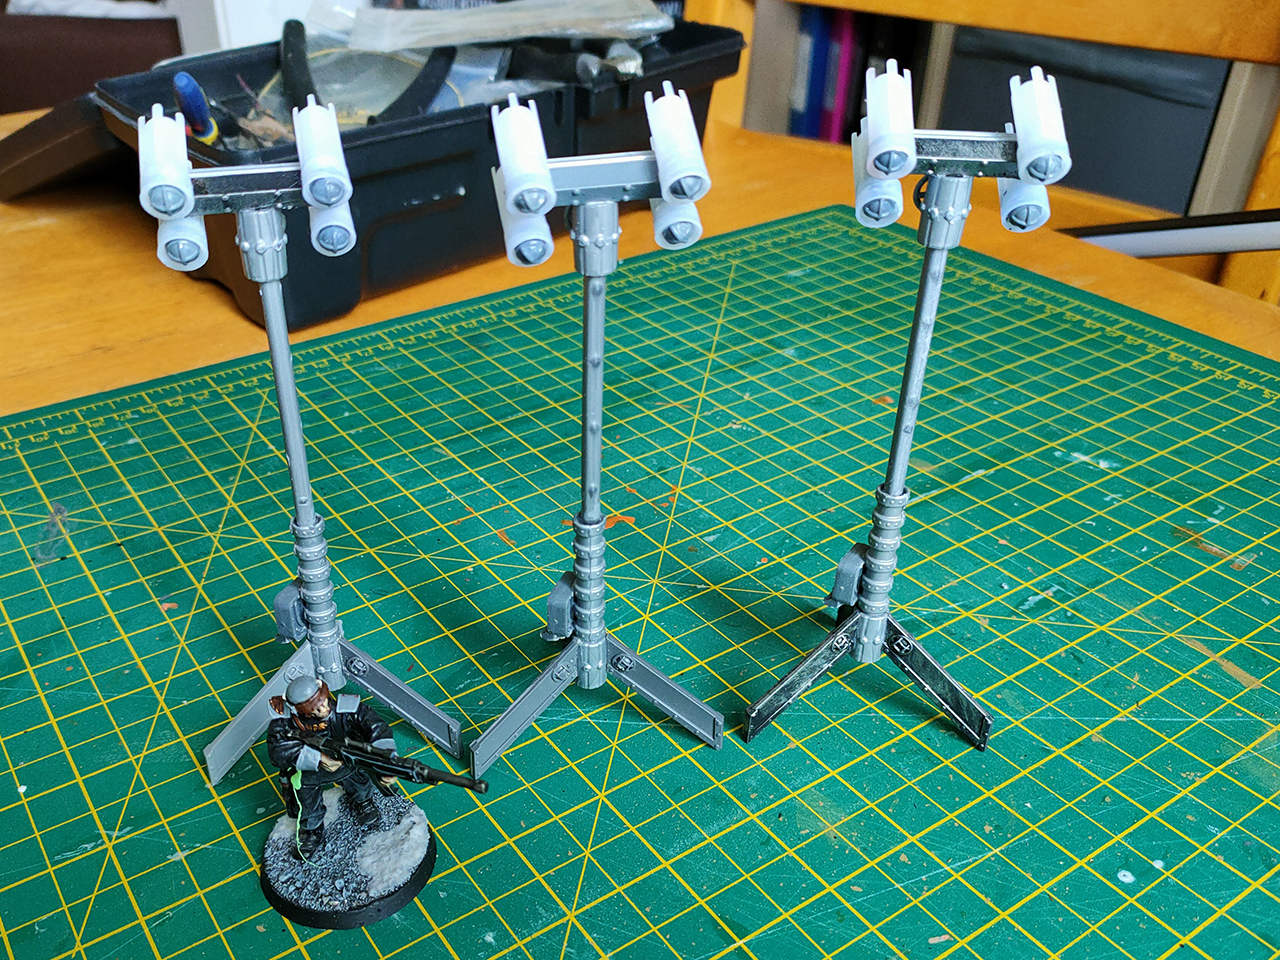
These were delightfully simple to put together, but a pain in the ass to visualise. Of course such things must exist in the 41st millennium, but what do they look like? You can use modern designs as a base, but you have to trial and error lots of different pieces to give it that suitably over-engineered riveted skull-punk look that 40k goes for.
For the lights I used old superglue lids with chopped down bulbs from the Sector Imperialis kit (RIP, gone before your time). Chunks of sprue and ribbed pipe from the classic Tehnolog Chemical Plant set helped sell the idea they were retractible.
The legs were made from cut down buttresses from the classic Cities of Death terrain (RIP gone before your time), with a little control panel from the Necromunda accessories sprue.
On with the paint!
More art than science
Everything was undercoated in black, then a zenithal of grey. I removed the transparent plastic tube during painting, as I was unsure what to do with it but I knew I didn’t want it to get messy.
All the grey areas had Athonian Camoshade sponged onto them in random places to look like dirt and grime. When that had dried, everything got a drybrush with Deepkin Flesh to carry through the green tones.
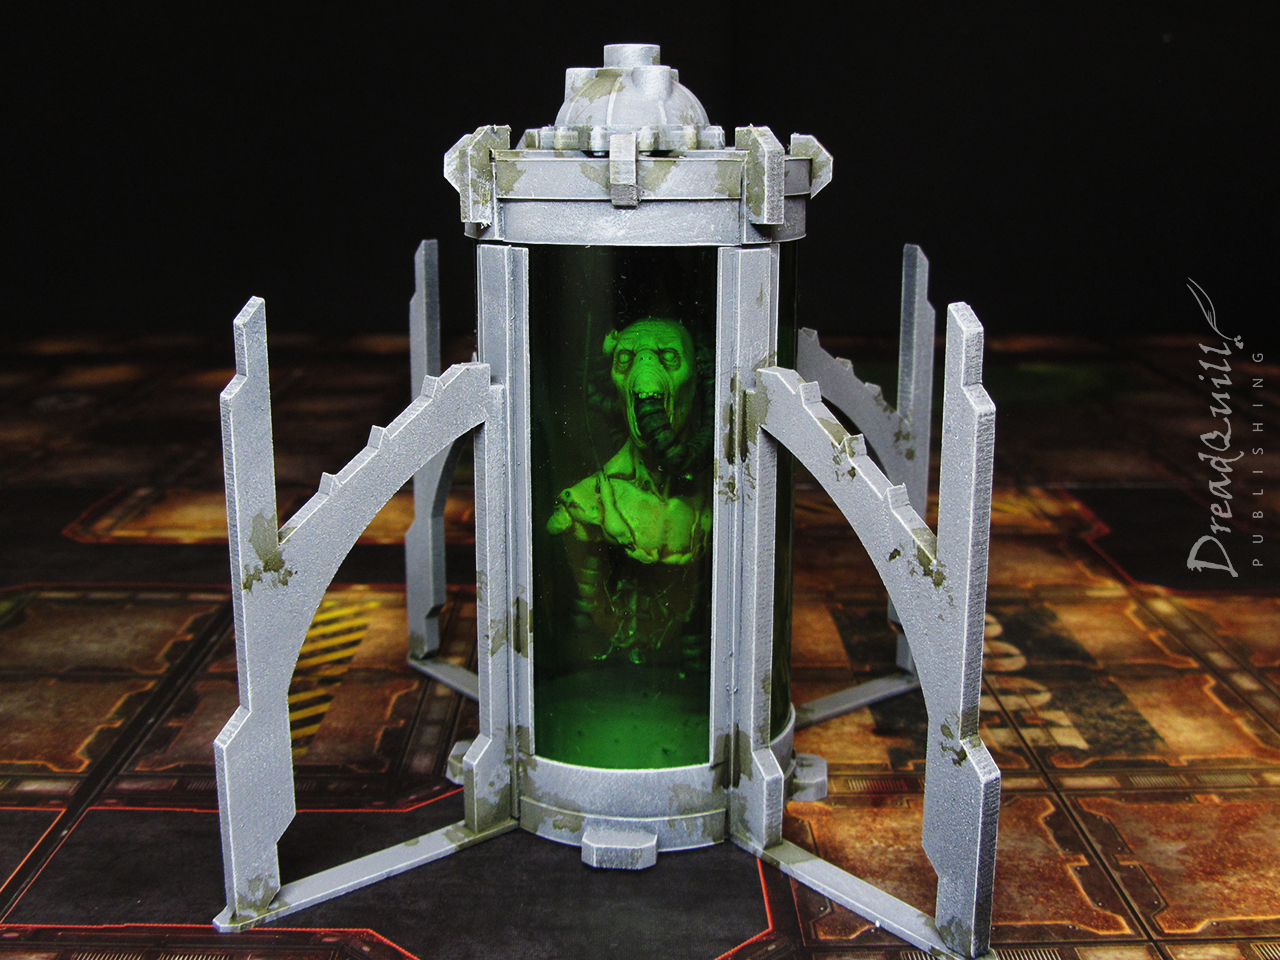
The beasties inside hit with Reikland Fleshshade on the fleshy parts and Templar Black Contrast on the tubes – that was it! No need to be fancy, as they would be largely obscured by the glass anyway.
The glass itself was pleasingly straightforward. I have a pot of Tamiya Clear Green, which produces this incredibly toxic smell when opened, and produces an incredibly toxic effect when applied to miniatures. I used it to good effect on my Ambulls, and it always gets rolled out whenever I need some horrible goo effect.
In this case, I just slapped it on the inside of the tube and left it to dry, not worrying too much about it being patchy or uneven – it only adds to the effect!
The tables were painted much the same way – the only difference is the addition of everyone’s favourite Blood for the Blood God in key areas, and smeared a bit for visual effect.
The test subject was again just washed with Reikland Fleshshade on the fleshy bits and Agrax Earthshade on the straps. The chains were drybrushed silver and washed with Agrax again.
The floodlights I went a little wild with, adding two(!) extra colours to the palette.
The metal sections were painted Scorpion Brass and washed with Agrax, then silver was stippled over the top to look like chipped paint.
The lights were my first attempt at drybrushed OSL, and they’re effective enough to sell the idea that they are floodlights. I’d do them slightly differently now, having more depth of colour rather than flat yellow, and adding pure white to the centre of the bulbs where the light it coming from.
Overall, I love how well everything came out! I was sceptical through the process, especially of how the cloning vats would come out. I should have trusted the process – Tamiya Clear Green never lets me down!
My mind is fizzing with extra props I’d love to add to this collection, but I’ve closed the book on them for now. There’s enough to fill a board and the project is complete. Plus they look great in action!
Many years ago, when MDF scenery was still being invented, I acquired a very basic Wild West train set from TTCombat as a cheap and cheerful alternative to ruins and sandbags typical of most 40k terrain setups. Our gaming group were experimenting with Necromunda Community Edition (many years before the 2017 re-release) and were enjoying the narrative arcs that smaller-scale conflict could bring, and with it the need to have more interesting scenery to brawl over.
Time passed, and certain sets of scenery were trotted out for battle less and less. It wasn’t a concious decision, more a combination of how easy it was to set up, how well it fit the theme of the board, and what interesting combat situations could it open up.
The Wild West themed train set rarely got high marks in those categories. The track itself was fiddly to set up as it came in 4-inch chunks that rarely stayed straight, and there wasn’t enough of it to cross the board fully, ending with some ugly terminations. The theme was tricky to match too – when Necromunda 2017 came round the whole aesthetic pivoted, and a passenger steam locomotive was rarely a welcome sight on the board. It also had limited scope for interesting play – the passenger compartment wasn’t large enough to have two models standing side by side, so it served only to block line of sight in a small area of the board.
I never even got round to painting it. The train had reached its terminus.
The restoration
The pandemic gave me an opportunity to refine my terrain collection. I already had a large number of MDF shipping containers (acquired at the same time as the train set), so had little desire to add to the pile with some leftover plastic Munitorum containers. I’d been experimenting with cutting them up for use in hab blocks I was working on, and was thinking about turning them into street furniture like garbage skips, so why not cut some more up?
The flash of inspiration came when I remembered the train set gathering dust – skip plus wheels equal fun – and I could rebuild the whole train set to be more aesthetic!
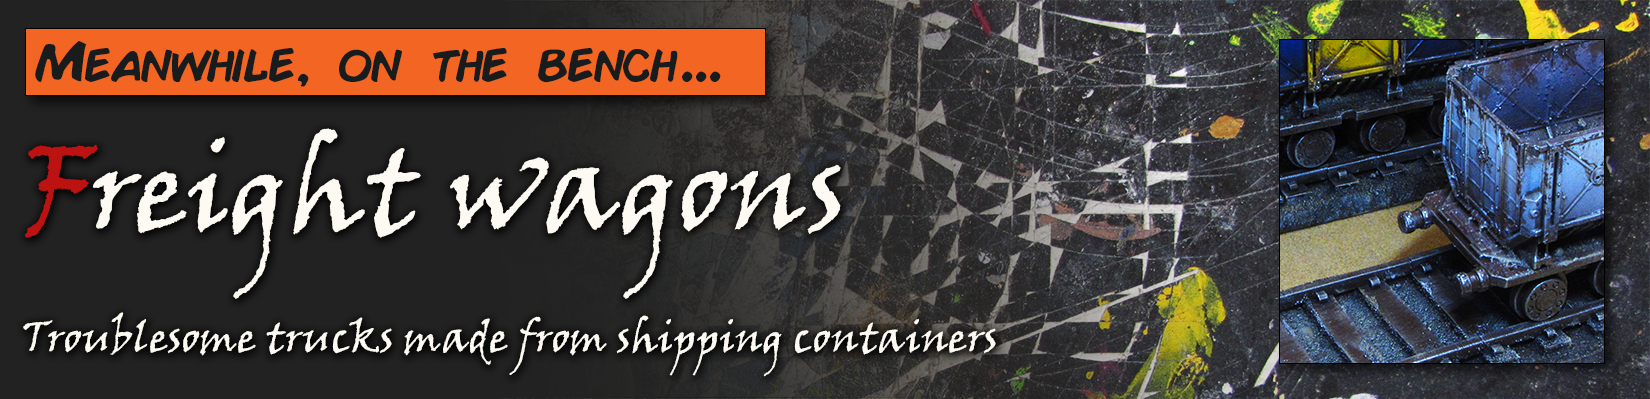
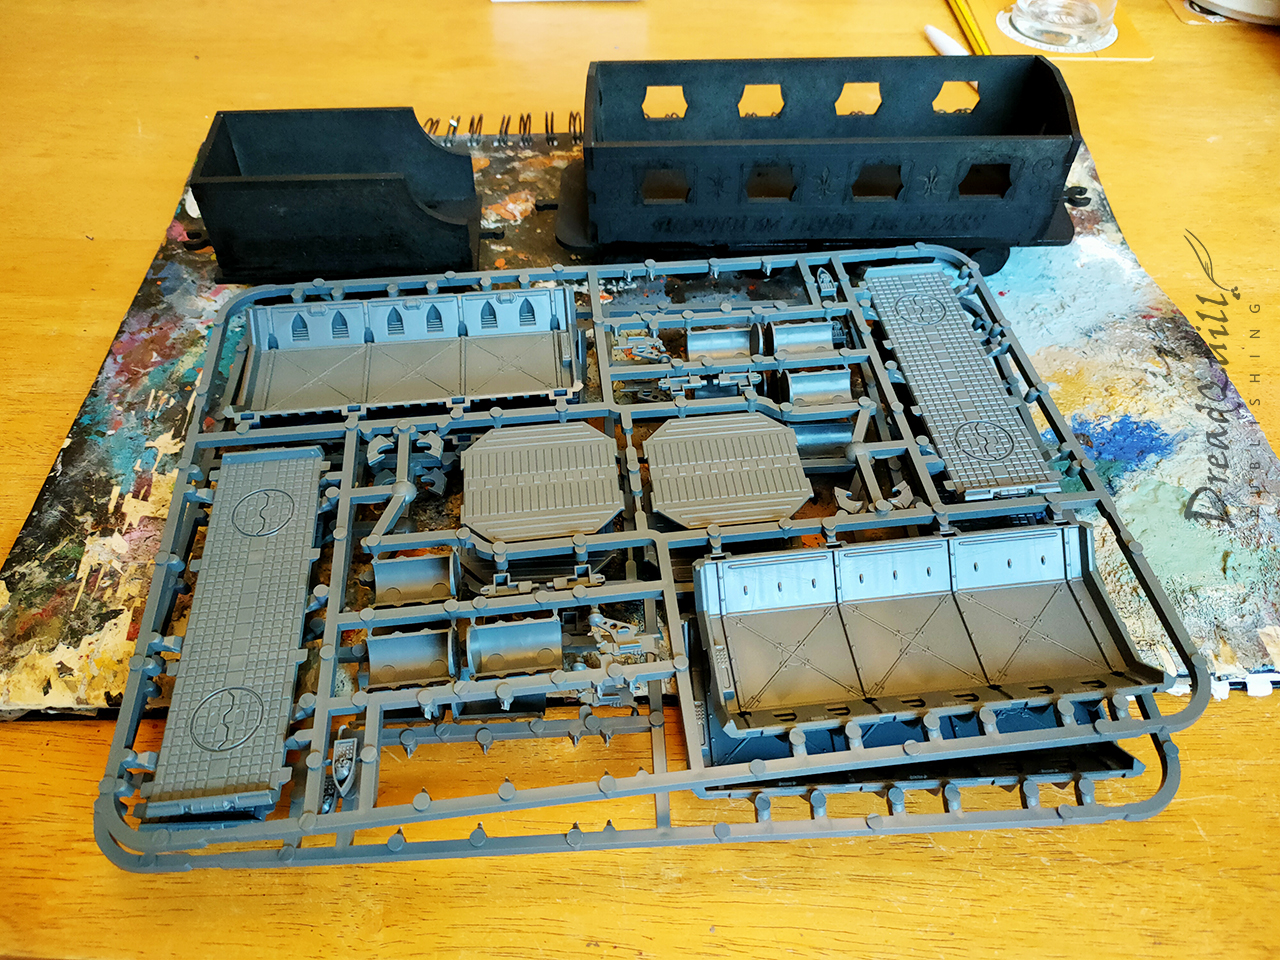
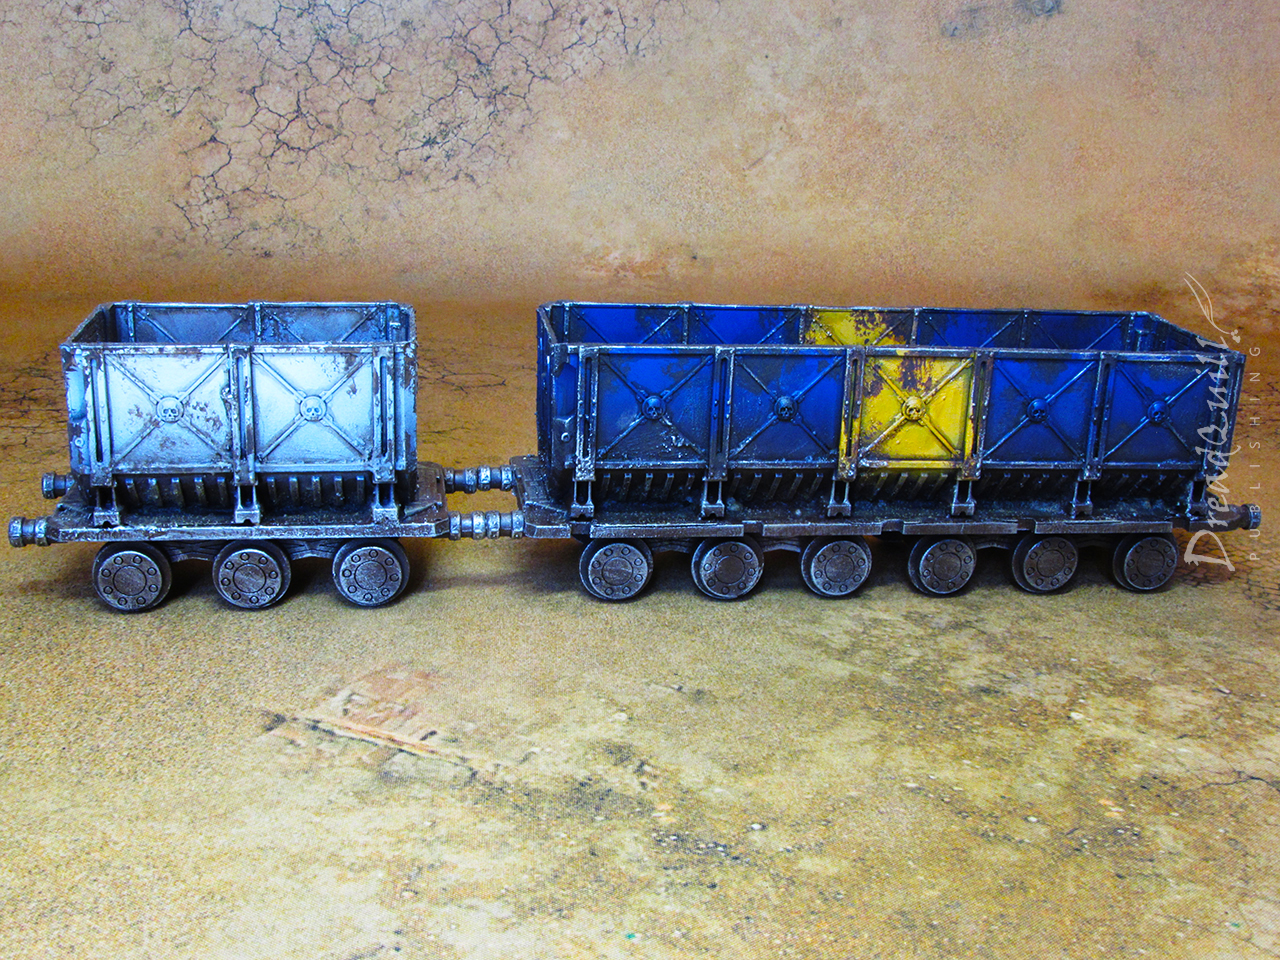
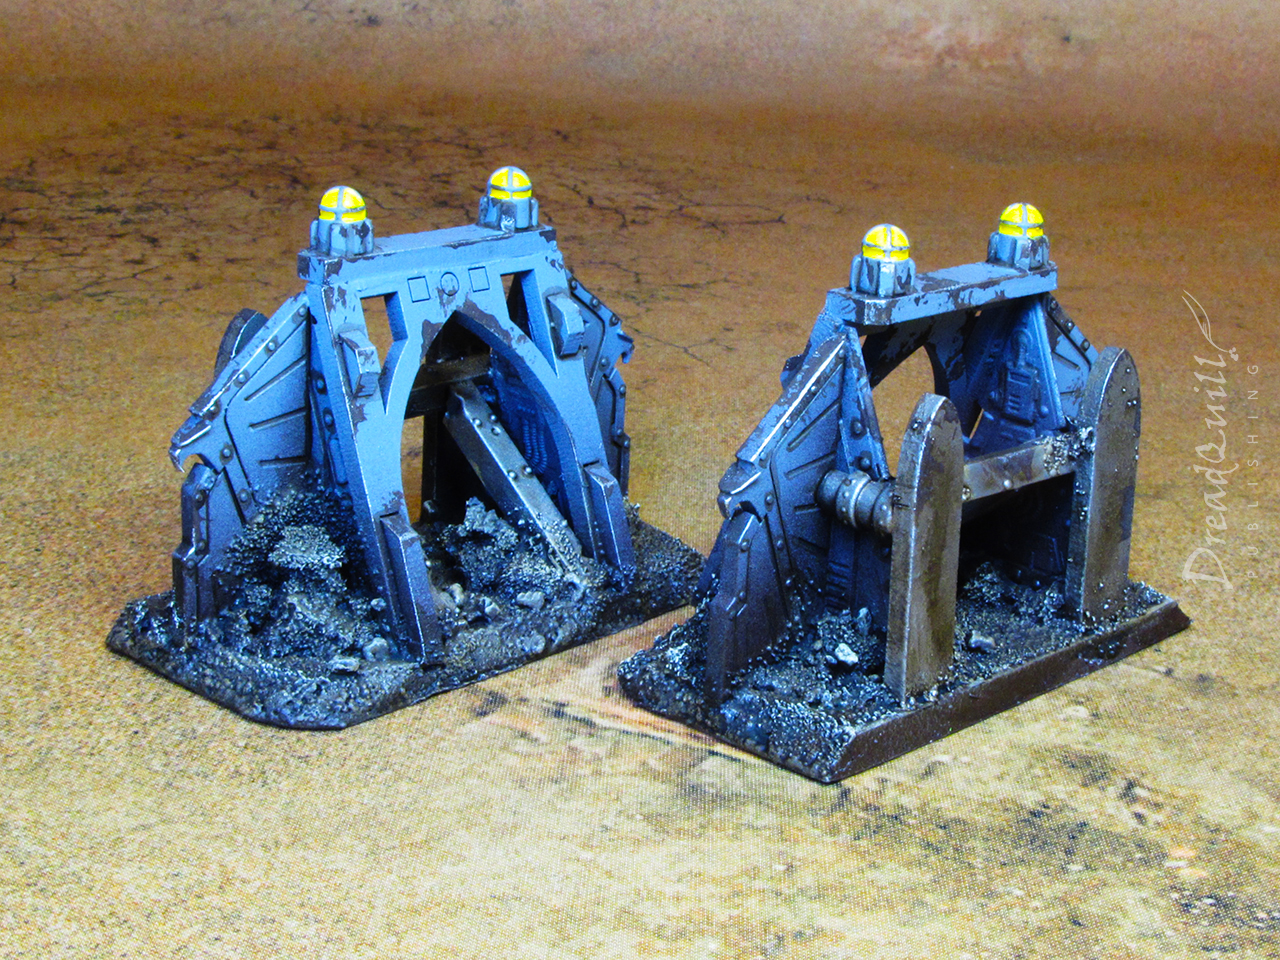
I had three carriages to play with – the train engine proper, the coal wagon, and a passenger carriage. I set the engine aside for a future project to concentrate on the bits that would eventually become freight wagons.
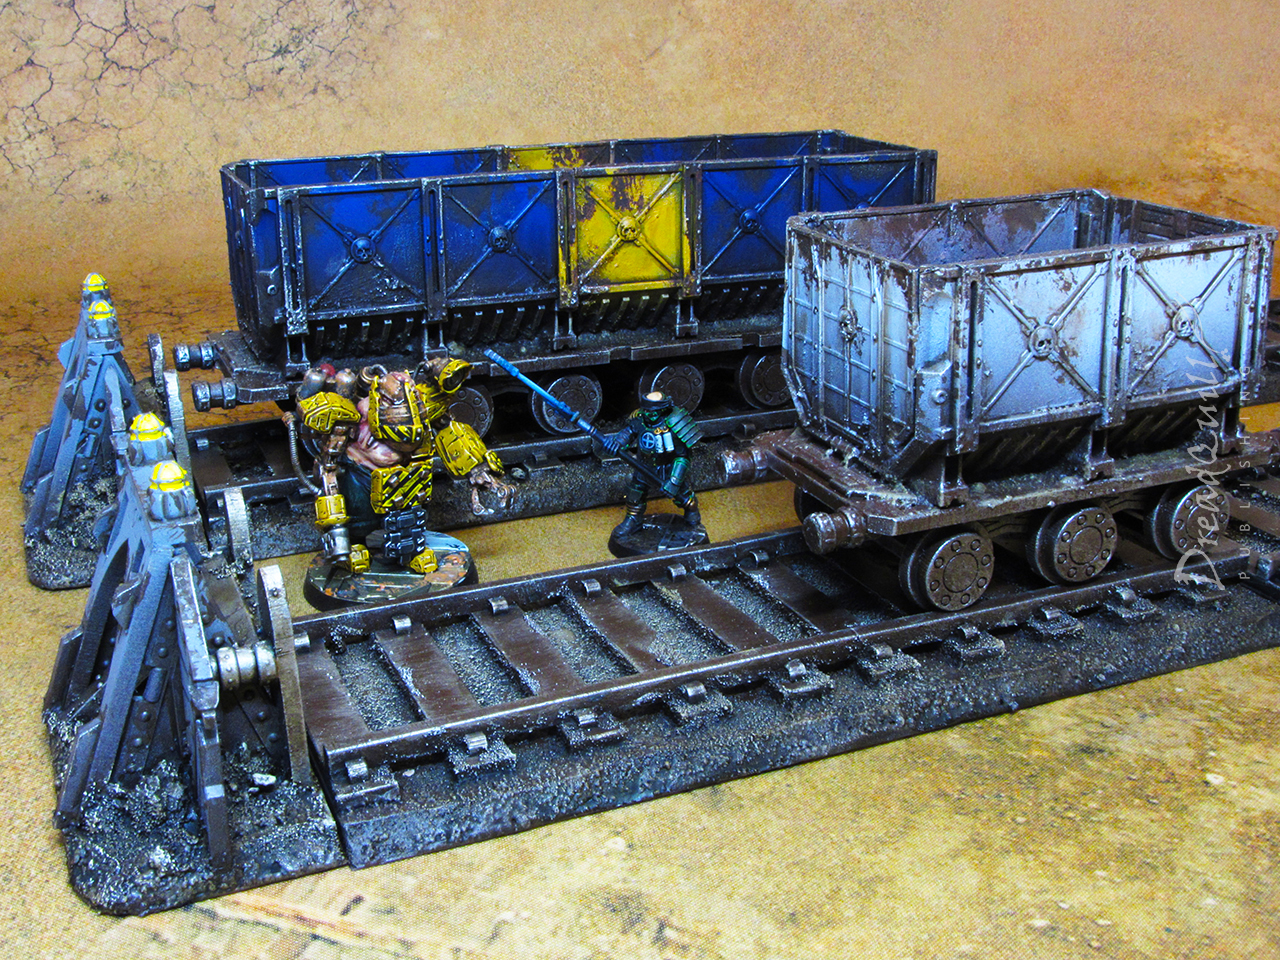
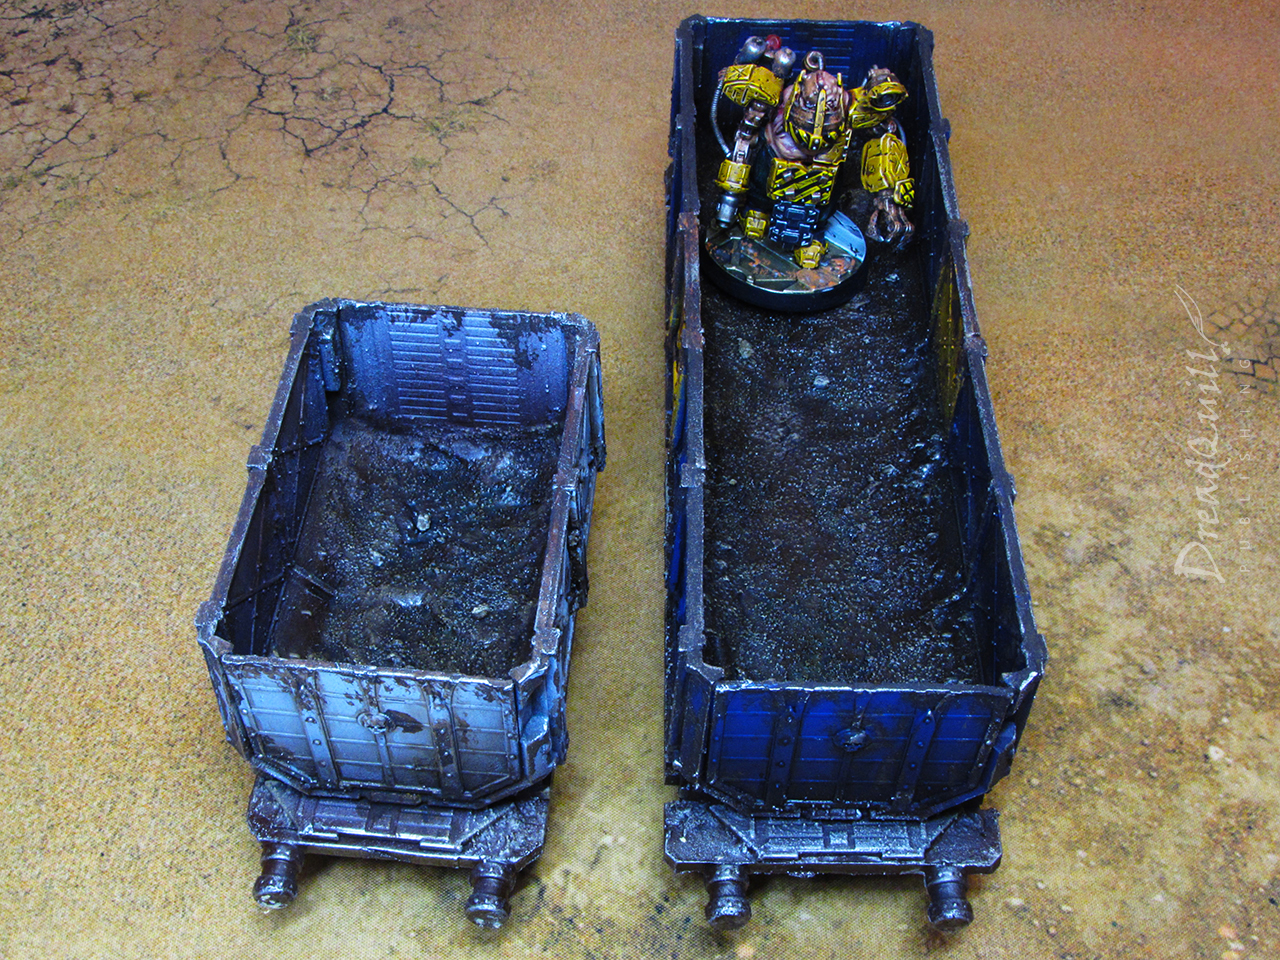
It was straightforward to cut the carriage beds free, leaving me with a flat surface to attach my cut up munitorum containers. They were two different sizes which meant being a being a bit creative with how I chopped up the containers, but pleasingly they were almost exactly the right size for a five-panel and two-panel wagon. I used up about 2.5 munitorum containers’ worth of panels constructing these wagons, so there’s still half a container in the box for a future endeavours.
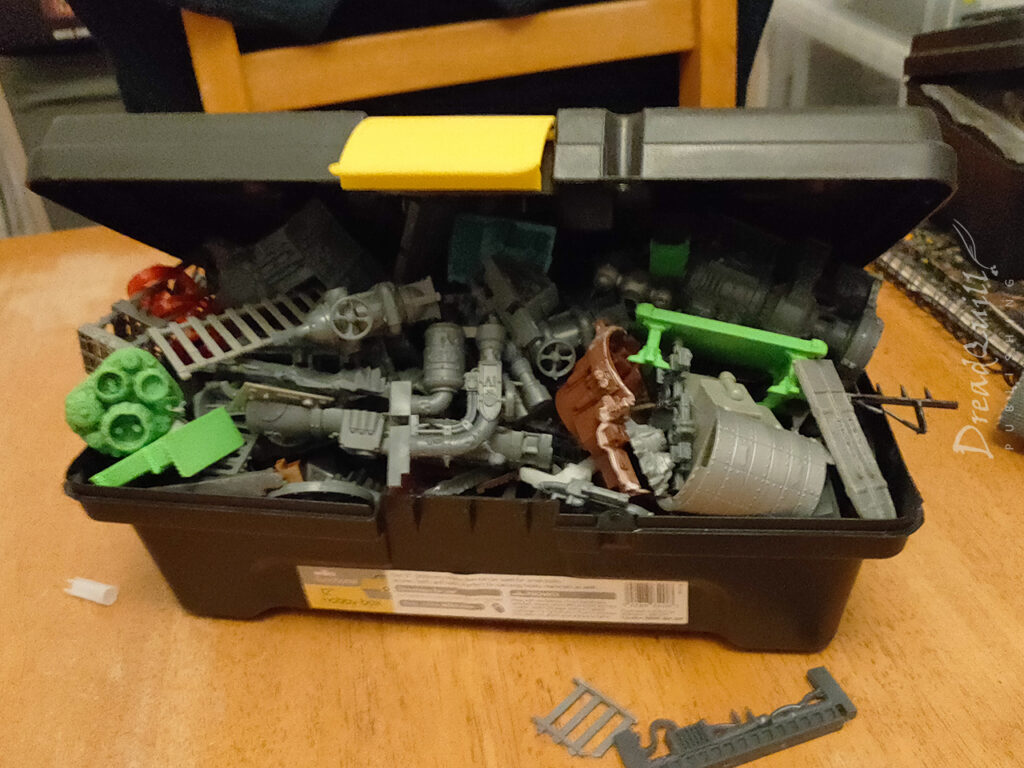
The ‘future endeavours’ box
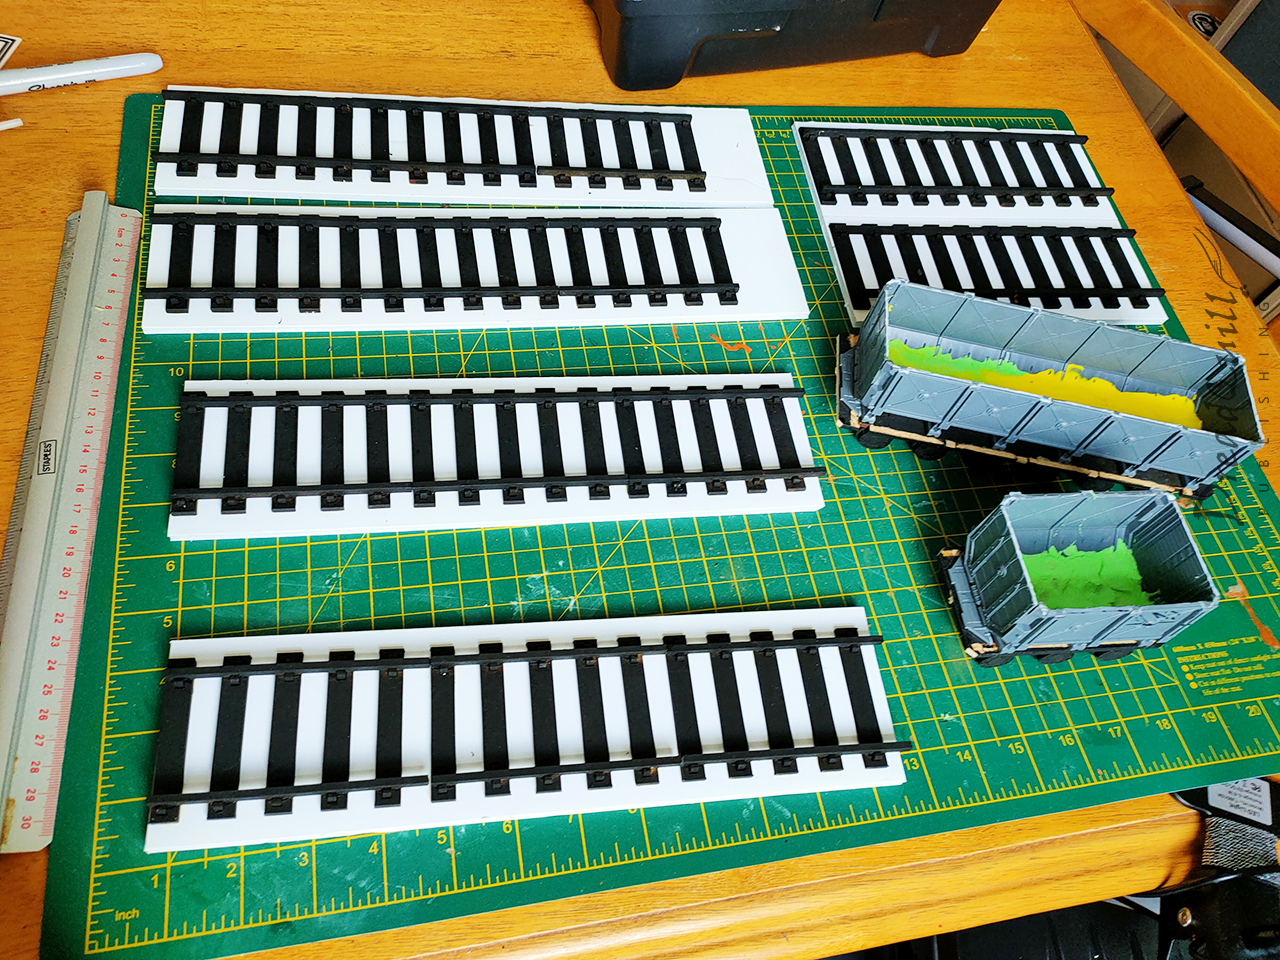
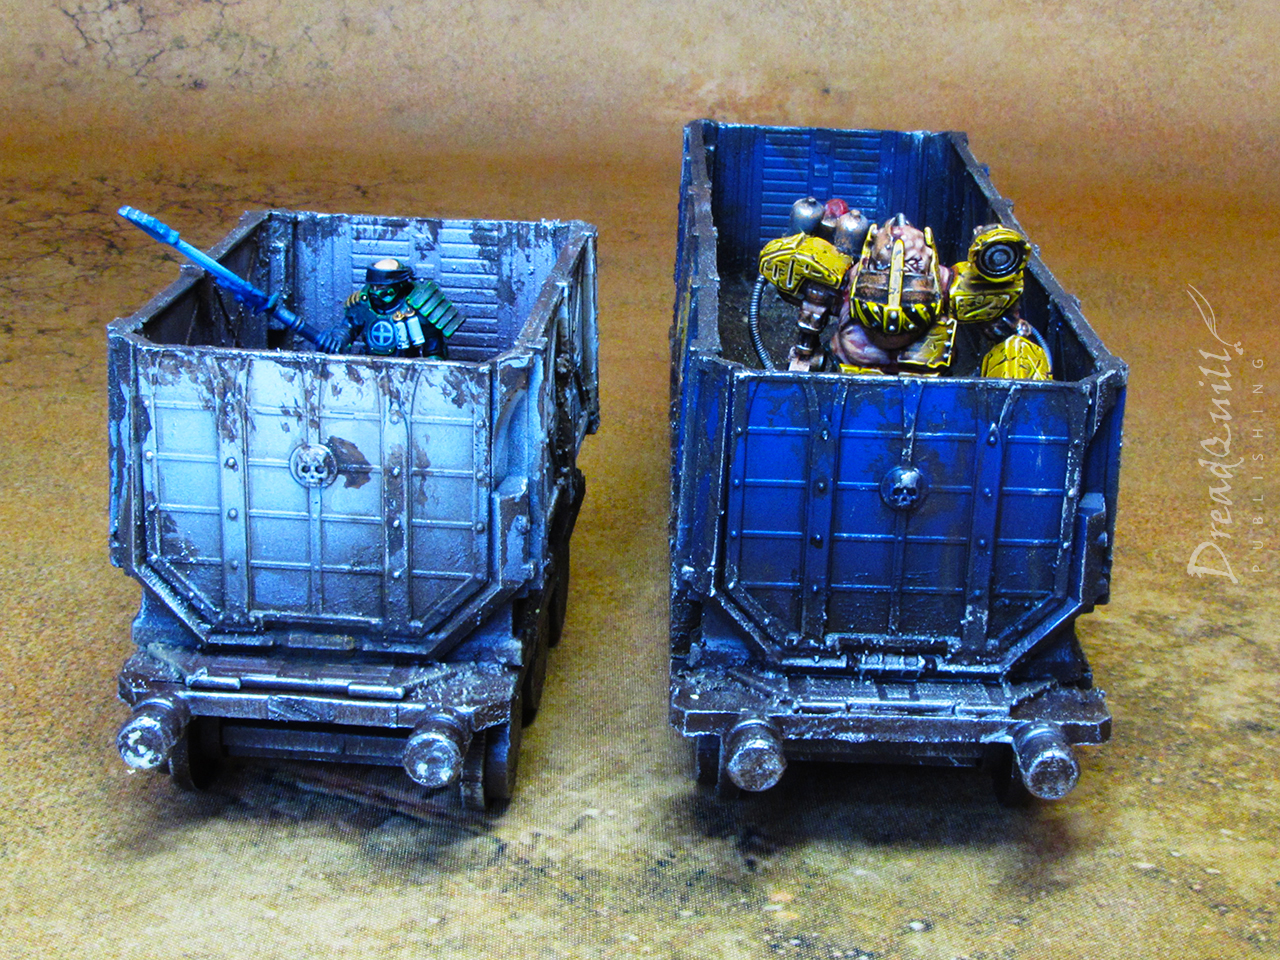
I smushed some putty and textured paint into the bottom of the containers help sell the idea that they’d been used a lot, and served the double purpose of elevating miniatures inside. I wanted it to be usable in both Necromunda and Inquisitor, so needed to be tall enough to provide cover to the tall miniatures, and short enough to be seen over by the short miniatures.
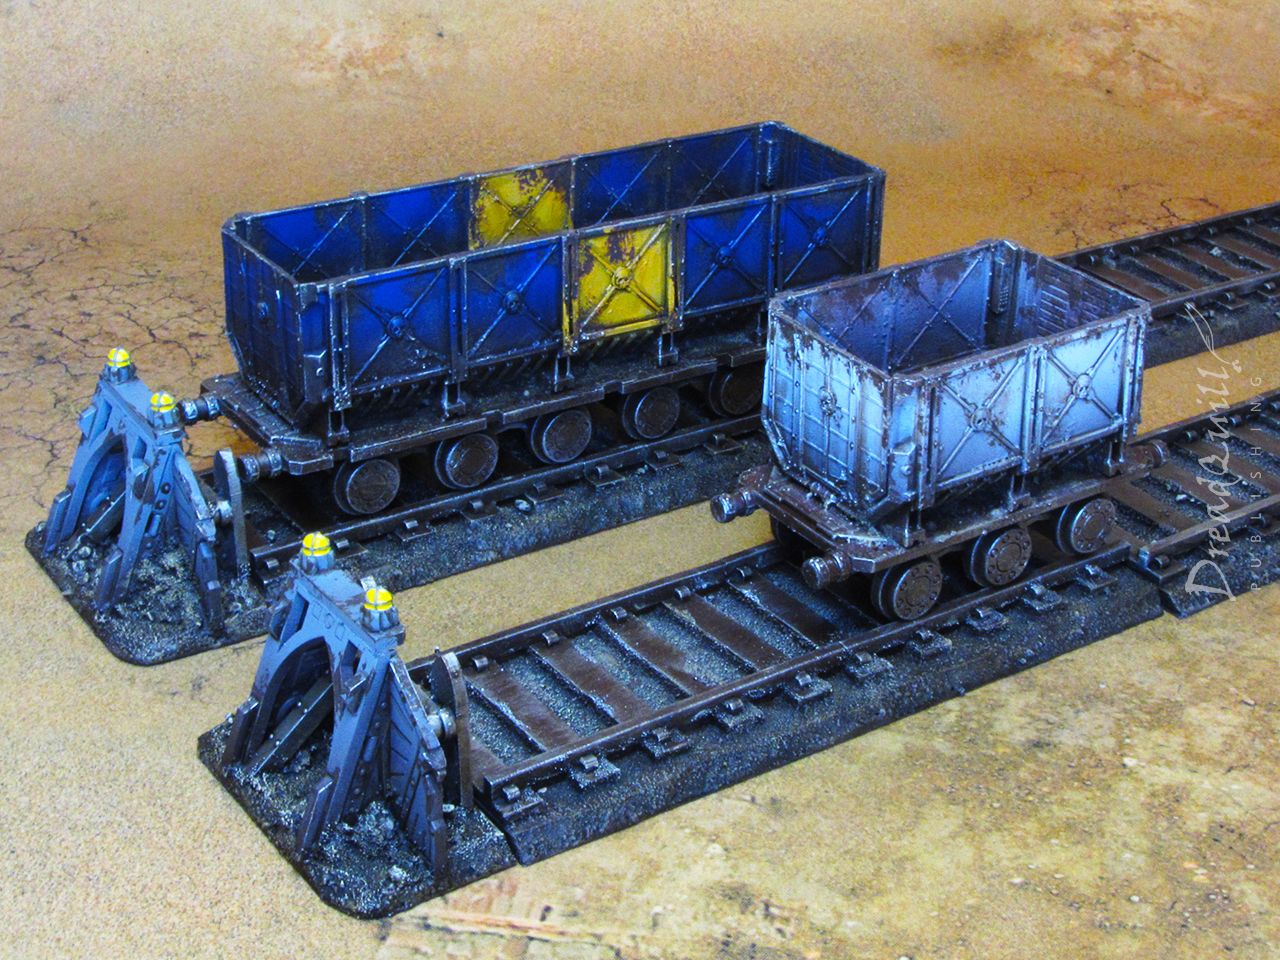
I also counted out the track pieces and grouped them together in sets of 3 (with a few left over for two sets of 2) and glued them to some foamboard in 12″ lengths. This would massively expedite setup and tear down, as well as giving me an opportunity to add some texture and colour to the track ‘base’ to tie them into their setting a bit better.
Buffering
I was left with a few bits of foamboard left over and a desire to avoid the problem I had before of railway tracks ending in the middle of nowhere. It was time to break out the future endeavours box and build some buffer stops!
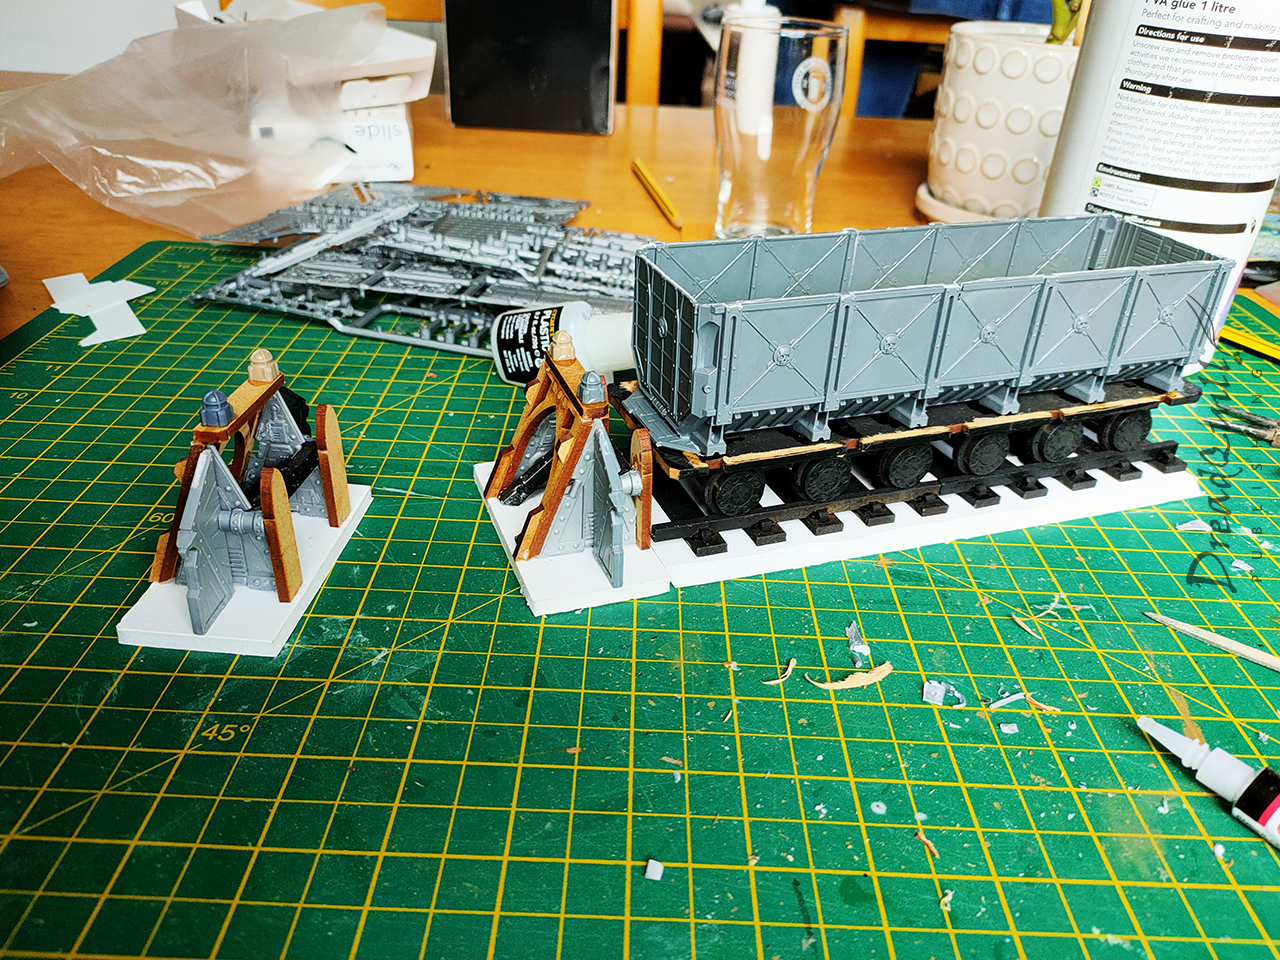
I wanted to make two so I could have two tracks next to each other terminating in the middle of the board, suggesting a depot or station of some kind. It also took a lot longer to create these from scratch than I thought, as I experimented with all kinds of designs built from plastic and MDF scraps from the box. The only thing I knew I wanted was for it to be solid enough to be used as cover by larger models. I used bits of sprue and cork to build up little piles behind the buffer to help sell the illusion of sturdiness.
I’d been experimenting with magnets in other projects, and couldn’t help but add some magnets to this project too. The little MDF hook-and-loop connectors on the original undercarriages were so flimsy they snapped off after two uses, so I wanted something a bit more sturdy. A pair of plastic pipes at each end, topped with a neodymium magnet, positive on the left and negative on the right. Although the wheels didn’t roll down the track it meant the carts snapped together neatly in any orientation, and I could drag them around the table if I wanted them free of the rails.
Finally, I bevelled the edge of the foamboard with a craft knife and painted on my sand and PVA. I foolishly didn’t weight the track sections down, convinced the rail sections would keep the foamboard from bowing while drying. To combat this, I applied a load of PVA glue to the underside and weighted them down so they bowed back towards their original position. Not perfect, but not noticeable any more!
Gonna paint your wagon
Painting these guys was a blast! Quite literally – nearly all of it was done with rattlecans. Undercoated black then brown, with the wagons masked off to be blasted with another few choice colours. The longer one was sprayed Ultramarines Blue, the smaller wagon was sprayed grey, then with a white zenithal, always taking care not to spray the undercarriage.
The mantra is finished, not perfect. All the metal areas got a rough drybrush with Leadbelcher and we called it a day on that. I masked off another area on the blue wagon and sponged on some yellow paint for a pop of colour.
Everything got attacked with Agrax Earthshade – dotting the rivets and lining the panels, and splashing it about the deeper recesses and interior. Athonian Camoshade was sponged on in key areas to add an extra layer of grime.
Typhus Corrosion was stippled on with a large gammy brush, paying closer attention to corners and edges that would be likely to get knocked about during regular freight use
When that had dried, Leadbelcher came out again on a knackered old brush to roughly touch up some heavy-traffic edges where exposed metal would be showing through.
The buffer stops had little lights on the top, which I toyed with the idea of doing some OSL effect for, and quickly slapped that thought out my head. A big blob of bright yellow paint did the job.
The dirt/sand on the foamboard and interior of the wagons also got a healthy dollop of Agrax in the deepest recesses, lightly drybrushed with Ushabti Bone to highlight.
And they were done!
Final destination
I’m overjoyed with how they came out. A simple idea cleanly executed, they add some interesting points of interest to any tabletop you put them on. The carts are practical and encourage creative gameplay, and they look at home in any kind of environment. They’ve already seen use in some games of Inquisitor, most notably an unpainted version in Dust-up at Distro-19 and an unreleased episode where someone pushes a doomsday payload across the board.
When I was painting them, I felt like I was being sloppy and cutting corners. Looking back on them now, I can’t see any of those corners cut – just a cool set of terrain that I can’t wait to get back on the tabletop.
In the Before Times I picked up a bunch of weird Age of Sigmar scenery that I thought would work really well for an Inquisitor campaign I was running at Asgard Wargames. Papa Nurgle had other ideas for that adventure, and the plastics were consigned to the bits box for a rainy day.
Having some free time on my hands over the pandemic (and with another Inquisitor campaign planned) gave me the impetus needed to put the finishing touches on them.
Pour one out
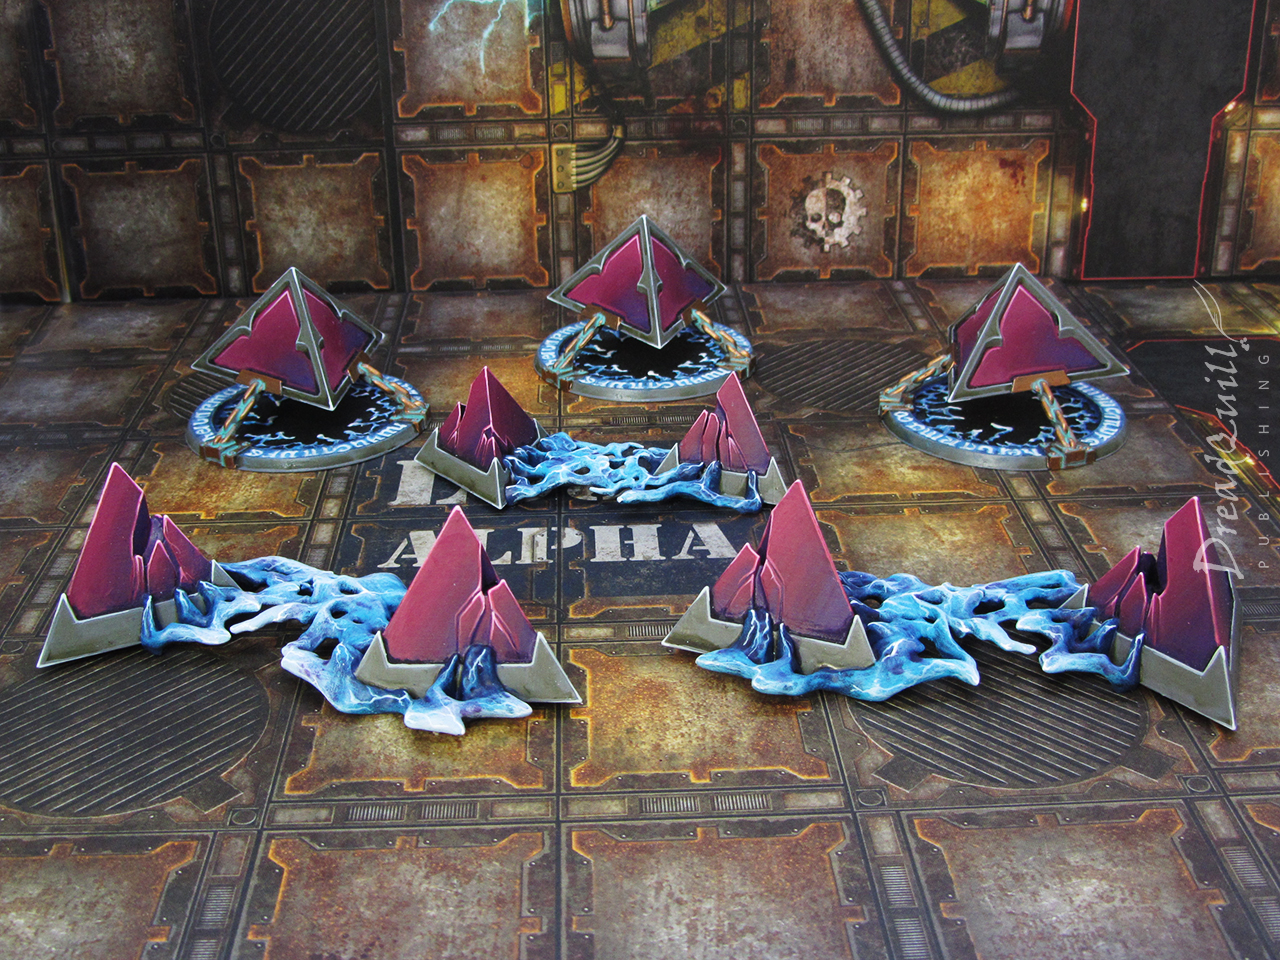
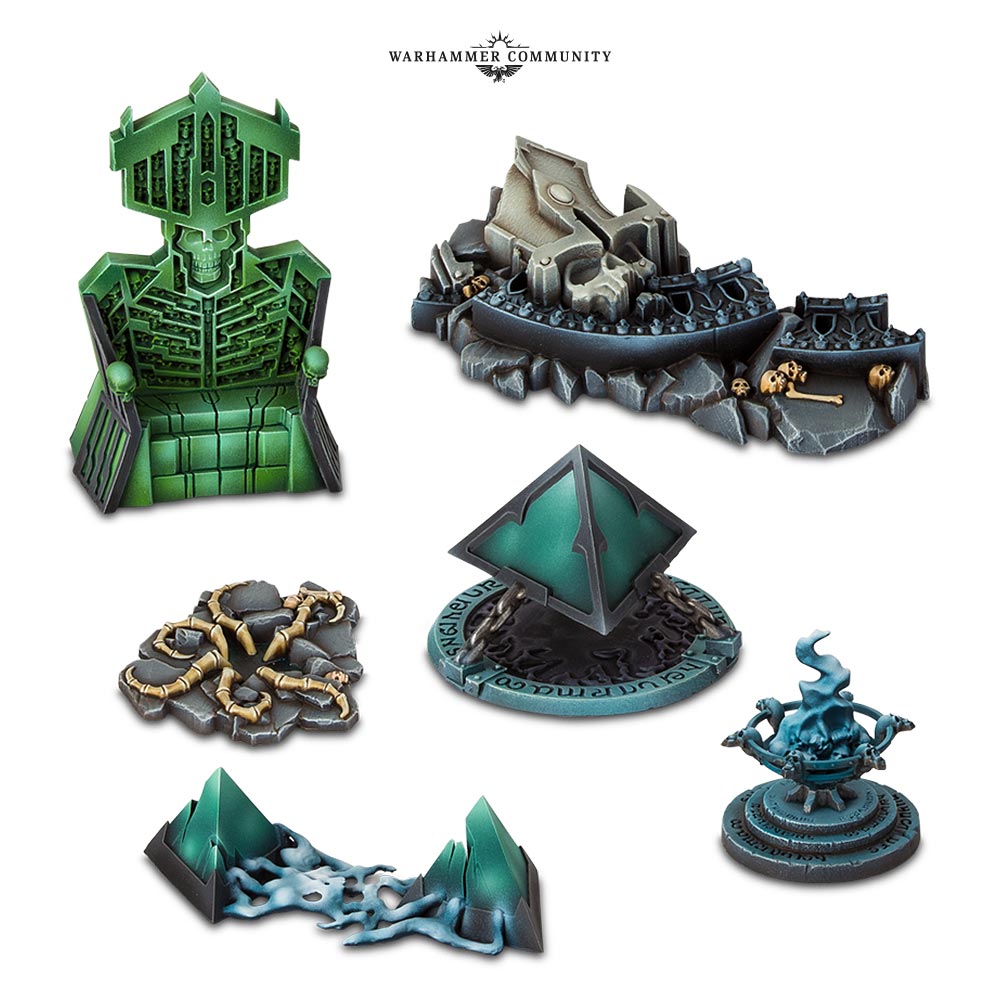
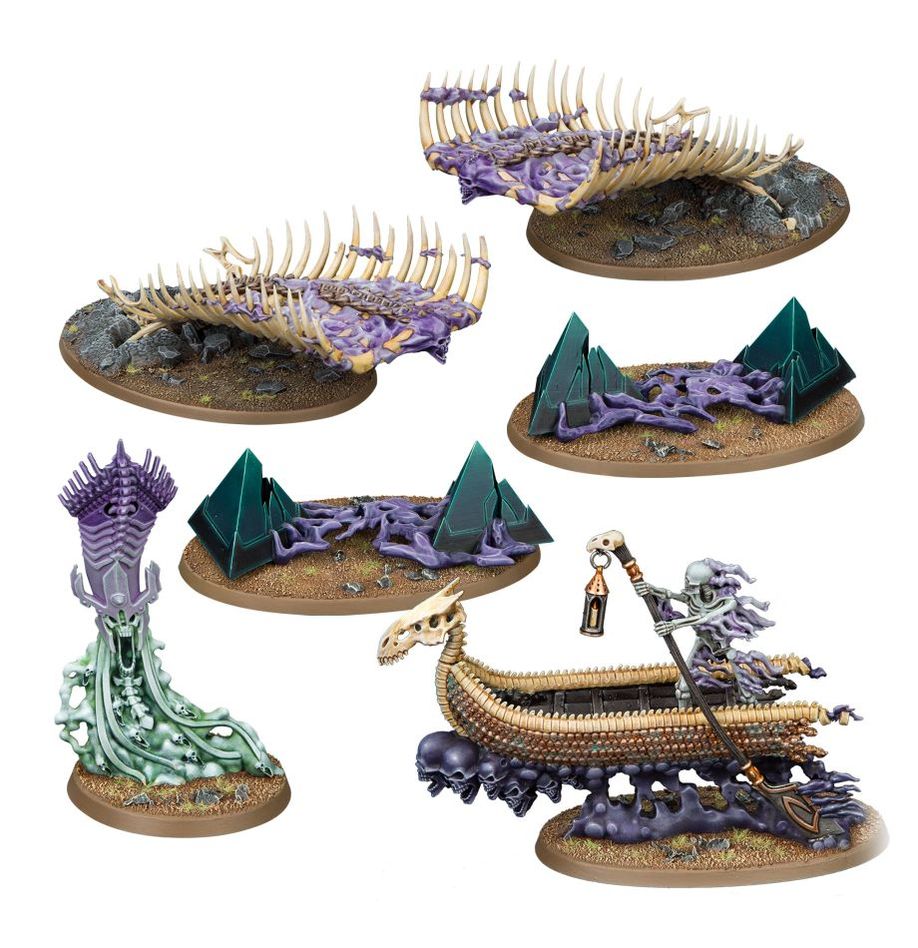
The two sets that drew my eye were the Arcane Hazards scenery kit for Warhammer Underworlds and the follow-up Forbidden Power endless spells for Age of Sigmar, now sadly very out of production.
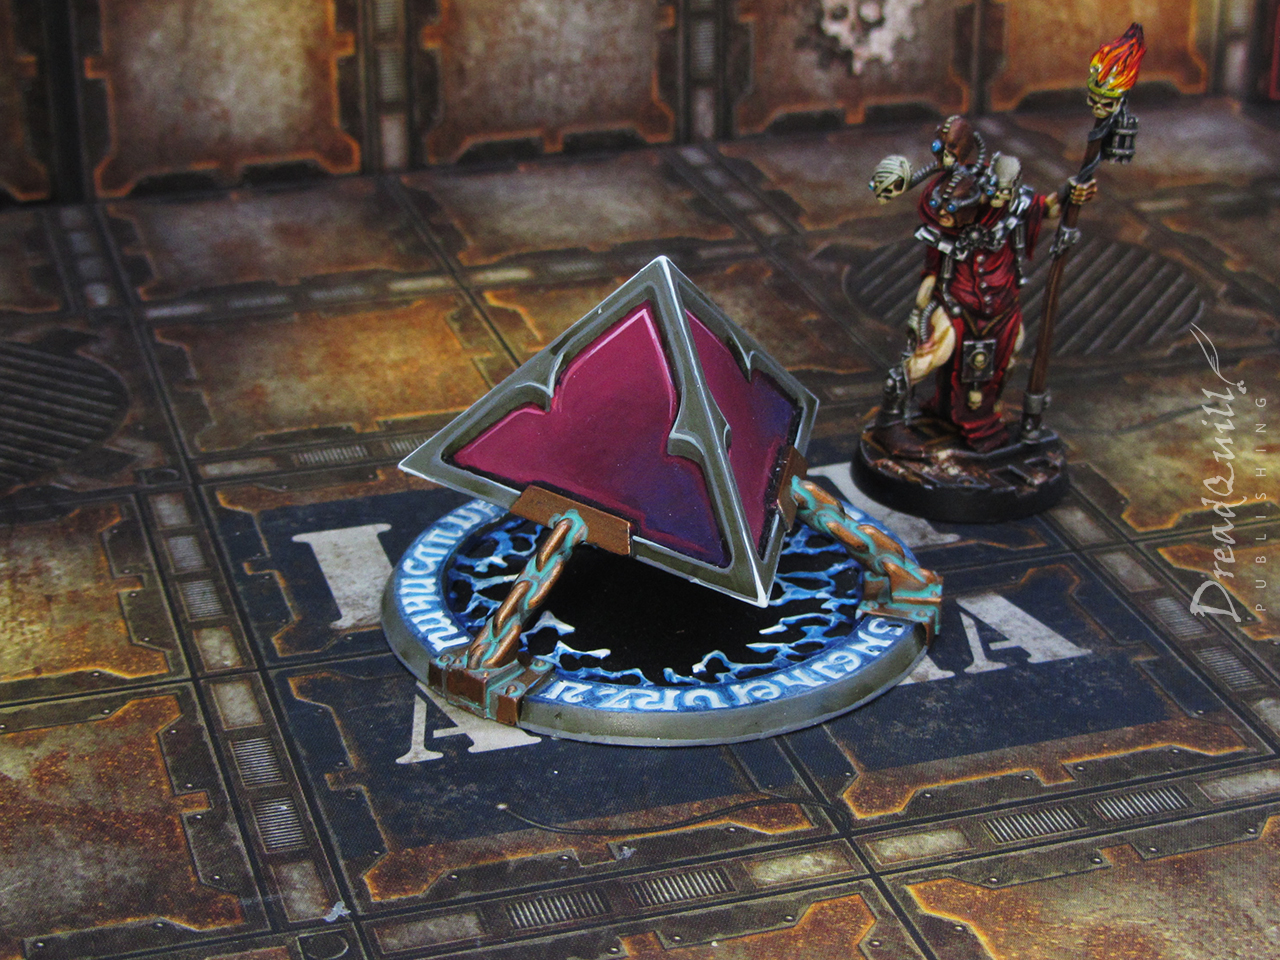
I was drawn by the ancient undead empire aesthetic that they’d gone for with the new Ossiarch Bonereapers range, and I’m a sucker for giant floating crystals radiating malign power.
I nipped over to ebay to grab some more of the floating/broken crystals, as I knew they’d be more useful as terrain if I had a few of them. Luckily many people were buying and splitting the Forbidden Powers box, which had some of what I needed.
No conversions needed, they just needed a splash of paint!
Cerveza Cristaaaaal
Painting this set was time consuming but satisfying. It was long before I had my airbrush, so everything was done the old-fashioned way – wet blending layers.
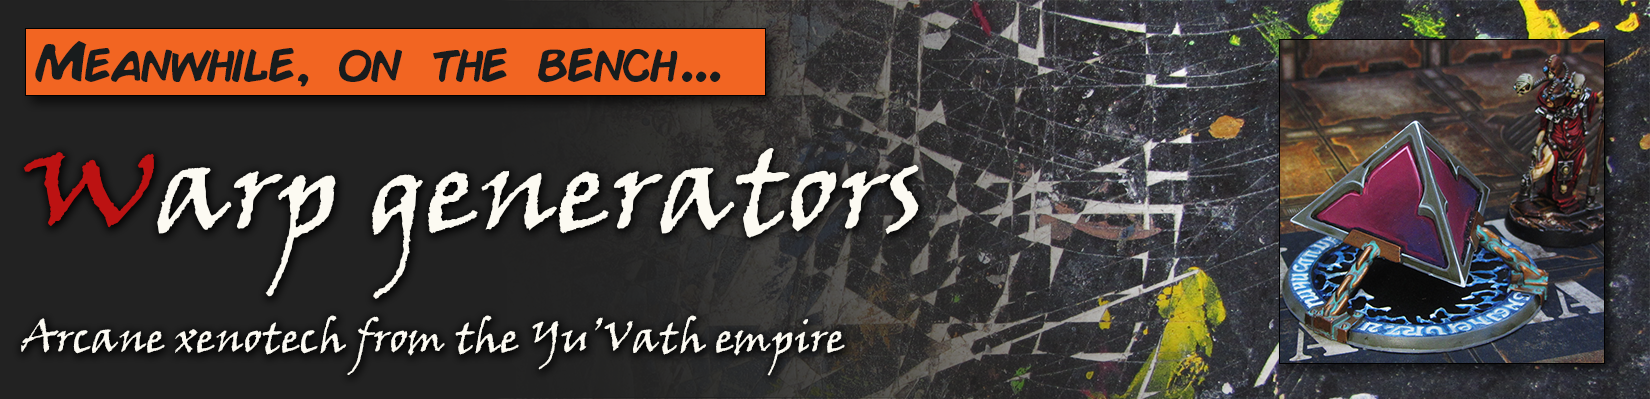
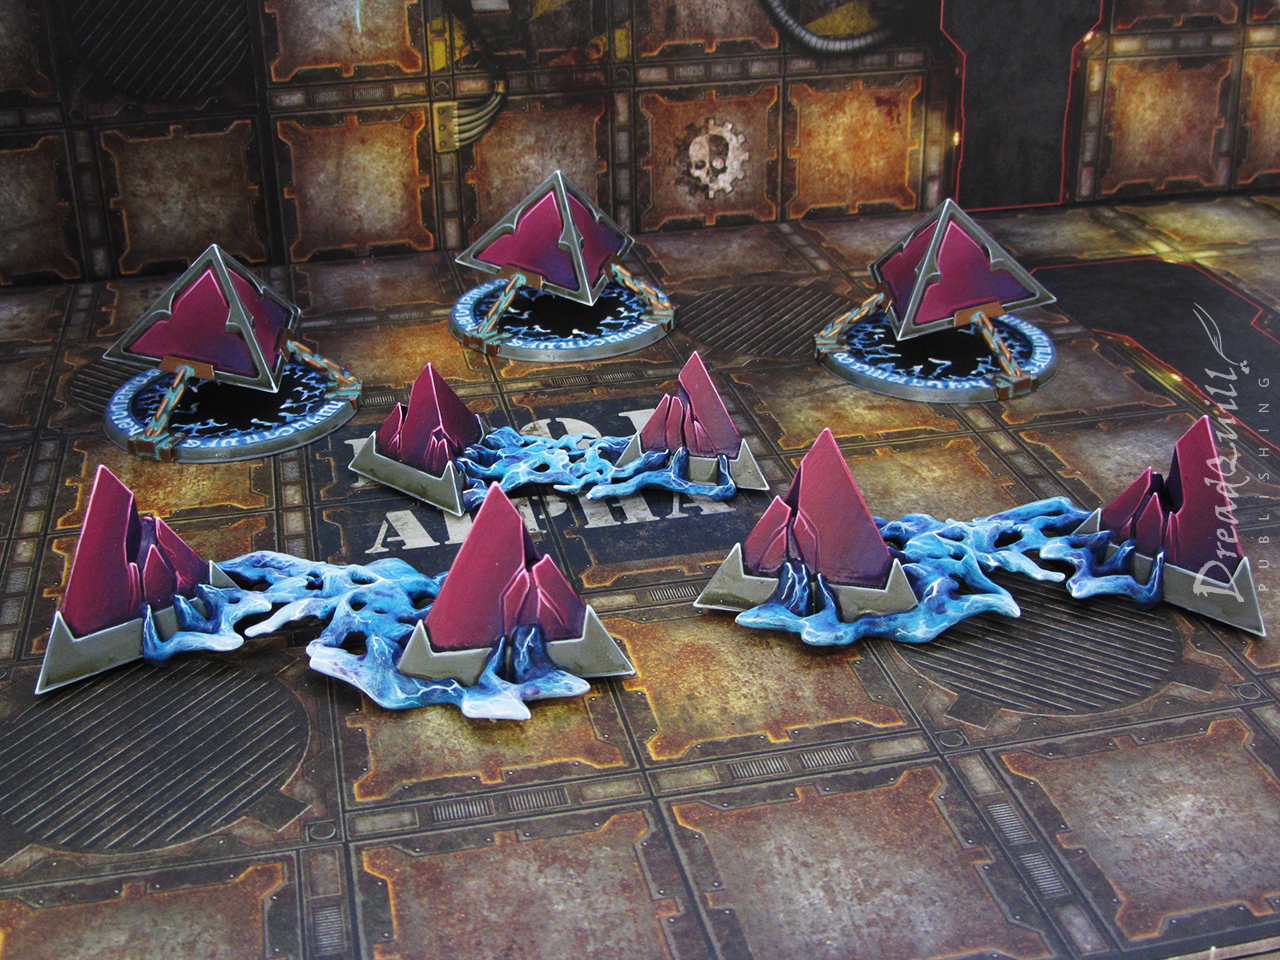
I based the colour scheme off previous crystal sets I’d done so they would visually tie together if they were present together on the board. The plan was to use them as Yu’Vath creations – perhaps as some strange power generator or warp artefact – so they needed to have a colour scheme that matched other Yu’Vath doo-hickeys I had.
They’re perfect at 28mm or 54mm scale, so they work really well as floating hazards for Inquisitor, or larger centrepieces for any of my 40k RPG games, or even Necromunda!
Starting with a black undercoat, the crystals were painted by layering colours in order, going from darkest to lightest.
Colour schemes
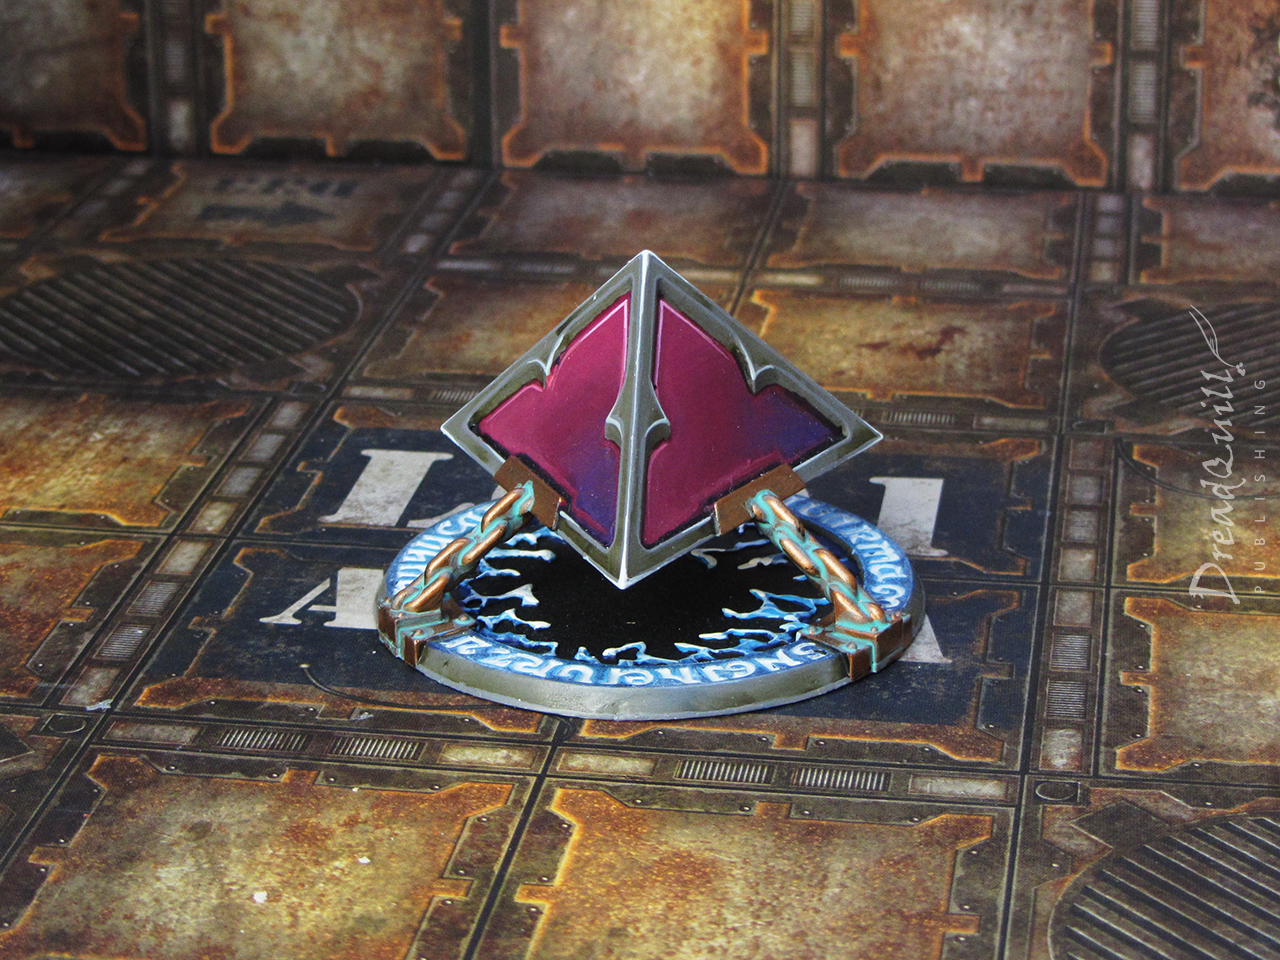
Xereus Purple > Screamer Pink > Pink Horror > 50/50 Pink Horror and White Scar mix for the edges > Pure White Scar dotting the corners
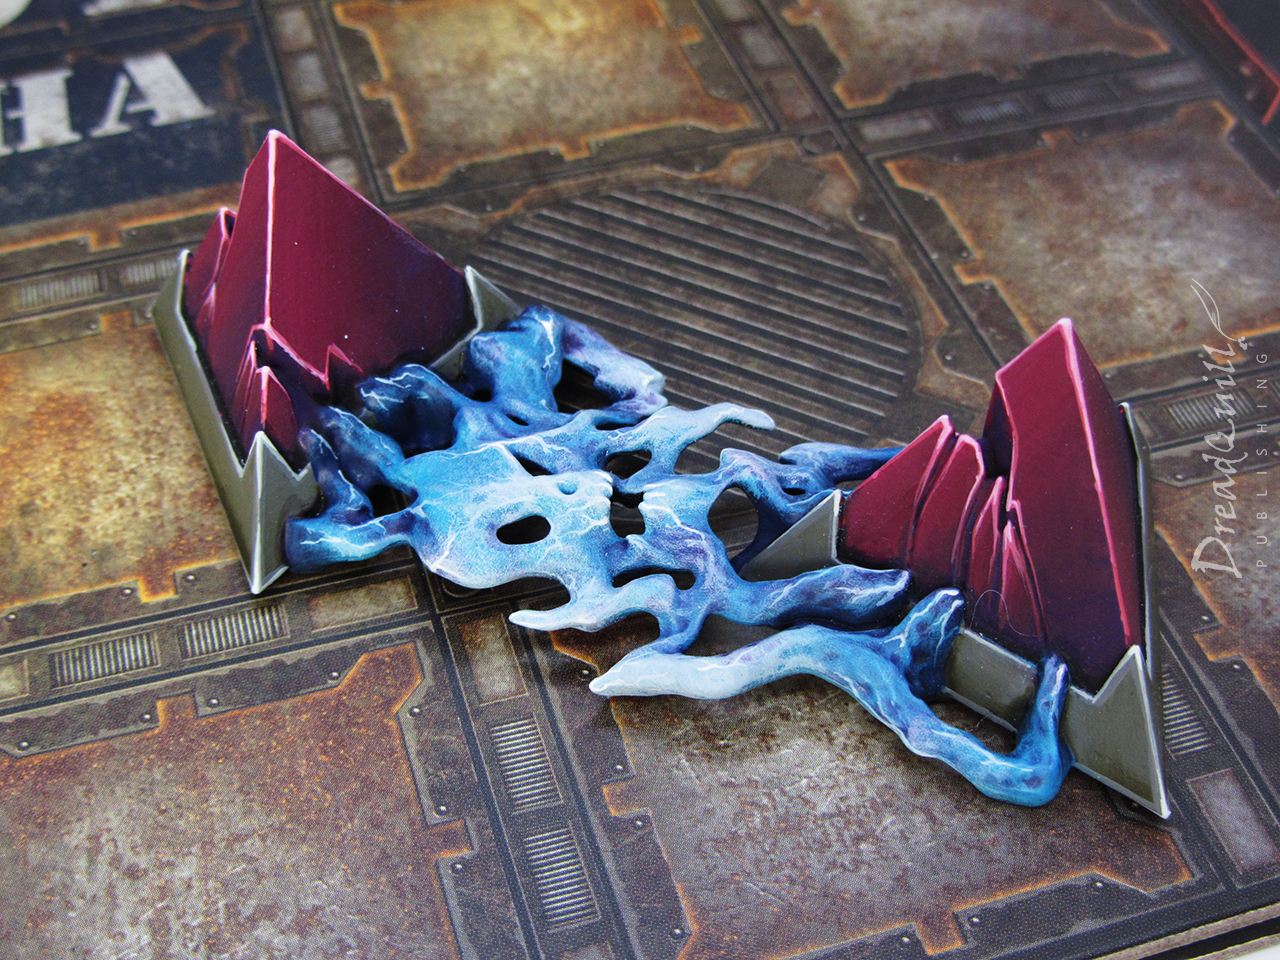
The blue energy was painted in much the same way, but using drybrushing and stippling rather than layering to create a different texture.
Kantor Blue > Lothern Blue > (bit of Naggaroth Nightshade wash dabbed in) > Lothern Blue > Blue Horror > 50/50 Blue Horror and White Scar mix. Electricity was painted on in Blue horror and finished with White Scar for added vim and vigour.
Grey sections were Mechanicus Grey washed with Athonian Camoshade, and highlighted with Celestra Grey. The chains were Brass Scorpion, washed with Nuln Oil, then hit again with Nihilakh Oxide.
Simple but effective!
I’m very happy with how they came out in the end. I had some emotional hangups about returning to them as they seemed like a cursed artifact – whenever they appeared they killed the campaign! I was able to push through and see them to completion though, and I’m glad I did.
The second Inquisitor campaign also never saw completion, largely due to illness at the last minute (Nurgle! Again!), and too much time passed to rope people back in. Perhaps a grand finale at Warhammer World is what’s needed…
Back in the heady days of 2022 I was approached to do a guest post for Anvil Industry off the back of some Chaos hoodlums I had been showcasing on social media. I was generously offered some store credit to make basically anything I wanted in exchange for writing up a guest post for them (an offer I would take up again in a heatbeat if you’re reading this xoxo).
“Quaddis is a strange world, long the plaything of the vice, vainglory, and eccentricity of the powerful and great of the Calixis Sector and far beyond. It is a place of strange tales and stories, and one of the oldest is that of the Widower – monster, changeling, creeper in the darkness.
The Widower of old was said to be the Haarlock’s warder and spy and – when needed – their peerless assassin – a thing that no weapon could kill and against which no lock could bar entry.”
Last year I ran a Necromunda Outlanders campaign for my friendly local game store Asgard Wargames, my first proper ‘public’ game with players outside my immediate friend circle and a campaign format we had very little experience of.
Most appealing to my deadline-averse hobby nature was that every scenario required specific objective markers or scatter terrain. The perfect excuse to plunder the bits box!
Advice for any new Dungeon or Games Master, sourced from dozens of campaigns with hundreds of players over thousands of hours and still making new mistakes. This wisdom to new GMs is broadly split into three categories – preparing to run a campaign, writing an adventure, and running the session.
Some mechanical examples are specific to D100 RPGs like Dark Heresy, Rogue Trader or Imperium Maledictum, but the principles still work for other systems like DnD or Starfinder.
Here are 18 tips for new GMs. Fail quickly, keep the game moving, and have fun!
We use cookies to ensure that we give you the best experience on our website. If you continue to use this site we will assume that you are happy with it.