Last year I ran a Necromunda Outlanders campaign for my friendly local game store Asgard Wargames, my first proper ‘public’ game with players outside my immediate friend circle and a campaign format we had very little experience of.
Most appealing to my deadline-averse hobby nature was that every scenario required specific objective markers or scatter terrain. The perfect excuse to plunder the bits box!

Mining for parts
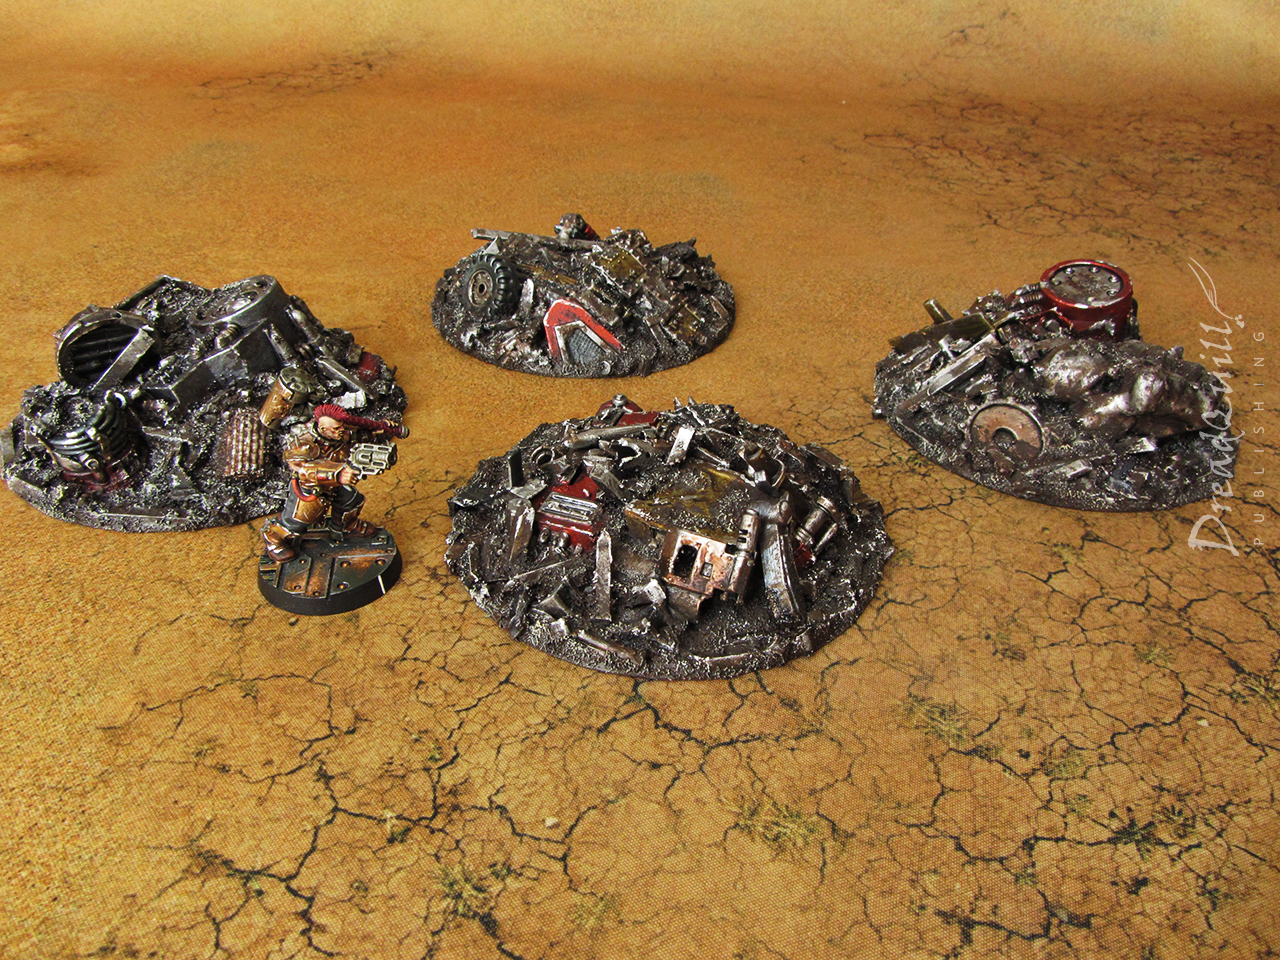
First scenario to get a look in was Mining Expedition, where gangs have to battle over and search through four ‘prospecting sites’. The only stipulation from the scenario was that they needed to be about 4″ in size.
I had rather unhelpfully thrown away all my old CDs from the noughties, which would have been perfect scatter terrain fodder, so I was on the hunt for another half dozen equal-sized round bases that didn’t involve any hacksawing.
I had been planning this campaign over the Christmas season, meaning lots of delicious tubular snacks. Incredibly the lid of my favourite holiday snack (Twiglet tubes) was exactly the dimension I needed! Praise the Omnissiah!
It was only in hindsight I realised I’d overlooked the prospecting site’s requirements to be stood on, and didn’t make them particularly friendly for models to climb on top of.
I got around this issue by a) not worrying about this at all, as players don’t read the rules, and b) allowing gangers to perform their Prospect double action if they were within 1″ of the edge of the site and proving them with heavy cover.
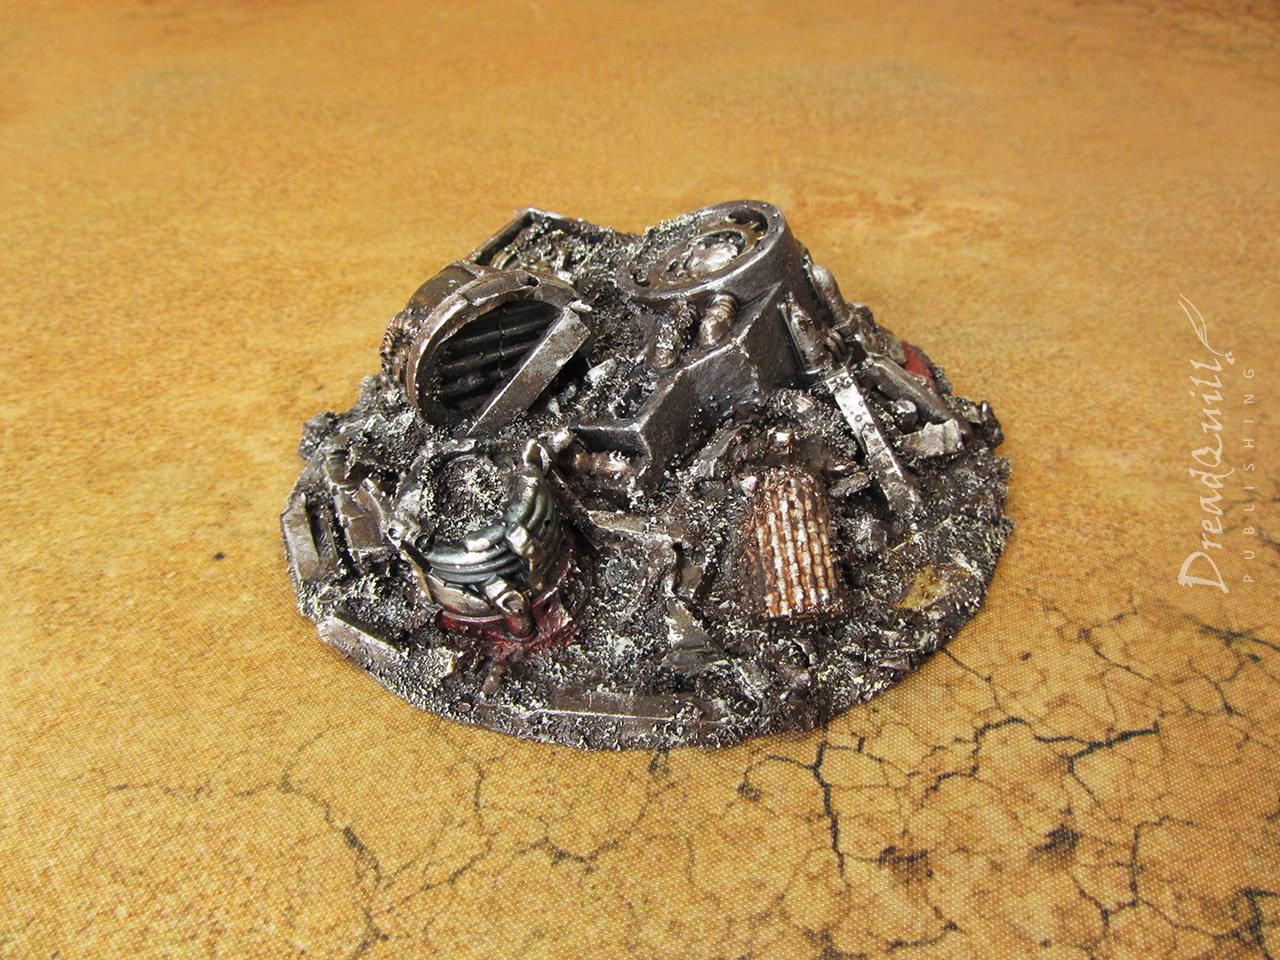
Blocking it out
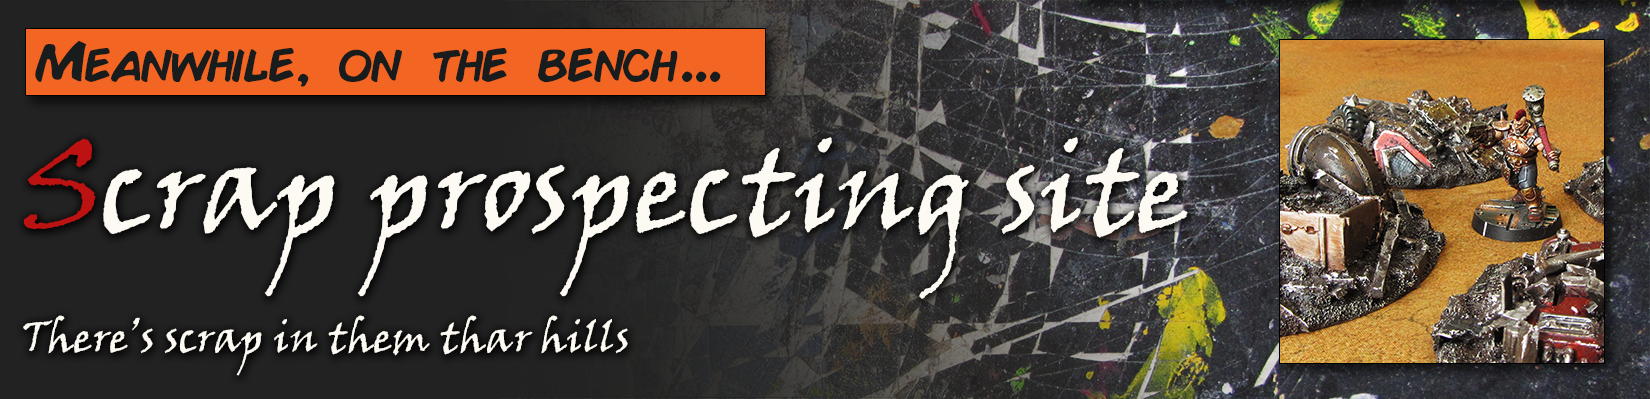
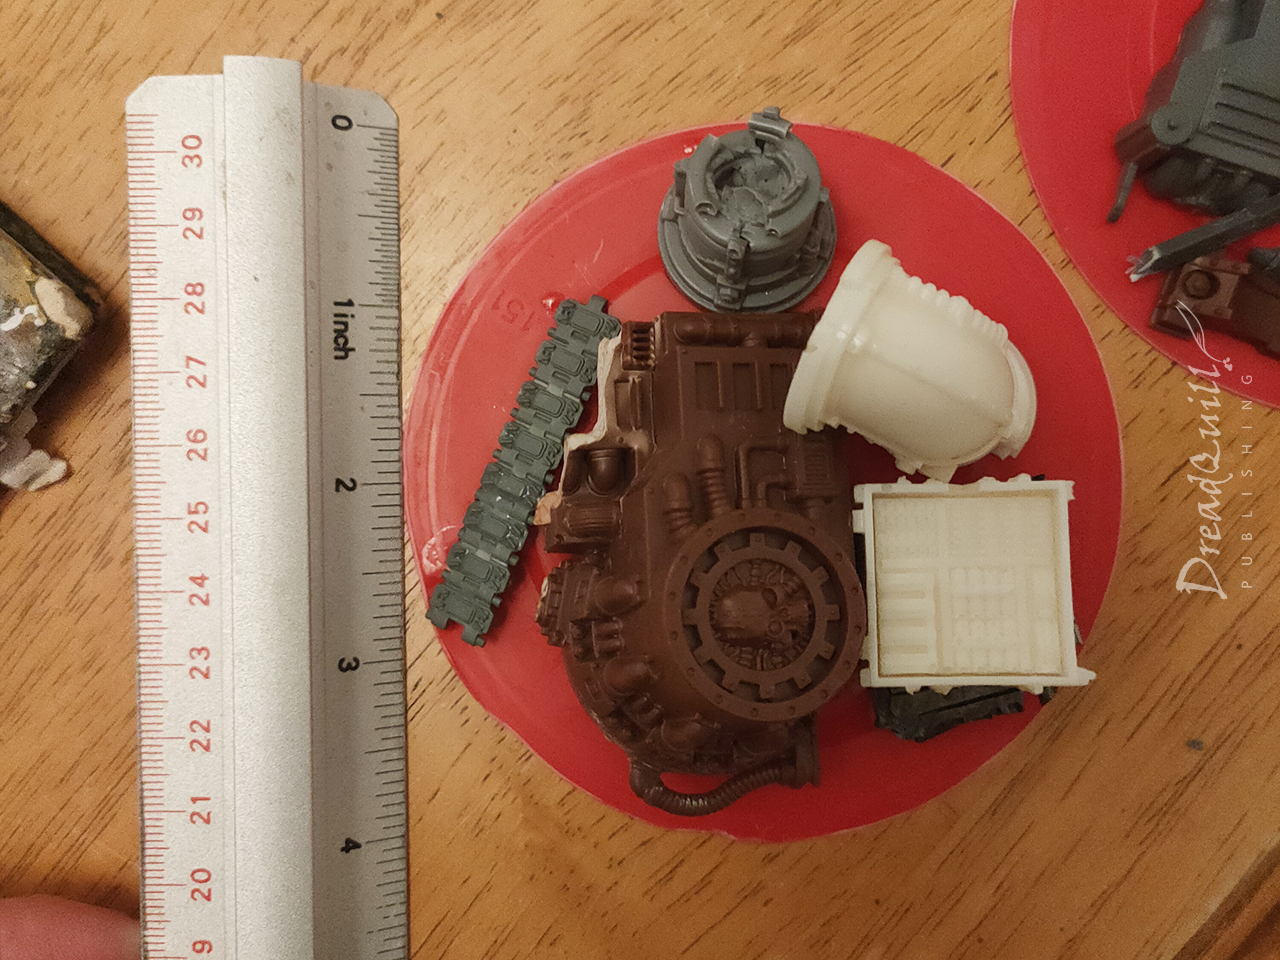
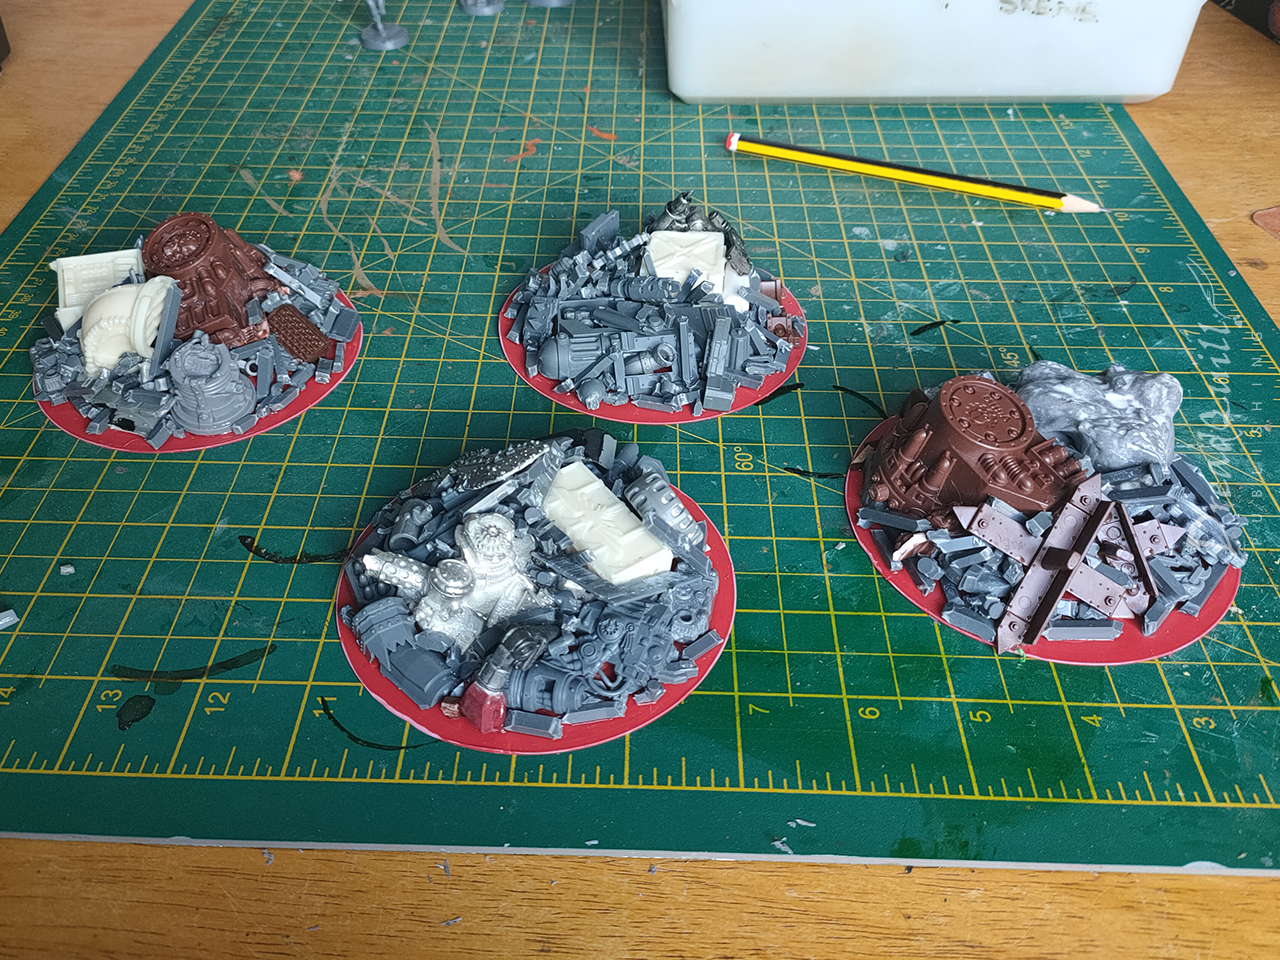
It was particularly satisfying to go through my various bits boxes to pick out pieces I’d been holding on to for some unknowable future project and slap them down to the bases. These would be big, chunky, or heavy pieces that took up space and didn’t have much utility. A hacked up mechanicus generator, miscast crates and pipes, a big chunk of white metal (from Warmachine I think?) and a glob of flash-cured resin.
Sprue Goo
As part of this campaign prep I’d found myself with a glut of sprues. I’ve been more conscious of hobby wastage and I didn’t like the idea of them going to landfill, and at the time GW’s sprue recycling initiative was yet to reach my area.
I’d seen some recommendations for ‘sprue glue’ – cutting up your empty sprues and putting them in a jar of acetate until they become a sticky syrup of melted plastic. It’s used as a kind of liquid greenstuff – smoothing gaps between large plastic pieces or as a more robust filler for scenery. I didn’t fancy the idea of a toxic jar of flammable goo, and I had way more sprues than I could goo.
Instead I got into the habit of hacking my sprues into small straight sections and keeping them in a big plastic tub. I wanted to separate as many of the bits that obviously identify it as sprue – so all round bits were snipped from the straight bits.
This gives me a huge box of scrap filler pieces that look great when sprinkled liberally around junkyard pieces, and really helped to fill out these naked bases.
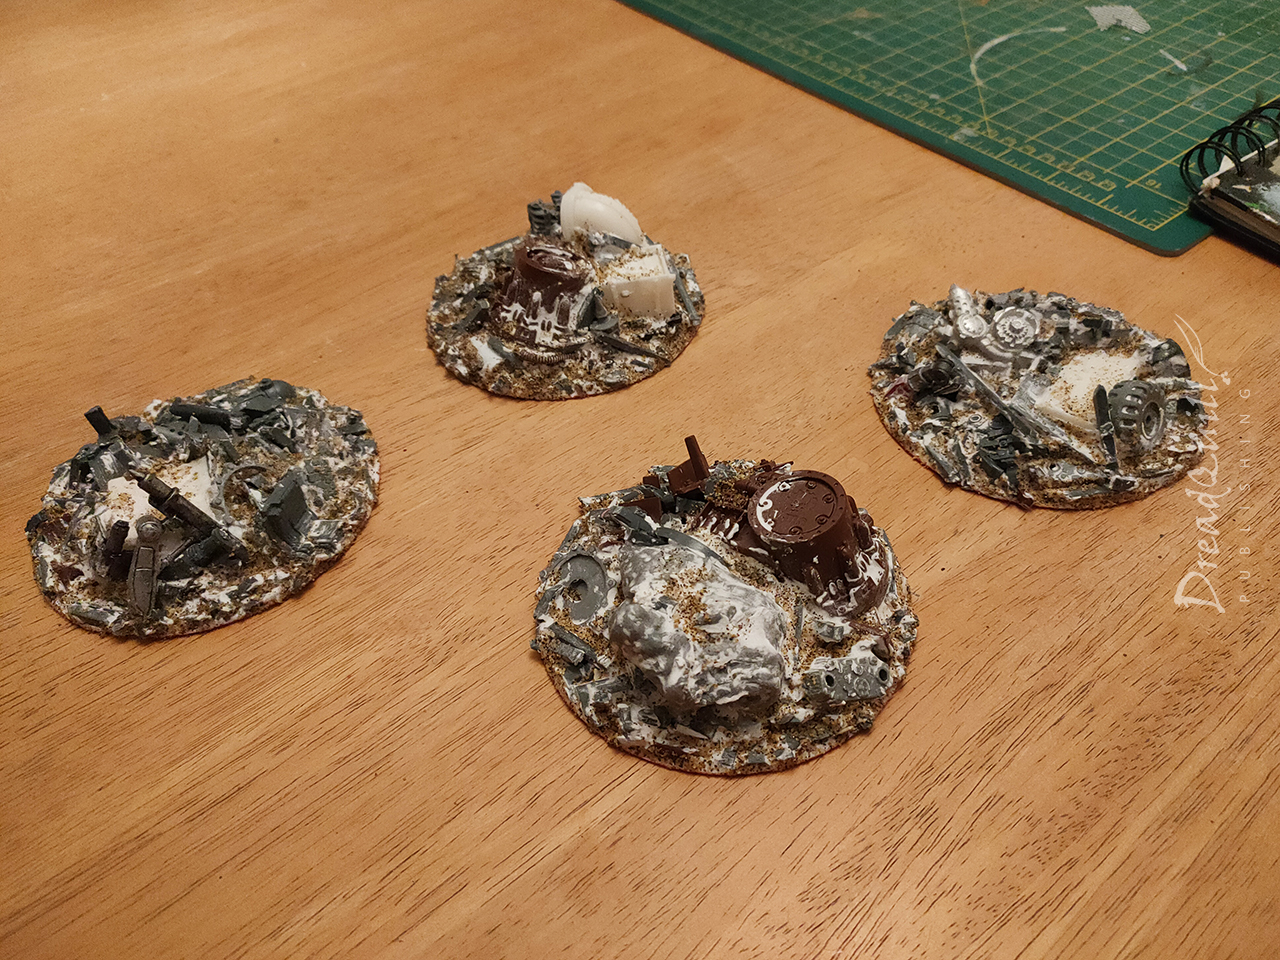
Filling in the gaps
When everything was dried (and extra superglue applied to keep everything attached to the red bases, which turned out to be frustratingly resilient to having things glued to it) I cracked out the tub of polyfilla to complete the look.
I wasn’t concerned that I lost a lot of detail after this stage – theyy were supposed to be mounds of scrap that may or may not have anything useful buried in them. Having a few interesting pieces poking out of a morass of metal and mud seemed like the ideal way to represent the scenario objectives.
A contrasting style
I’m still trying to break out of my micro-scale painting techniques for doing mid-sized scenery pieces like this, and I’d seen a recipe online somewhere for painting scrap using drybrushing and contrast paint. I’m late to the contast party so I didn’t really appreciate what I’d been missing out on.
The recipe was simple: drybrush silver, then contrast, then weather. It couldn’t be that simple, could it?
I undercoated everything black and cracked out the big brushes.
Mining my own business
This was my first proper foray into Contrast Paint, (to me) a new-fangled invention that I didn’t see a place for in my usual paint lineup. It was designed for batch painting armies, so why would I need it?
Boy was I wrong.
I went out and picked up half a dozen contrast colours I thought would work well:
- Aggaros Dunes
- Garaghak’s Sewer
- Skeleton Horde
- Black Templar
- Guilliman Flesh
- Flesh Tearer Red
- Blood Angels Red
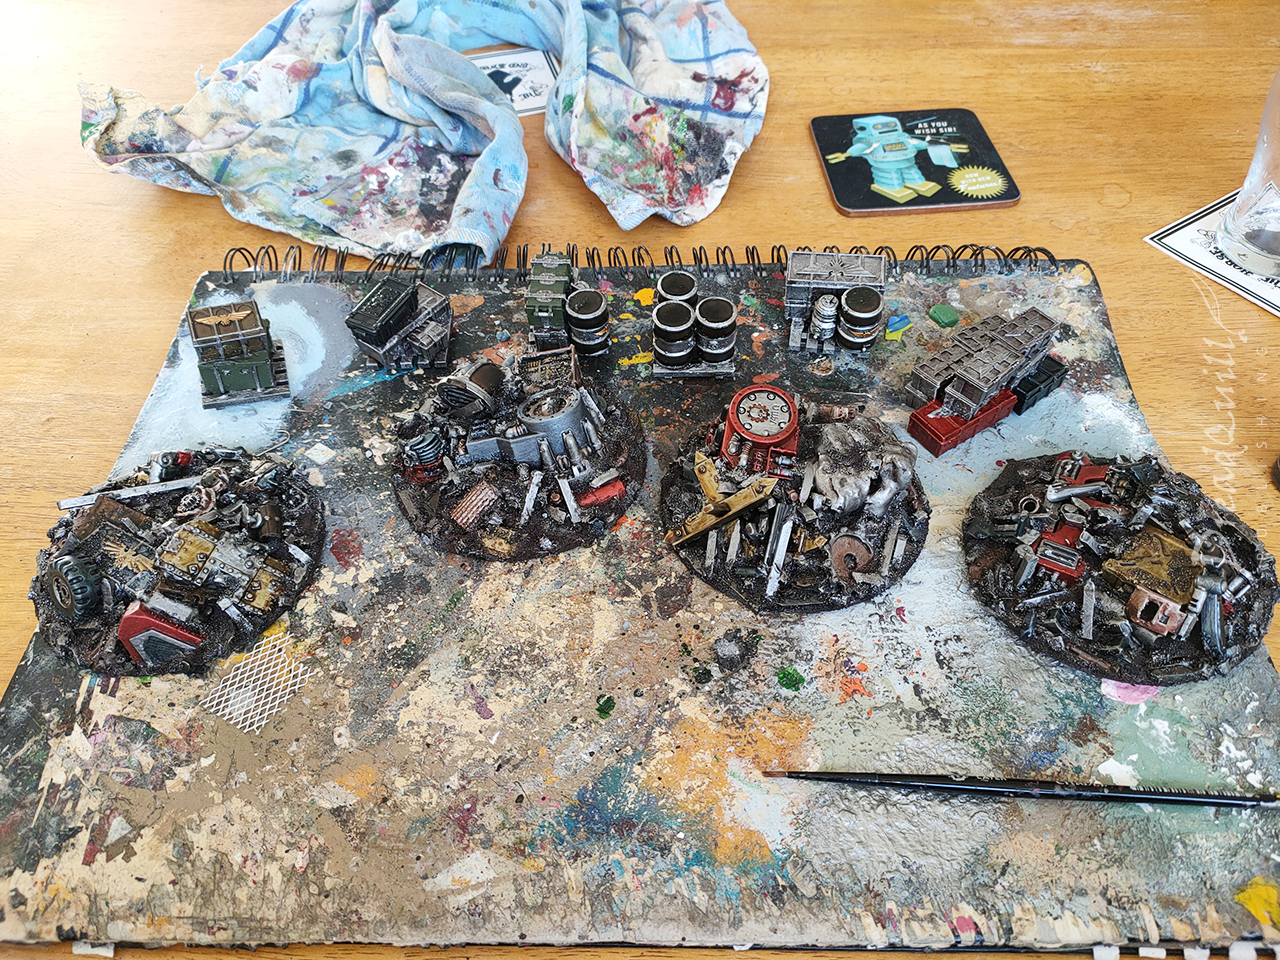
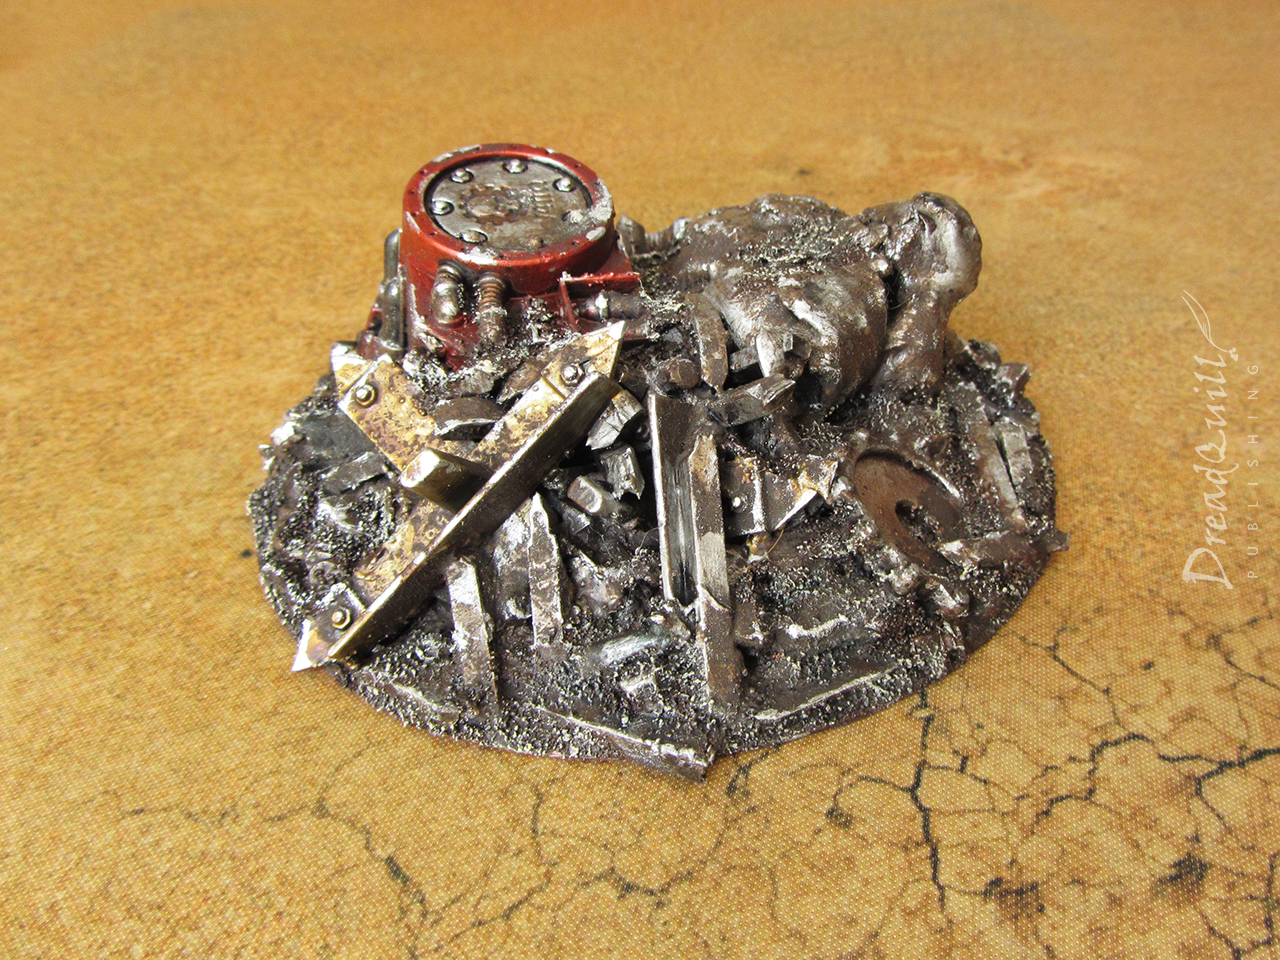
These were then applied liberally and randomly across the scrap piles, directly over a really rough and uneven drybrush. I was astounded at the effect!
When everything was covered in contrast, everything got attacked with Typhus Corrosion to create some matt brown areas and weather the metal a bit more.
I took some silver paint and very roughly highlighted some of the more prominent edges, being very careful not to take my time or be particularly neat about it.
A final light drybrush of Ushabti Bone around the sandy bits helps blend it into the floor a bit more.
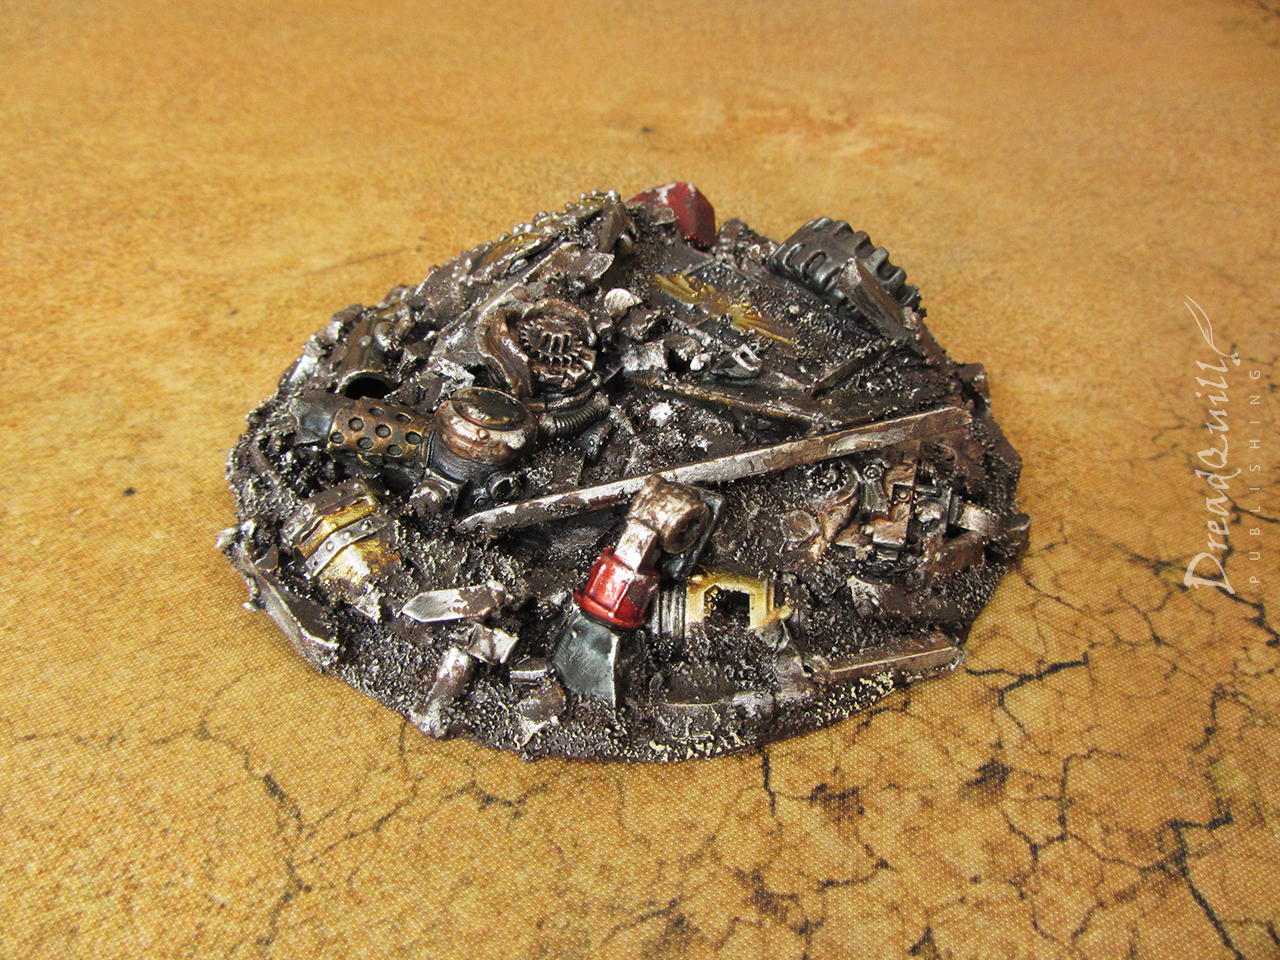
A prospective new technique
I’m so blown away with how easy and enjoyable that Contrast technique is, I’ve adapted it for loads of scenery projects coming up. It scales up really well, and Contrast has much better coverage over large areas than the regular washes do.
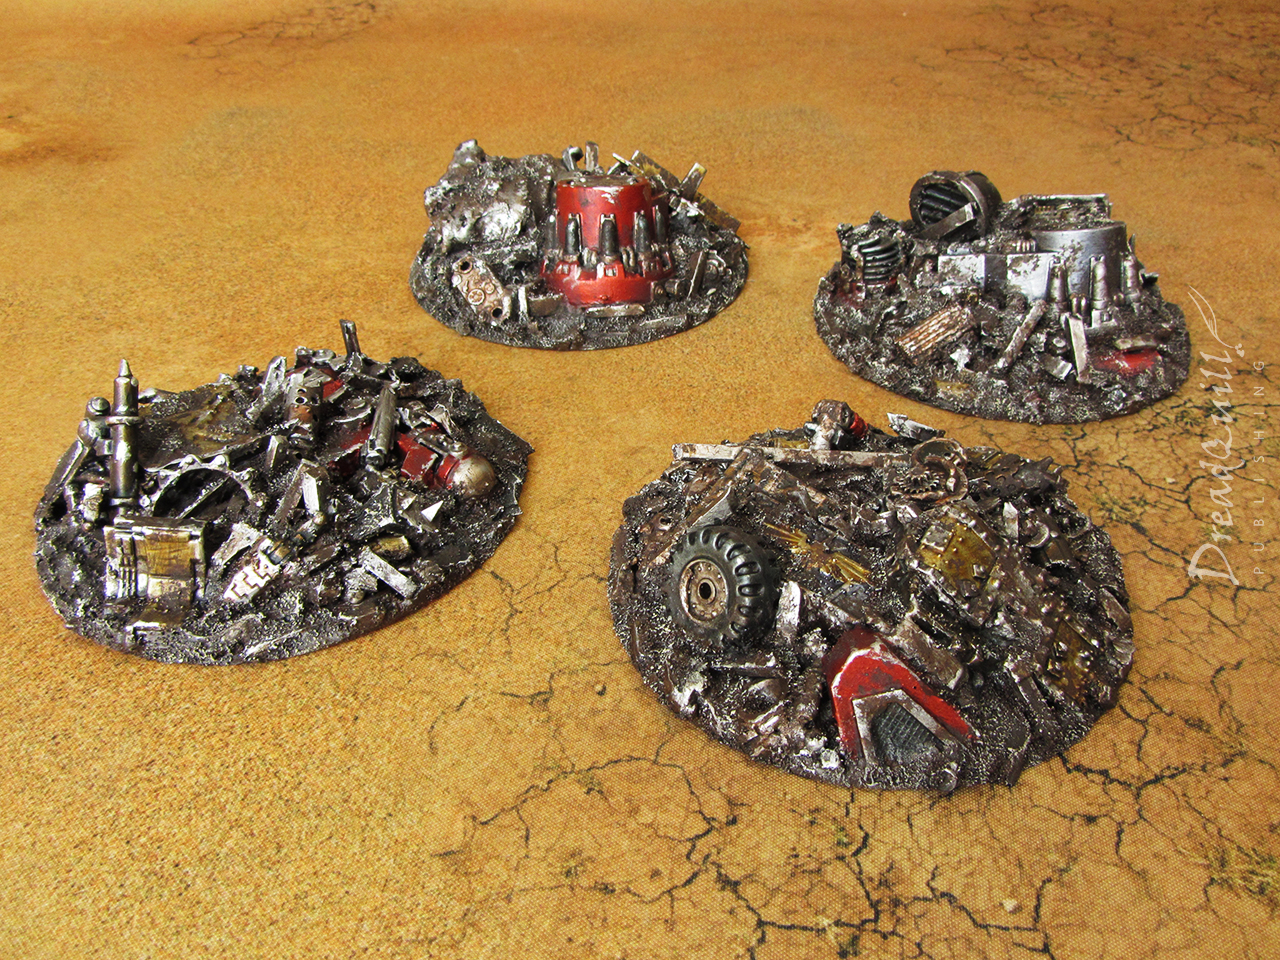
I’m incredibly satisfied with this whole project – finding exactly the right number of correct-sized bases, freeing up huge chunks of my bits box, creating a huge box of sprue ends, and discovering a completely new painting technique. It couldn’t have gone better!
I’m very excited about the possibilities this opens up. Perhaps entire hills made of scrap to create a junkyard board? Be still my beating heart…