
Many years ago, when MDF scenery was still being invented, I acquired a very basic Wild West train set from TTCombat as a cheap and cheerful alternative to ruins and sandbags typical of most 40k terrain setups. Our gaming group were experimenting with Necromunda Community Edition (many years before the 2017 re-release) and were enjoying the narrative arcs that smaller-scale conflict could bring, and with it the need to have more interesting scenery to brawl over.
Time passed, and certain sets of scenery were trotted out for battle less and less. It wasn’t a concious decision, more a combination of how easy it was to set up, how well it fit the theme of the board, and what interesting combat situations could it open up.
The Wild West themed train set rarely got high marks in those categories. The track itself was fiddly to set up as it came in 4-inch chunks that rarely stayed straight, and there wasn’t enough of it to cross the board fully, ending with some ugly terminations. The theme was tricky to match too – when Necromunda 2017 came round the whole aesthetic pivoted, and a passenger steam locomotive was rarely a welcome sight on the board. It also had limited scope for interesting play – the passenger compartment wasn’t large enough to have two models standing side by side, so it served only to block line of sight in a small area of the board.
I never even got round to painting it. The train had reached its terminus.
The restoration
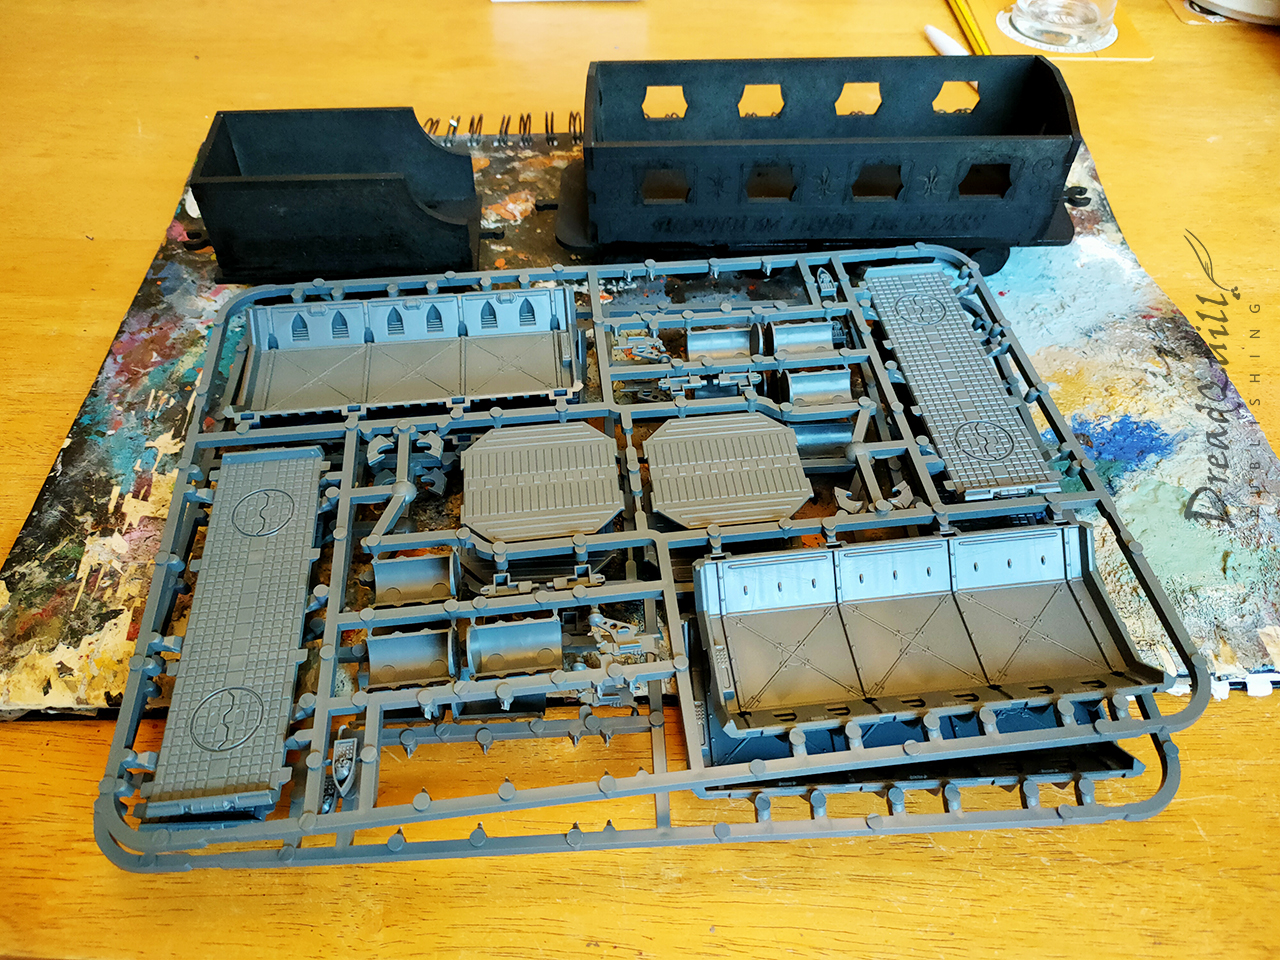
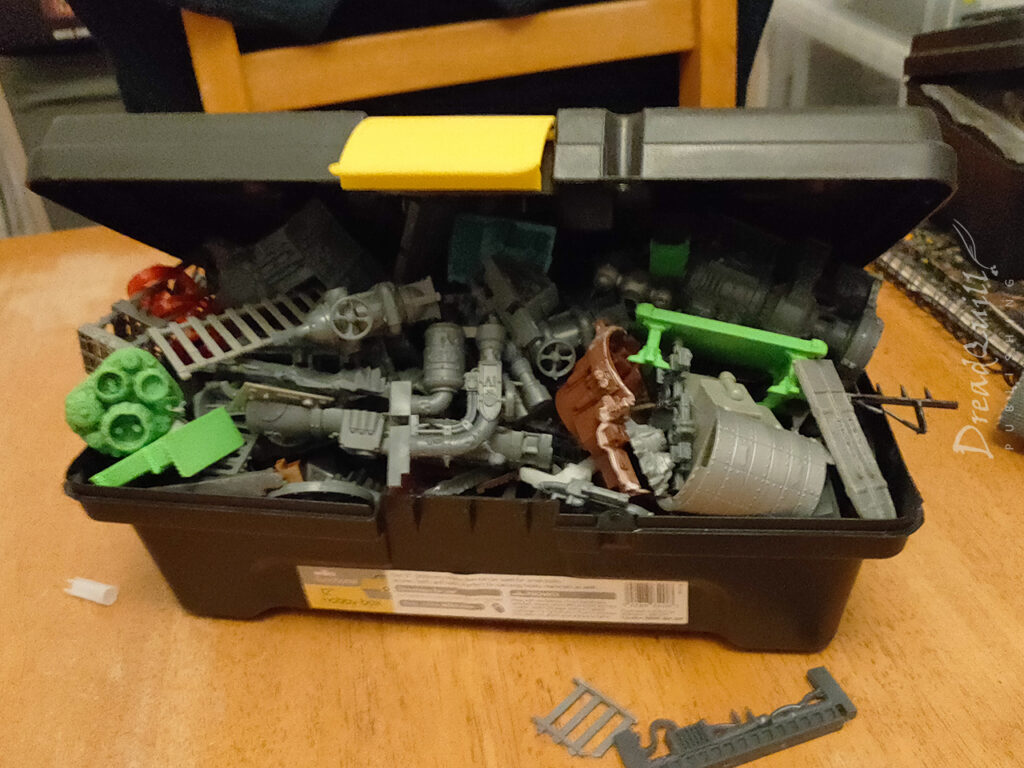
The pandemic gave me an opportunity to refine my terrain collection. I already had a large number of MDF shipping containers (acquired at the same time as the train set), so had little desire to add to the pile with some leftover plastic Munitorum containers. I’d been experimenting with cutting them up for use in hab blocks I was working on, and was thinking about turning them into street furniture like garbage skips, so why not cut some more up?
The flash of inspiration came when I remembered the train set gathering dust – skip plus wheels equal fun – and I could rebuild the whole train set to be more aesthetic!
I had three carriages to play with – the train engine proper, the coal wagon, and a passenger carriage. I set the engine aside for a future project to concentrate on the bits that would eventually become freight wagons.
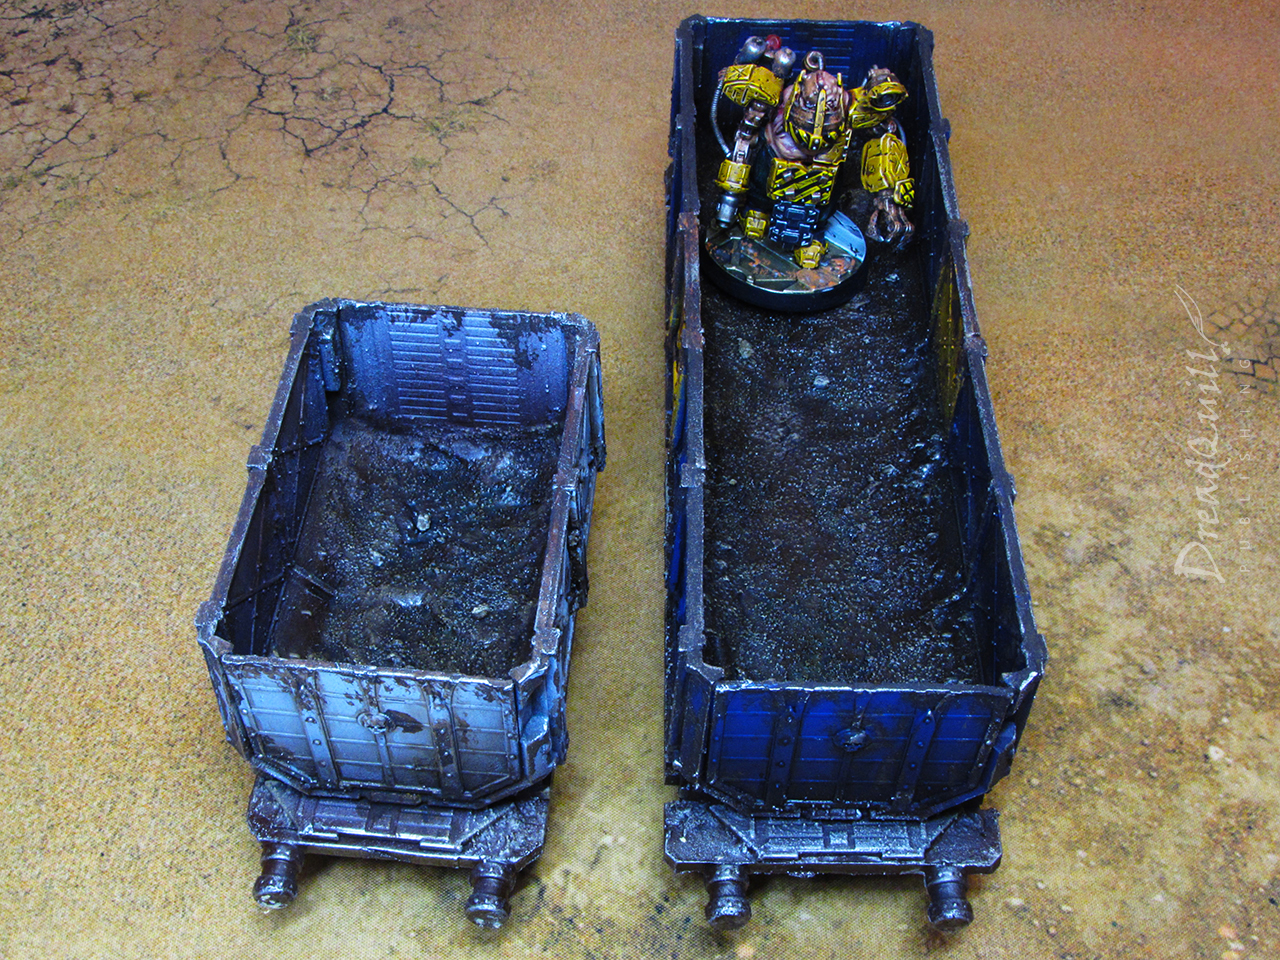
It was straightforward to cut the carriage beds free, leaving me with a flat surface to attach my cut up munitorum containers. They were two different sizes which meant being a being a bit creative with how I chopped up the containers, but pleasingly they were almost exactly the right size for a five-panel and two-panel wagon. I used up about 2.5 munitorum containers’ worth of panels constructing these wagons, so there’s still half a container in the box for a future endeavours.
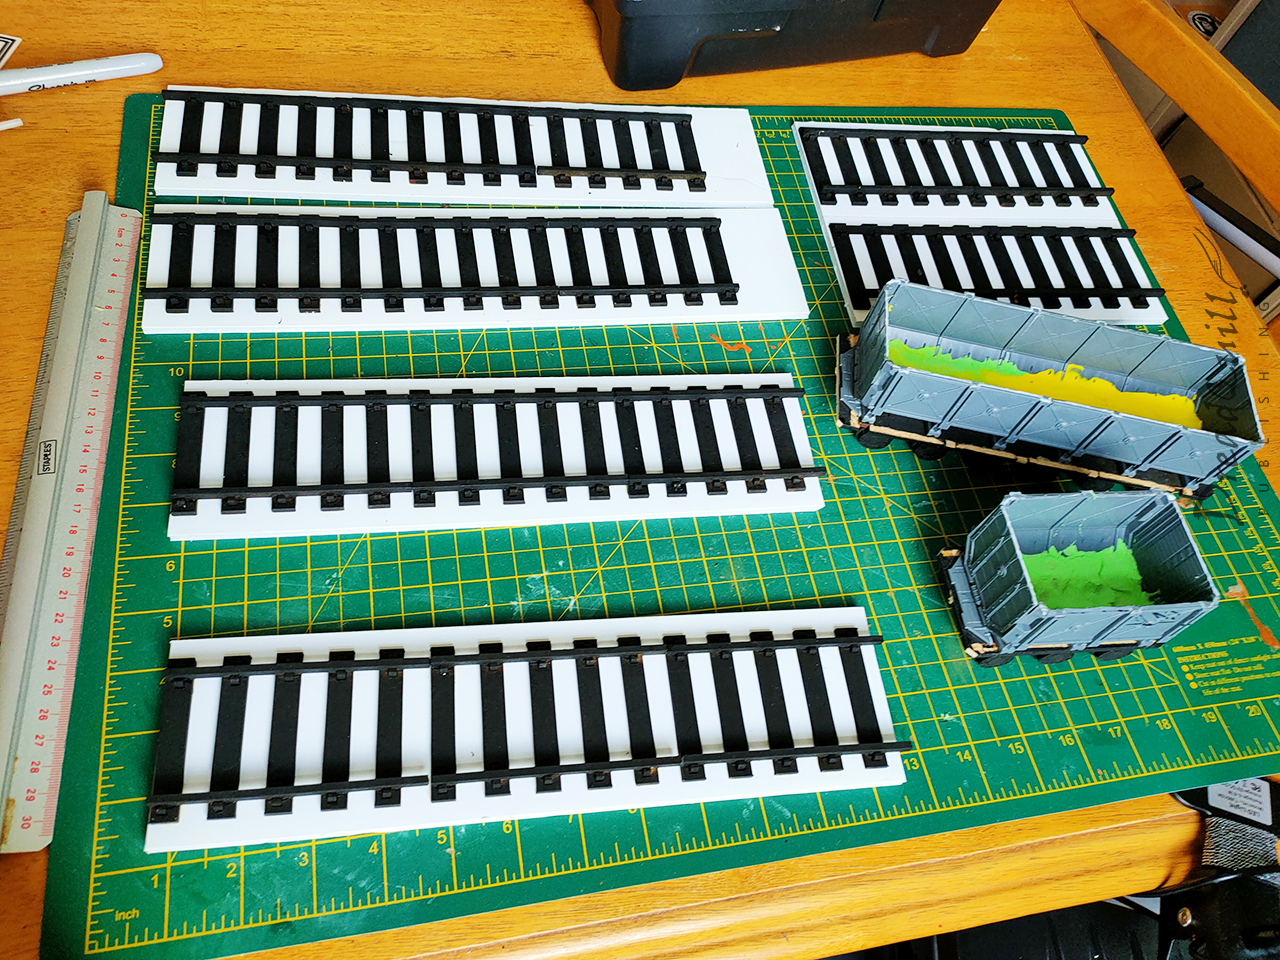
I smushed some putty and textured paint into the bottom of the containers help sell the idea that they’d been used a lot, and served the double purpose of elevating miniatures inside. I wanted it to be usable in both Necromunda and Inquisitor, so needed to be tall enough to provide cover to the tall miniatures, and short enough to be seen over by the short miniatures.
I also counted out the track pieces and grouped them together in sets of 3 (with a few left over for two sets of 2) and glued them to some foamboard in 12″ lengths. This would massively expedite setup and tear down, as well as giving me an opportunity to add some texture and colour to the track ‘base’ to tie them into their setting a bit better.
Buffering
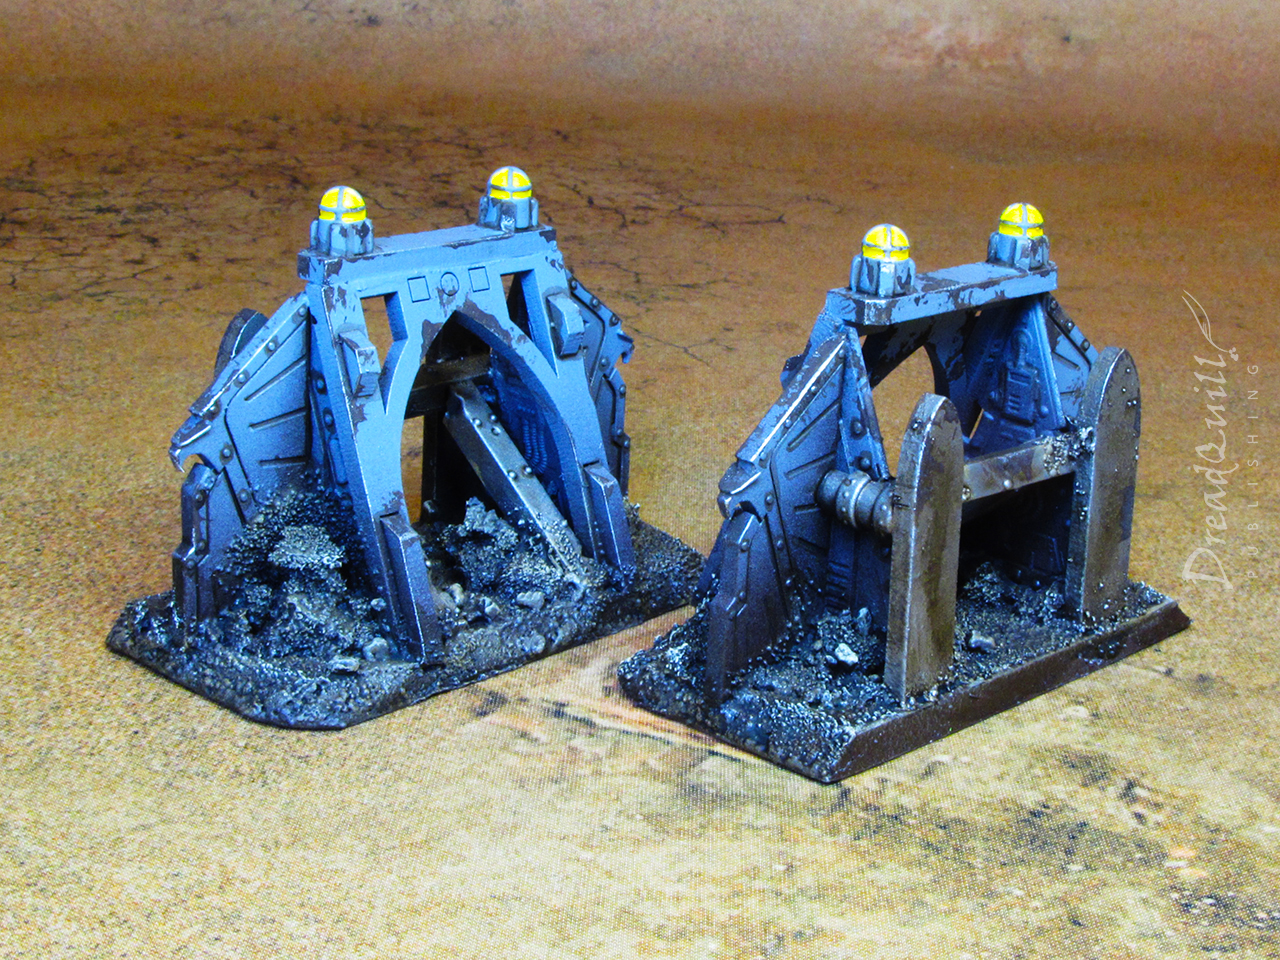
I was left with a few bits of foamboard left over and a desire to avoid the problem I had before of railway tracks ending in the middle of nowhere. It was time to break out the future endeavours box and build some buffer stops!
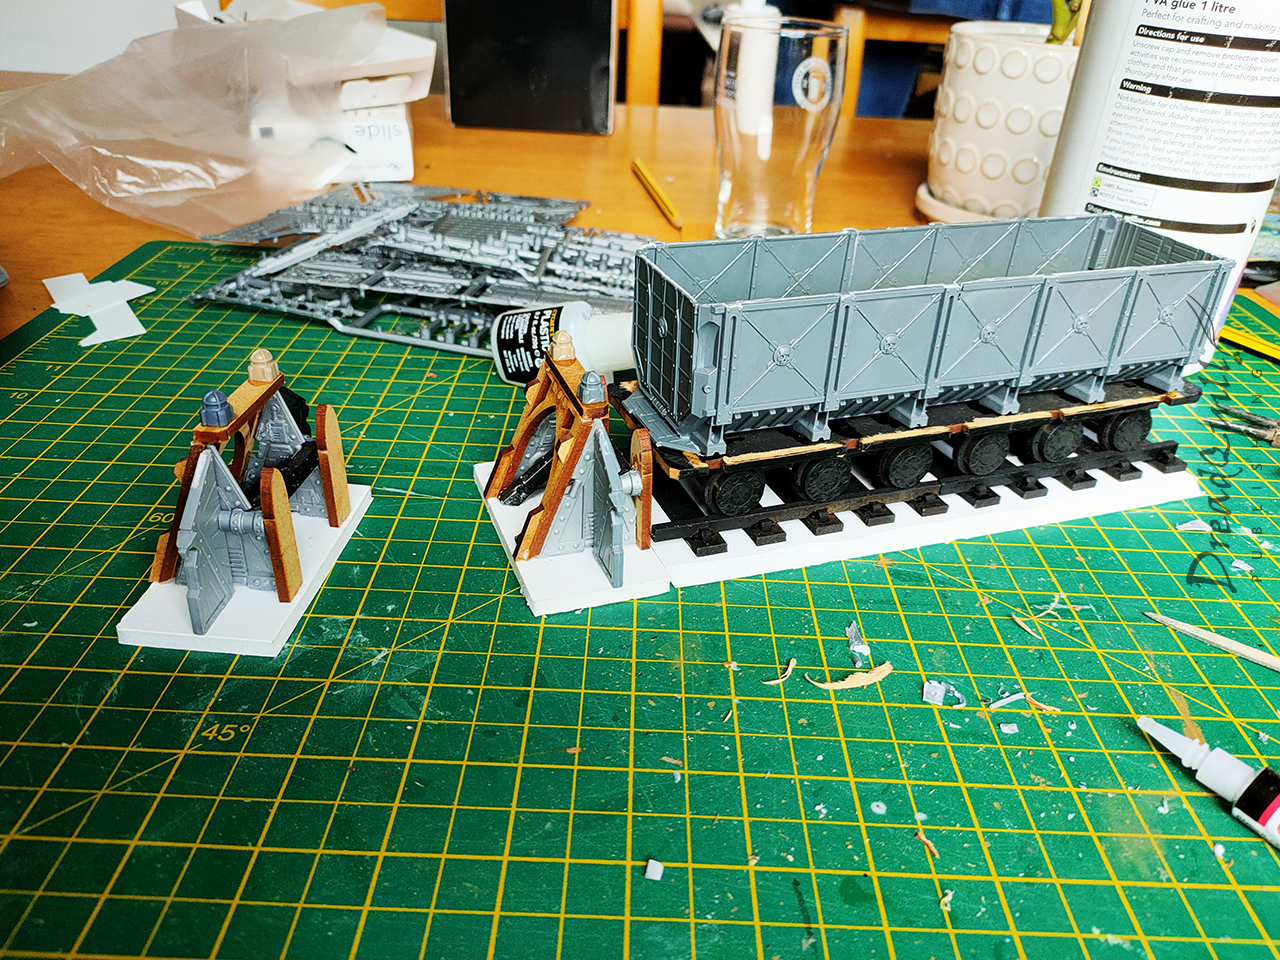
I wanted to make two so I could have two tracks next to each other terminating in the middle of the board, suggesting a depot or station of some kind. It also took a lot longer to create these from scratch than I thought, as I experimented with all kinds of designs built from plastic and MDF scraps from the box. The only thing I knew I wanted was for it to be solid enough to be used as cover by larger models. I used bits of sprue and cork to build up little piles behind the buffer to help sell the illusion of sturdiness.
I’d been experimenting with magnets in other projects, and couldn’t help but add some magnets to this project too. The little MDF hook-and-loop connectors on the original undercarriages were so flimsy they snapped off after two uses, so I wanted something a bit more sturdy. A pair of plastic pipes at each end, topped with a neodymium magnet, positive on the left and negative on the right. Although the wheels didn’t roll down the track it meant the carts snapped together neatly in any orientation, and I could drag them around the table if I wanted them free of the rails.
Finally, I bevelled the edge of the foamboard with a craft knife and painted on my sand and PVA. I foolishly didn’t weight the track sections down, convinced the rail sections would keep the foamboard from bowing while drying. To combat this, I applied a load of PVA glue to the underside and weighted them down so they bowed back towards their original position. Not perfect, but not noticeable any more!
Gonna paint your wagon
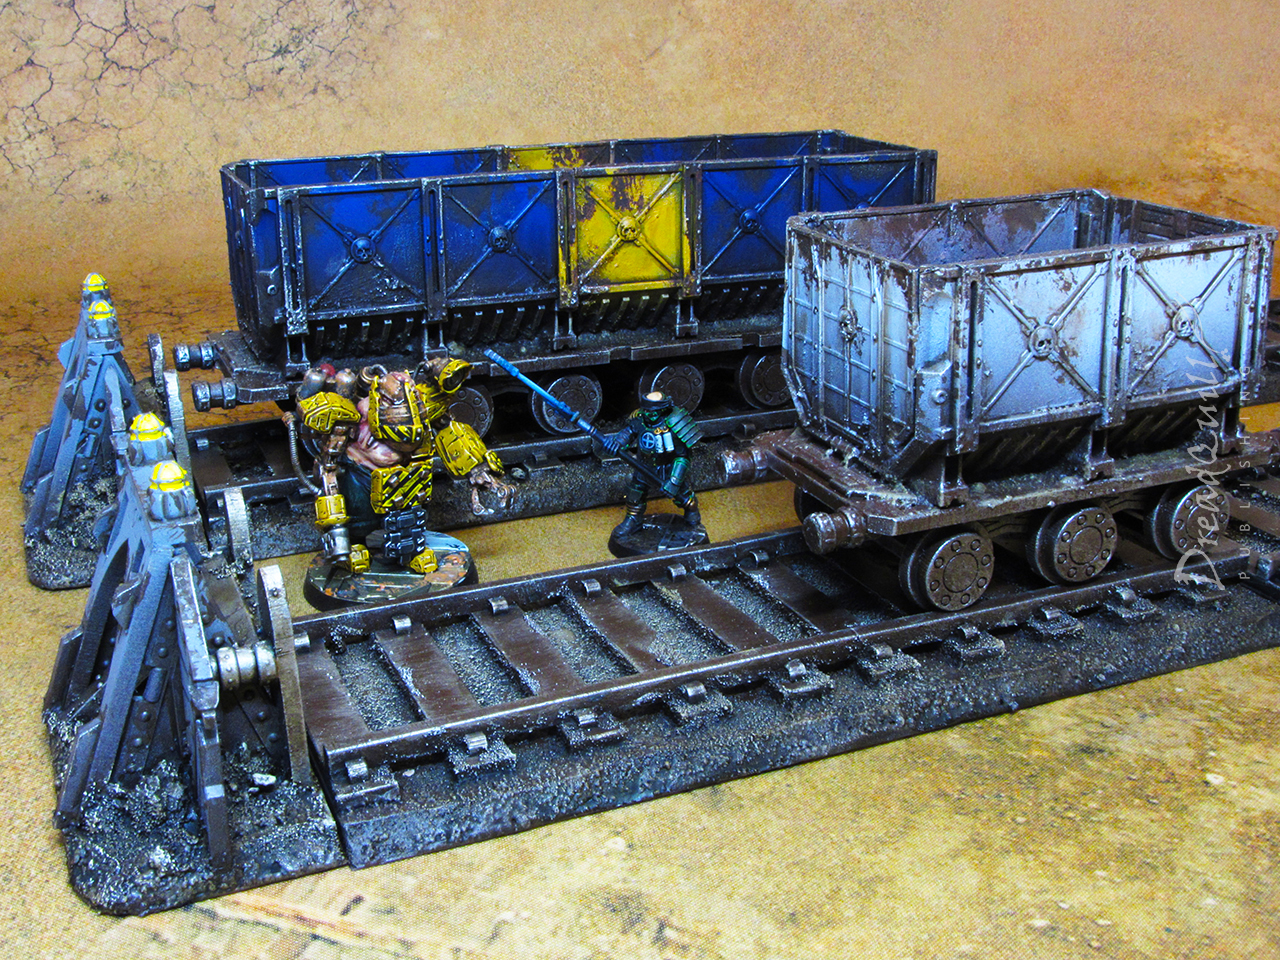
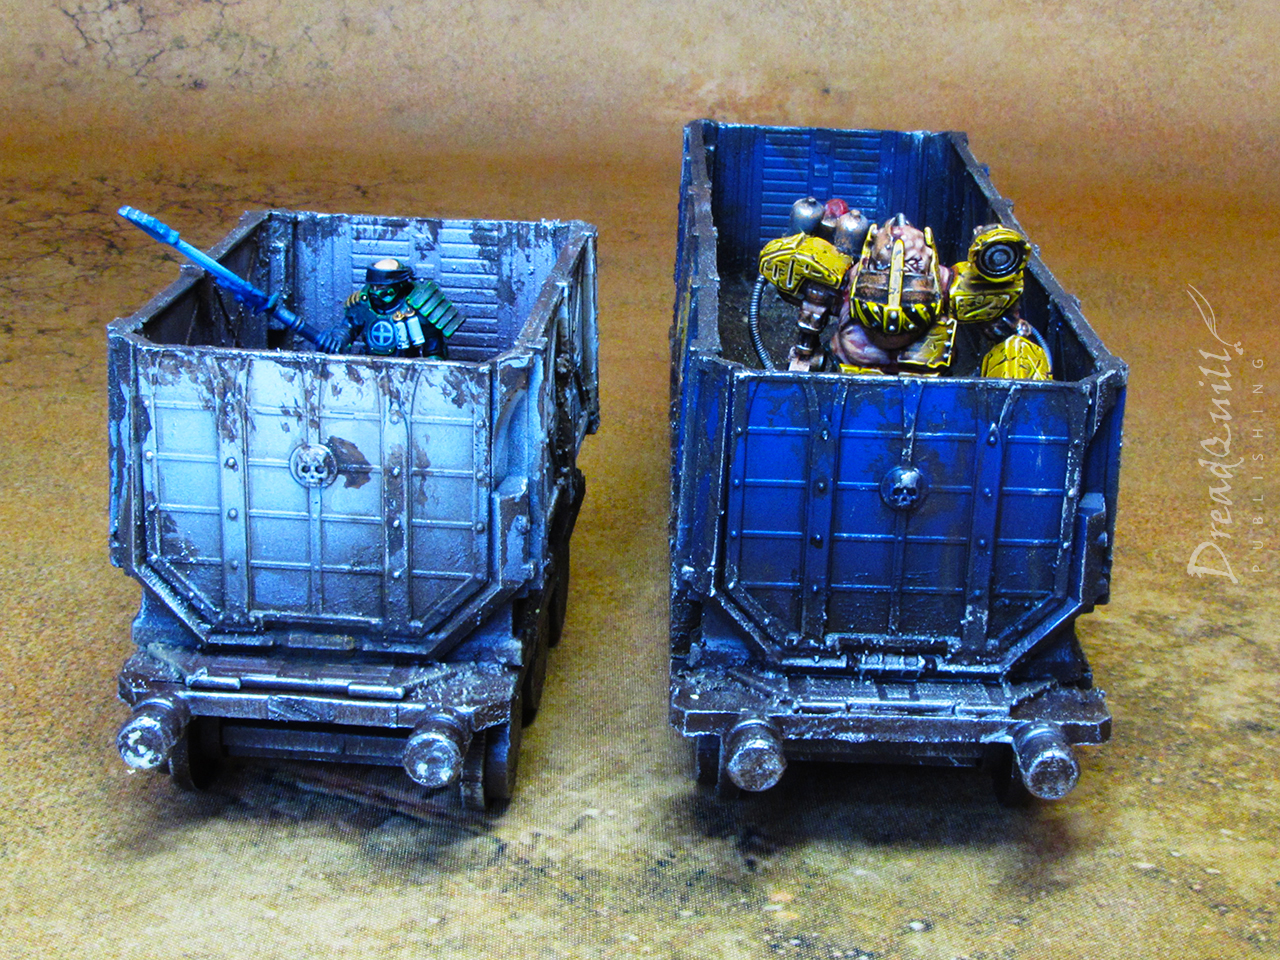
Painting these guys was a blast! Quite literally – nearly all of it was done with rattlecans. Undercoated black then brown, with the wagons masked off to be blasted with another few choice colours. The longer one was sprayed Ultramarines Blue, the smaller wagon was sprayed grey, then with a white zenithal, always taking care not to spray the undercarriage.
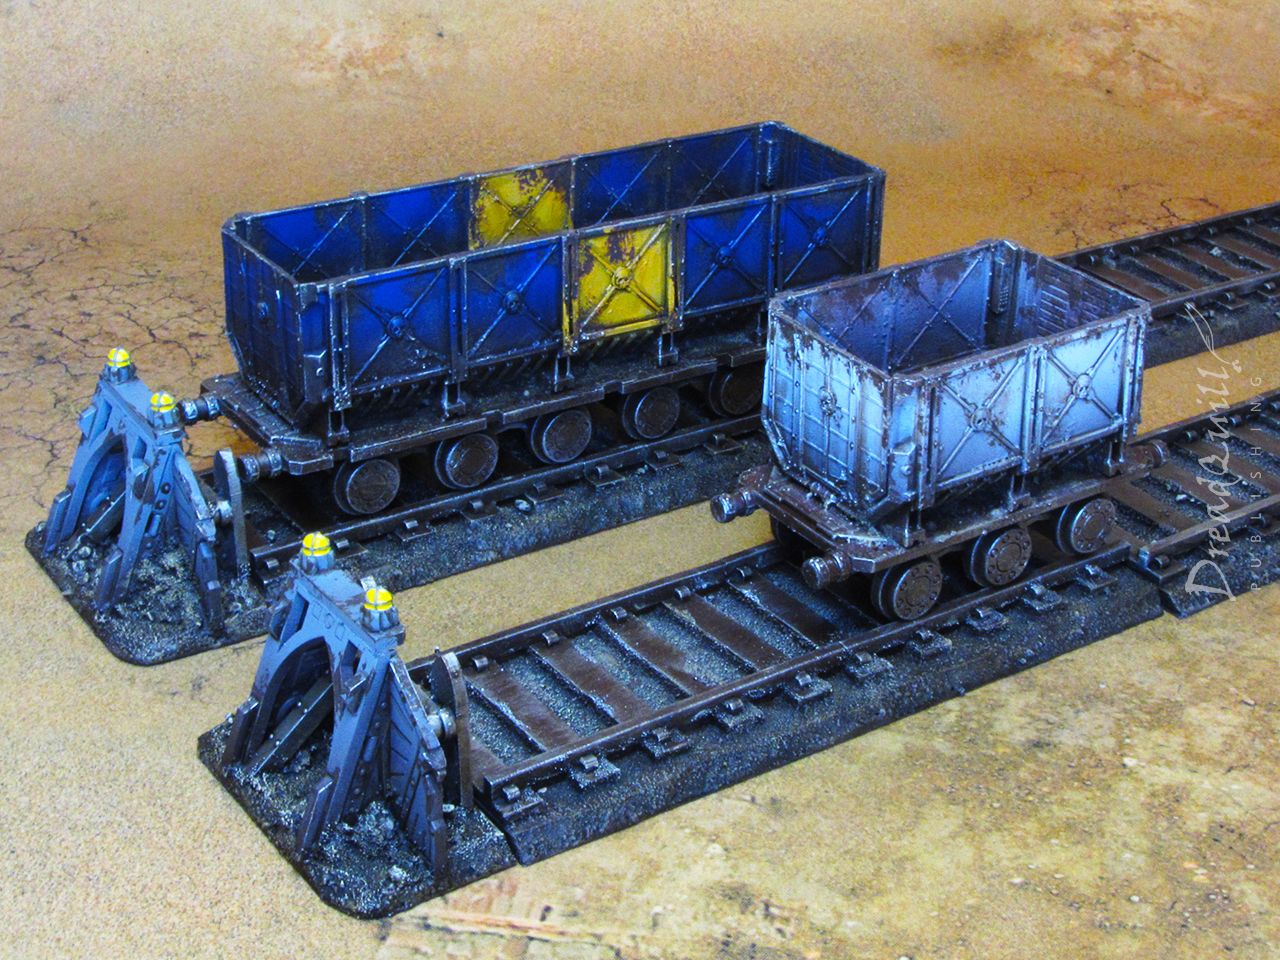
The mantra is finished, not perfect. All the metal areas got a rough drybrush with Leadbelcher and we called it a day on that. I masked off another area on the blue wagon and sponged on some yellow paint for a pop of colour.
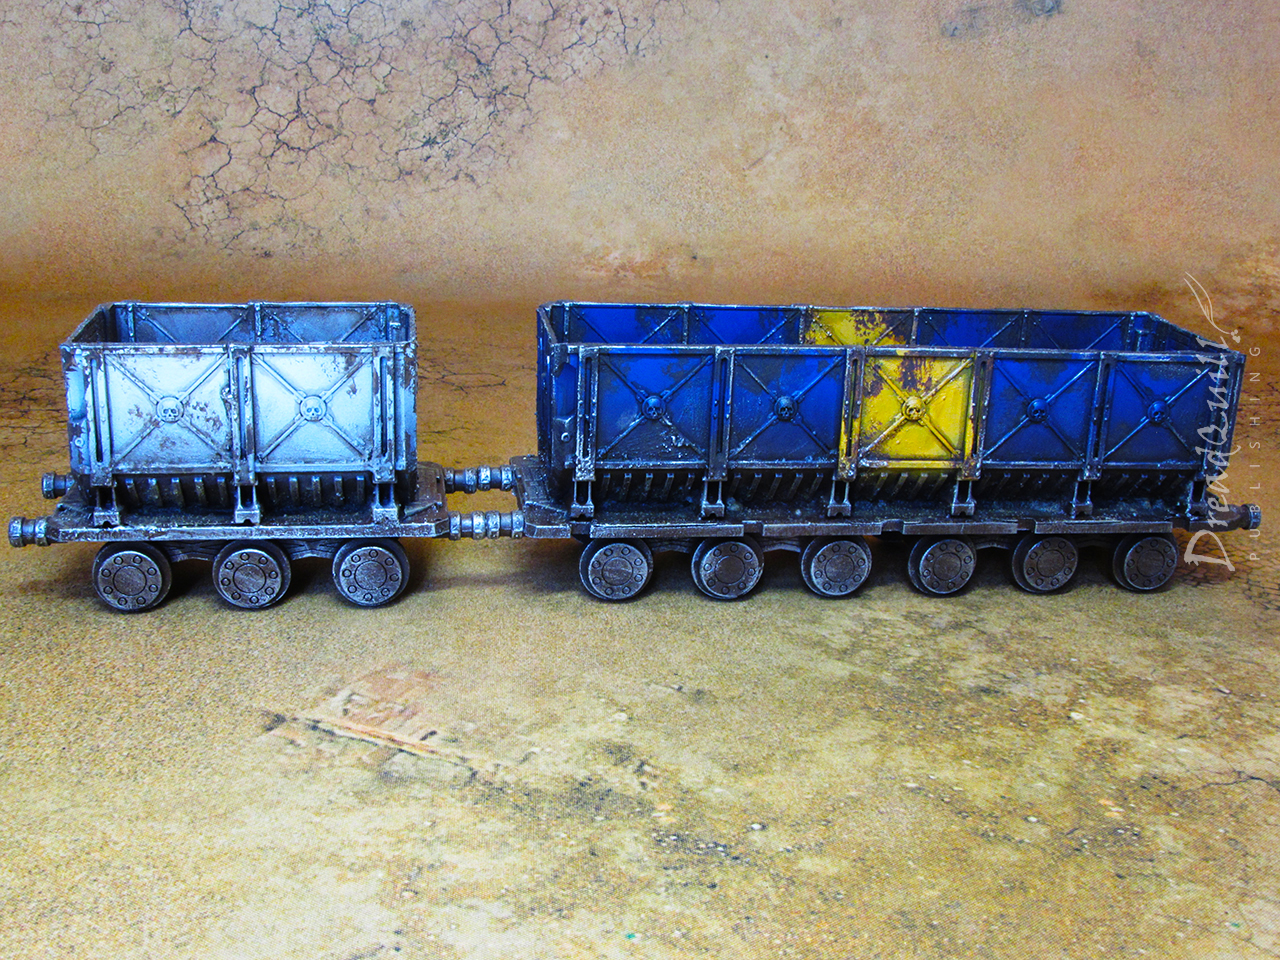
Everything got attacked with Agrax Earthshade – dotting the rivets and lining the panels, and splashing it about the deeper recesses and interior. Athonian Camoshade was sponged on in key areas to add an extra layer of grime.
Typhus Corrosion was stippled on with a large gammy brush, paying closer attention to corners and edges that would be likely to get knocked about during regular freight use
When that had dried, Leadbelcher came out again on a knackered old brush to roughly touch up some heavy-traffic edges where exposed metal would be showing through.
The buffer stops had little lights on the top, which I toyed with the idea of doing some OSL effect for, and quickly slapped that thought out my head. A big blob of bright yellow paint did the job.
The dirt/sand on the foamboard and interior of the wagons also got a healthy dollop of Agrax in the deepest recesses, lightly drybrushed with Ushabti Bone to highlight.
And they were done!
Final destination
I’m overjoyed with how they came out. A simple idea cleanly executed, they add some interesting points of interest to any tabletop you put them on. The carts are practical and encourage creative gameplay, and they look at home in any kind of environment. They’ve already seen use in some games of Inquisitor, most notably an unpainted version in Dust-up at Distro-19 and an unreleased episode where someone pushes a doomsday payload across the board.
When I was painting them, I felt like I was being sloppy and cutting corners. Looking back on them now, I can’t see any of those corners cut – just a cool set of terrain that I can’t wait to get back on the tabletop.
Now all I need is the train engine…
