
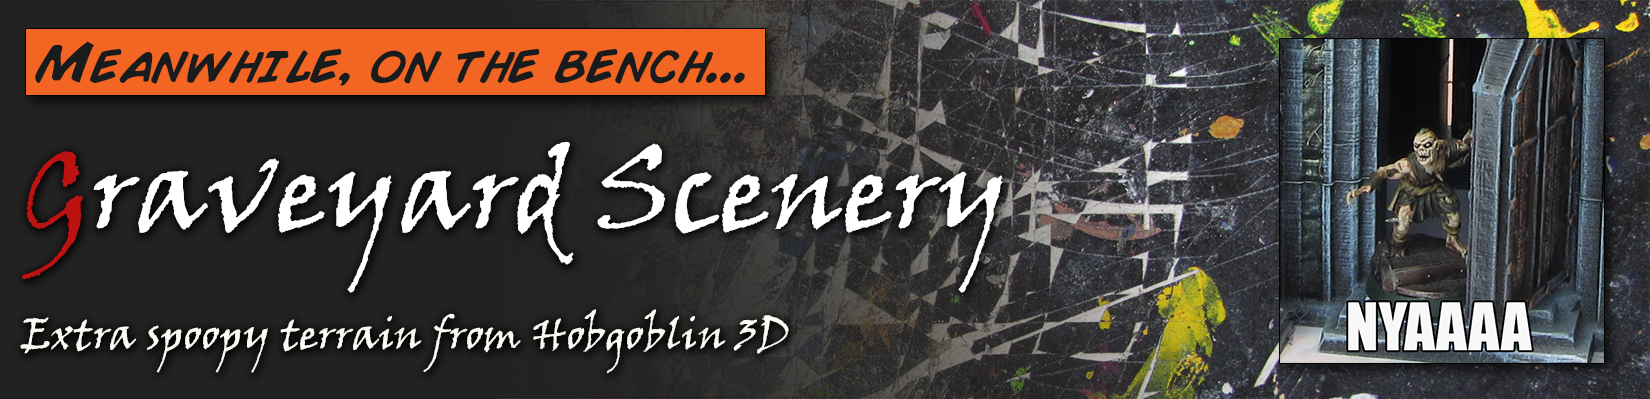

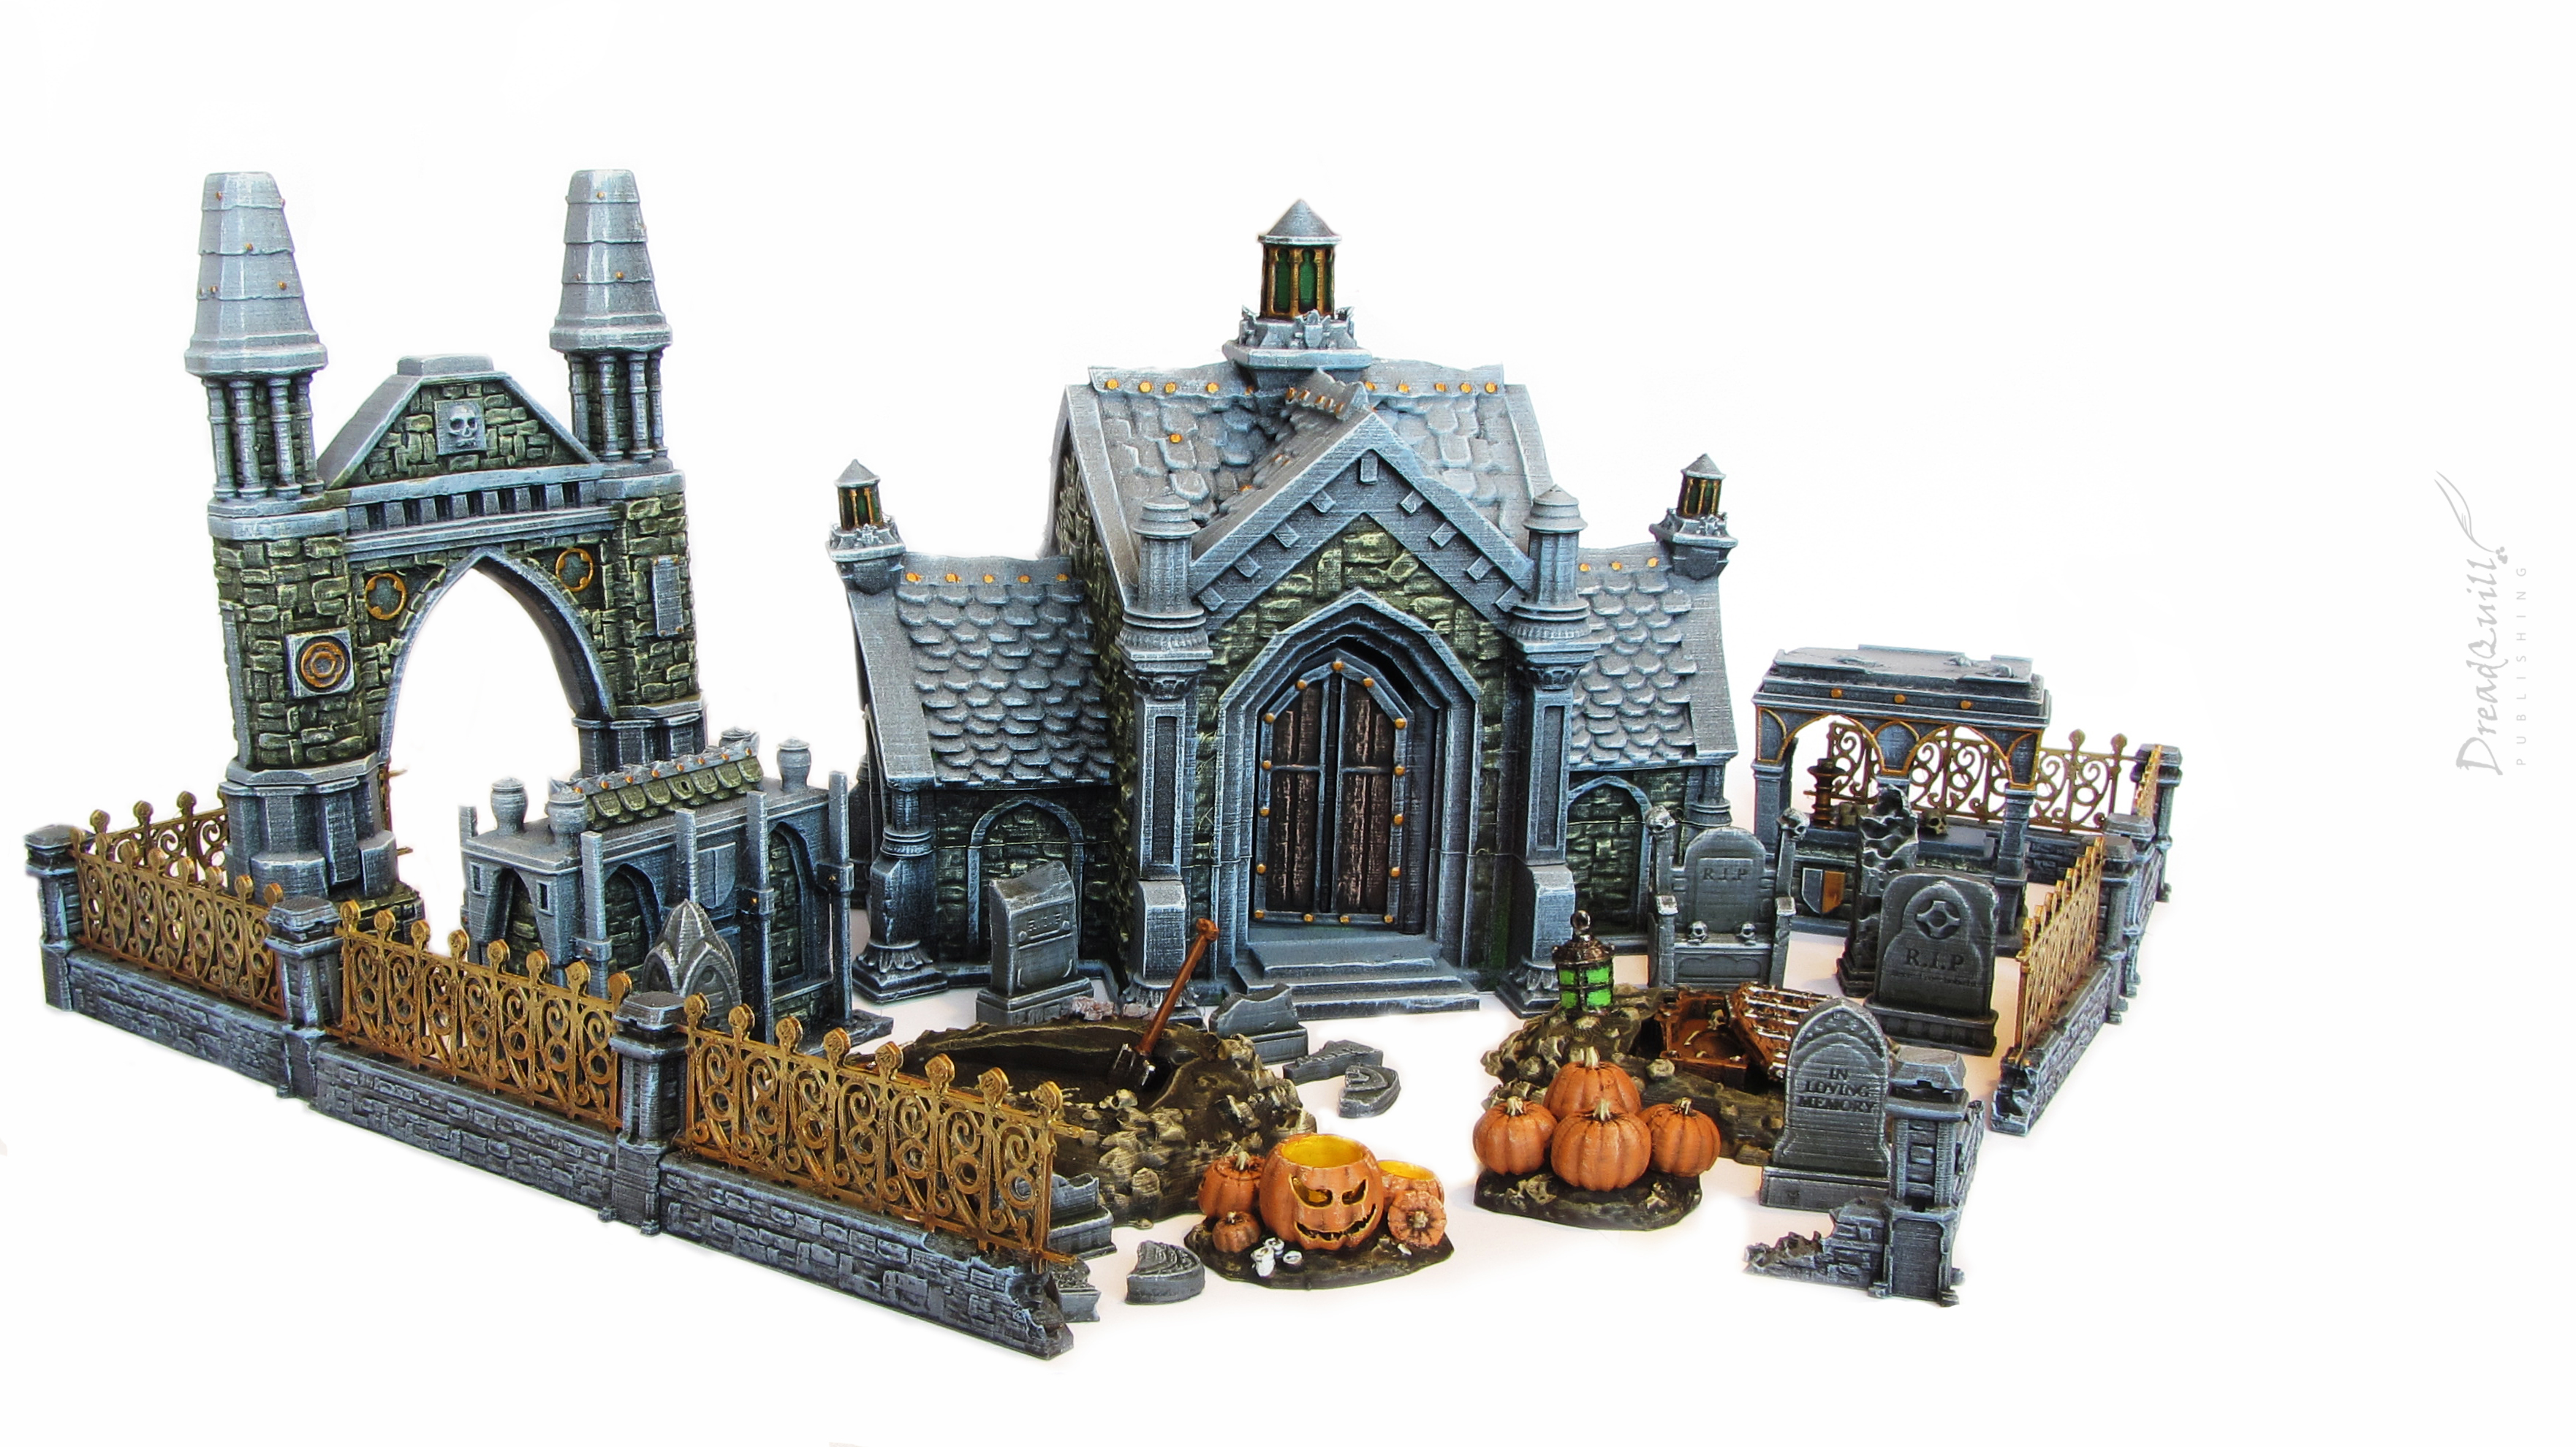
This week I’ve been cracking out some seasonal terrain for my good chums over at Hobgoblin 3D, namely a combination of their Graveyard of Grizliness bundle and the Abandoned Mausoleum kit.
Hobgoblin produce some great models for you to 3D print at home, and although they started out as pure fantasy terrain, they’re starting to branch out into more genre-neutral sets. This is very bad for a sci-fi nerd like myself, as I no longer can continue to make excuses as to why I can’t pick up their sets for myself.
Spooky ghoul from Mantic games for scale here, as these pieces are the largest single-piece 3D printed models I’ve painted to date. I’ve no idea how long these would have taken to print, I just get the luxury of painting them without the headache of operating a 3D printer!
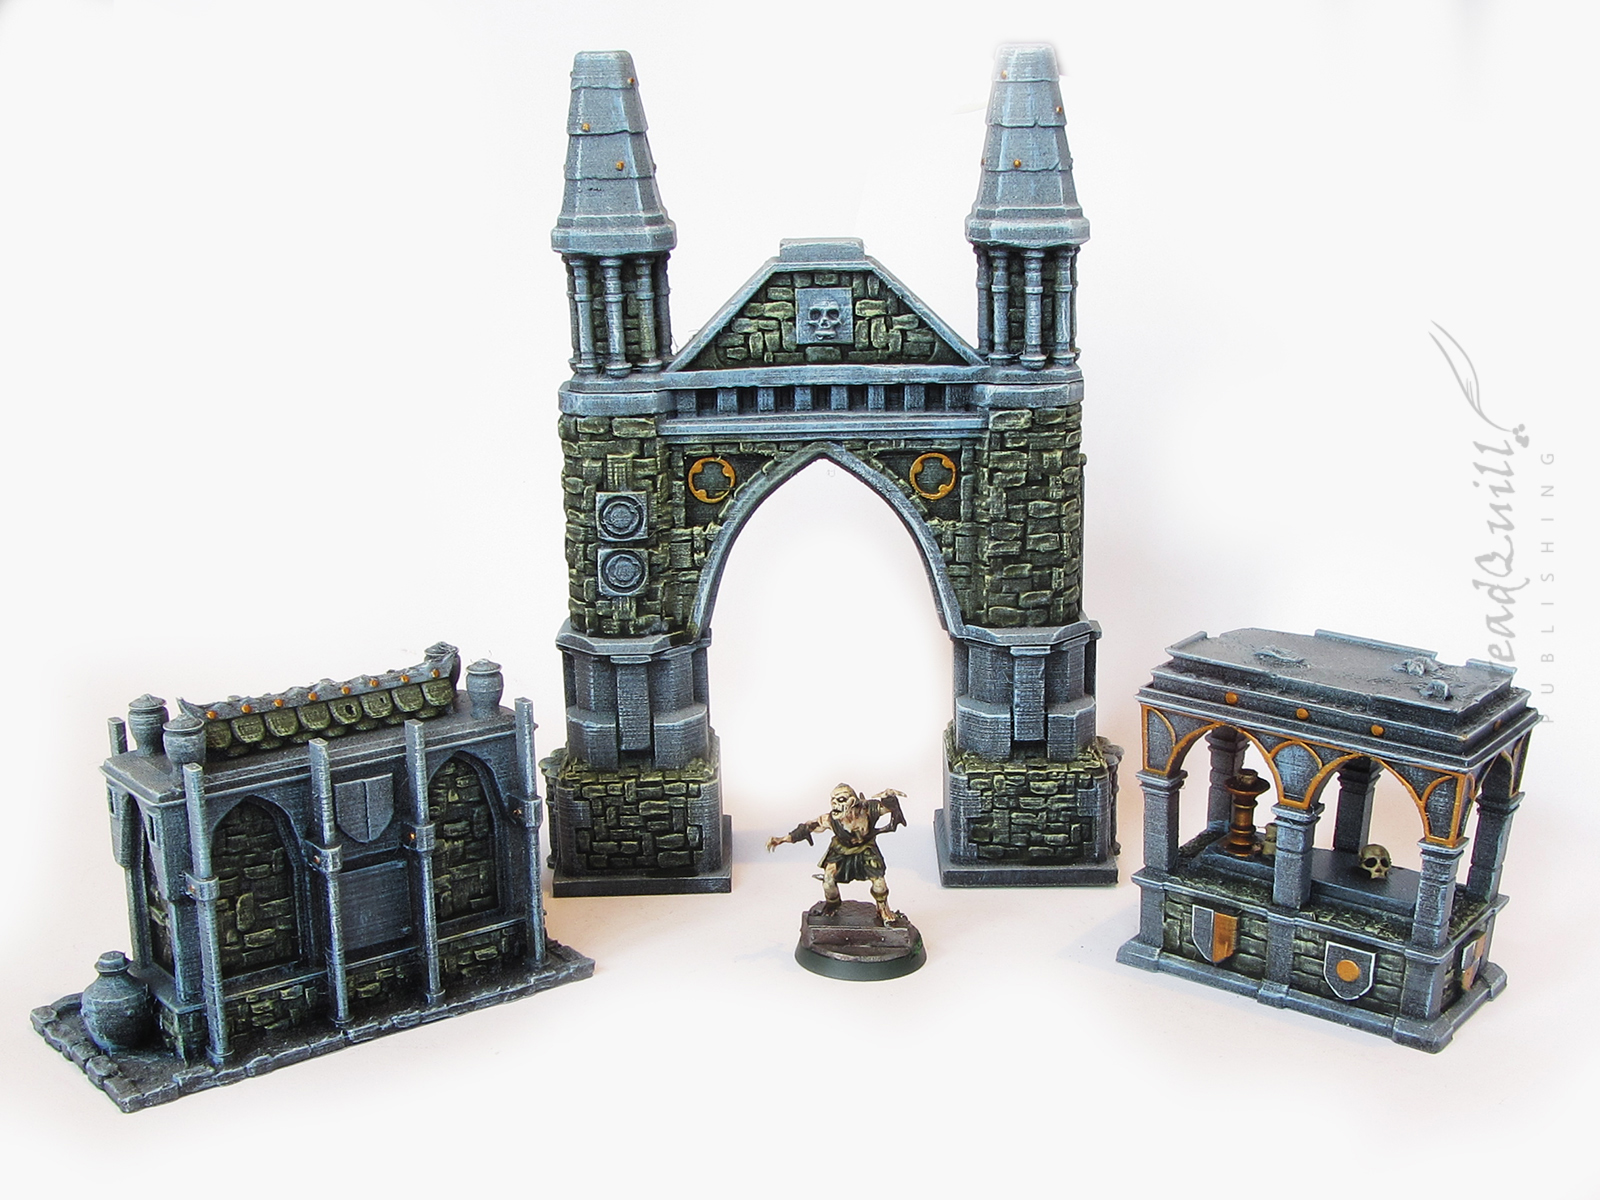
The archway in the middle was supplied in four parts admittedly, but they went together very easily and they form a single solid unit when assembled.

I’ve painted quite a few bits for Hobgoblin over the past year, but their most recent sets have been the closest thing to tempting me to getting a 3D printer for myself. This set in particular is perfect for the grimdark setting most of our games are set in.
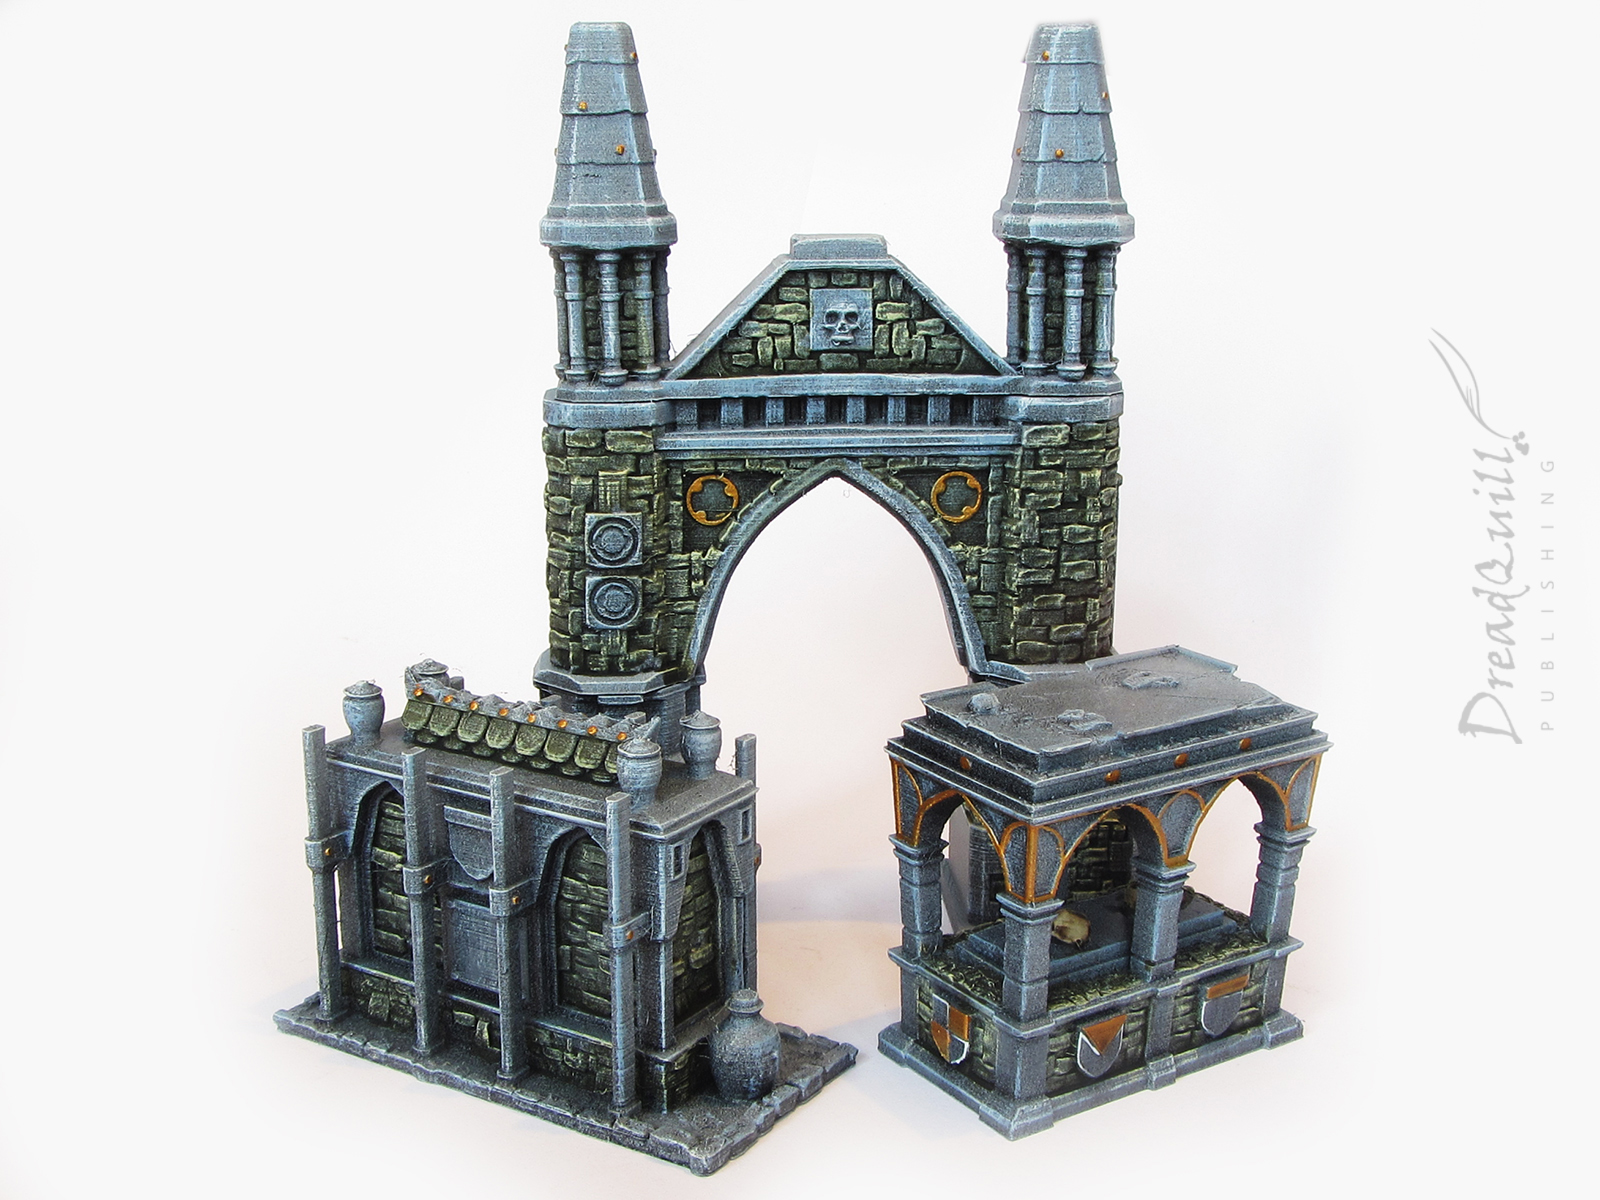
I can just imagine an entire graveyard board scattered with ornate railings and broken gravestones and a big shootout between cultists (up to no good in a graveyard, obviously) and some Acolytes.
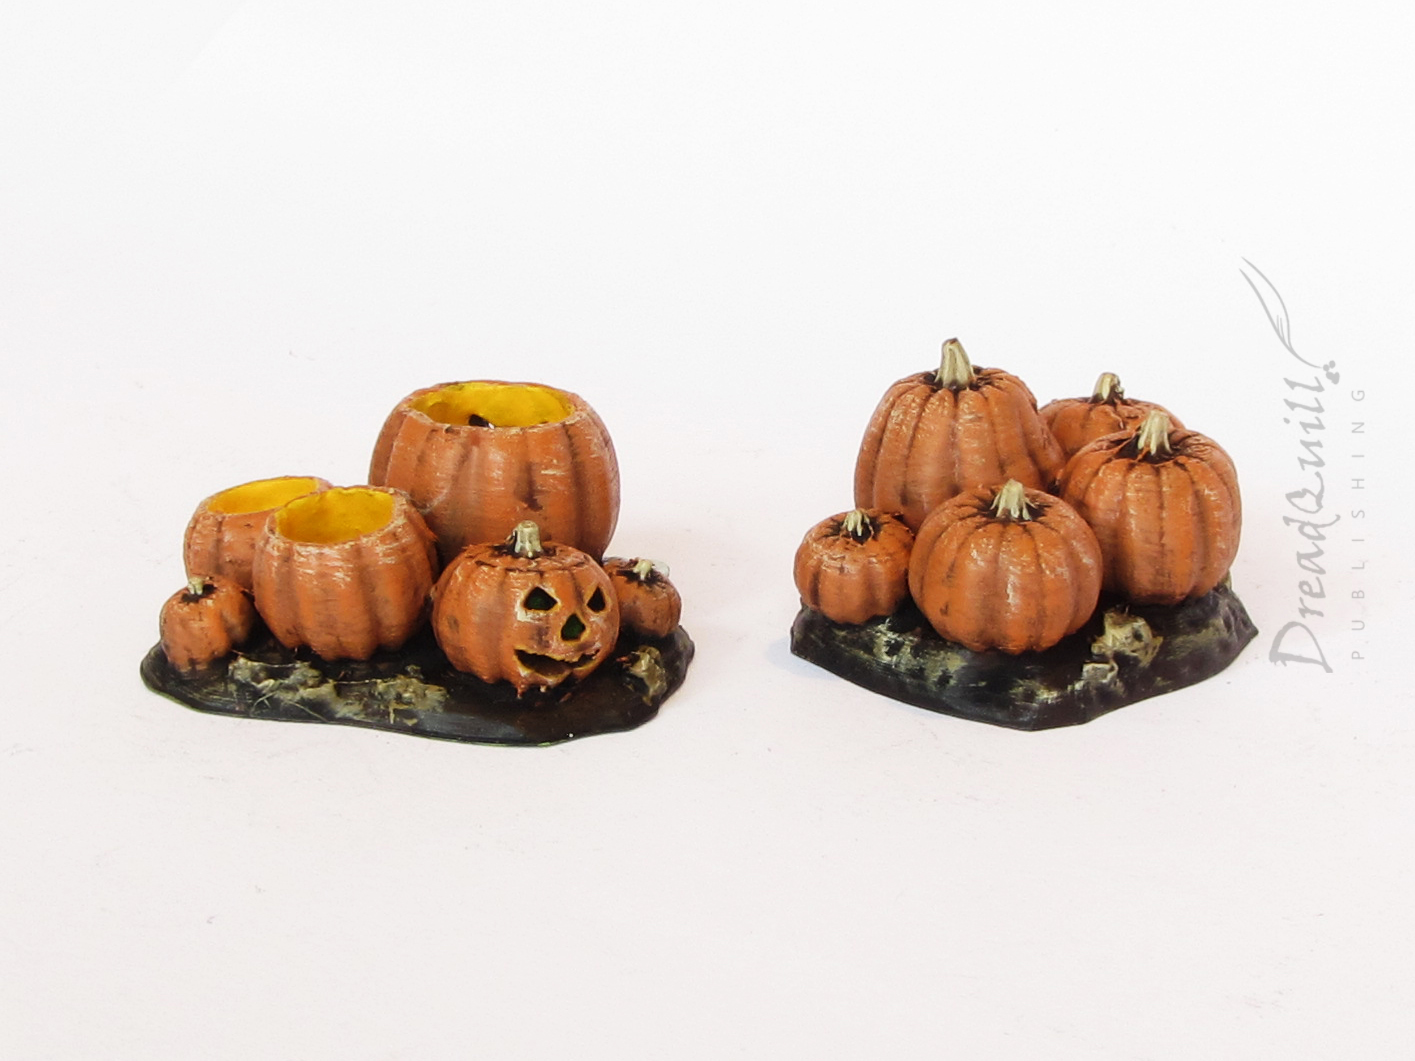

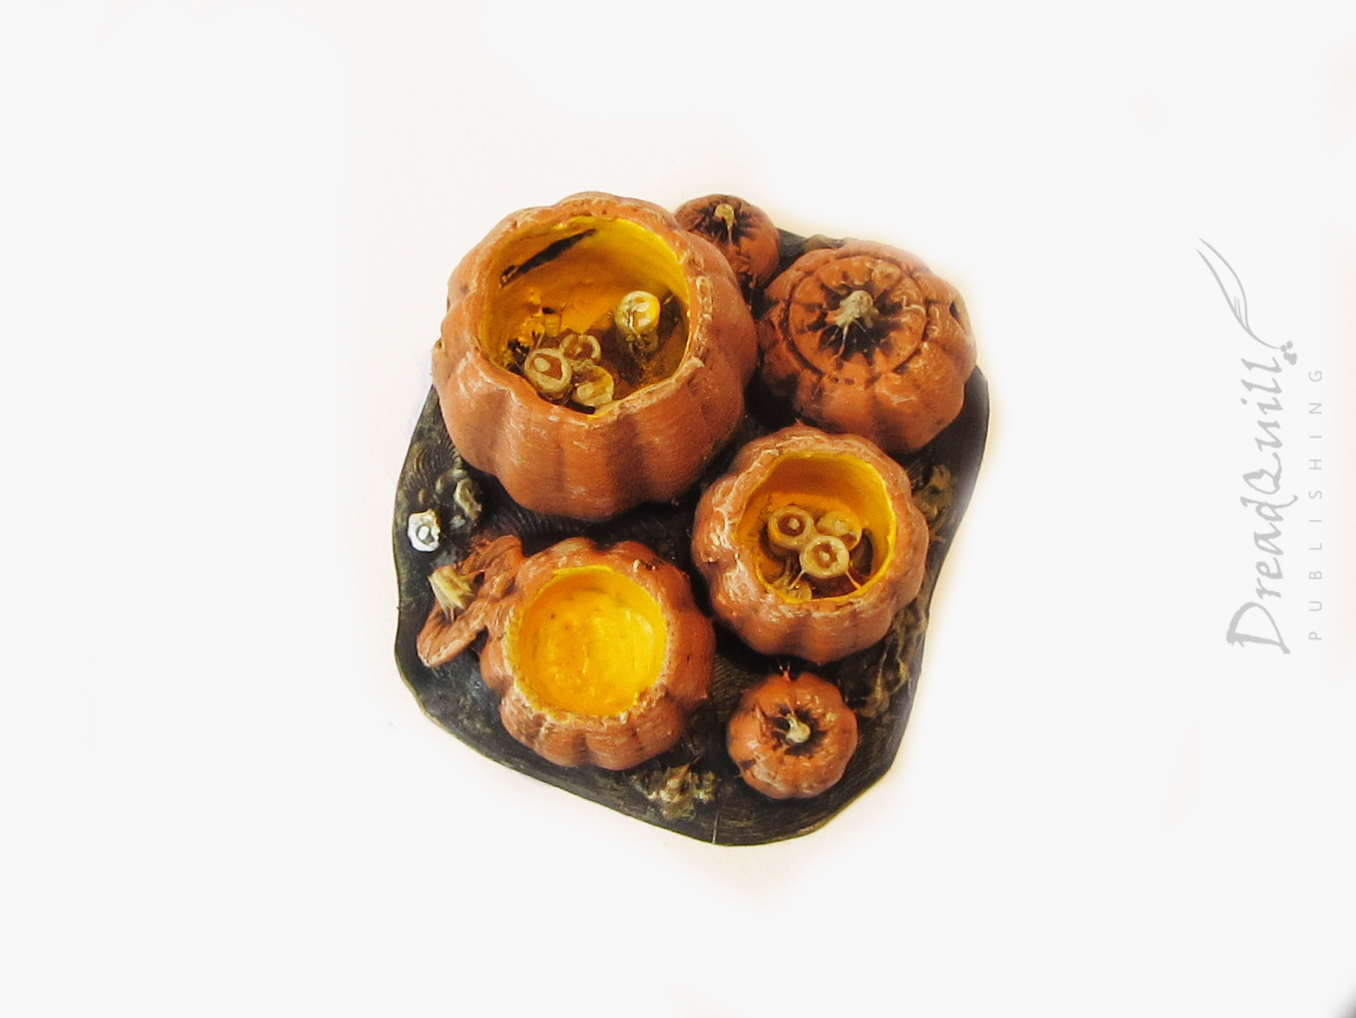
It wouldn’t be Halloween without pumpkins! I particularly liked the ‘carved’ pumpkin base, there’s lots of nice details on it, and the candles inside the jack o’ lanterns are particularly pleasing.


You couldn’t have a graveyard without gravestones could you? There’s a nice variety here, and the nice part about owning the kit is you can print off as many of each as you need, rather than being limited to the ones you buy. Although they look quite nice I wasn’t a fan of the broken headstone pieces, they were a bit too fiddly to paint (and I’m about 70% sure I lost a piece in the painting process).
I can see the appeal, but for me they’d be better off as part of a diorama or scatter piece, such as the pumpkins above or the open graves below.

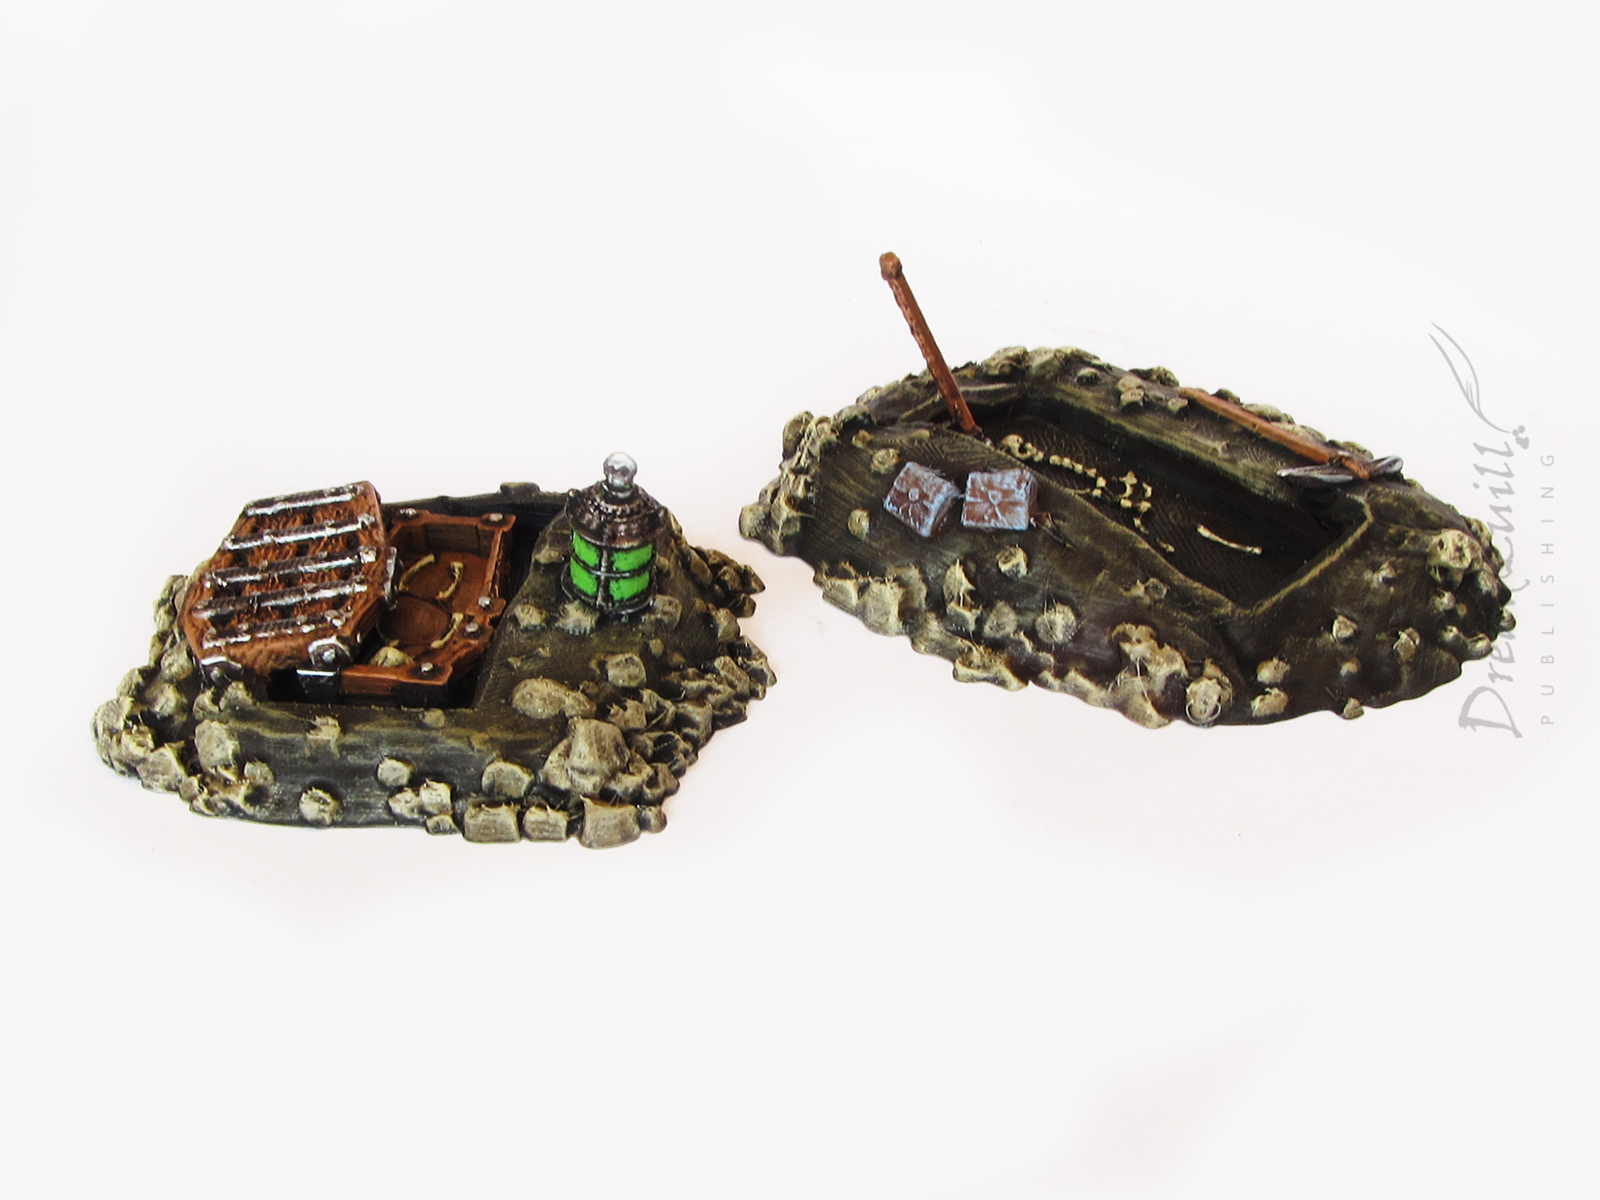
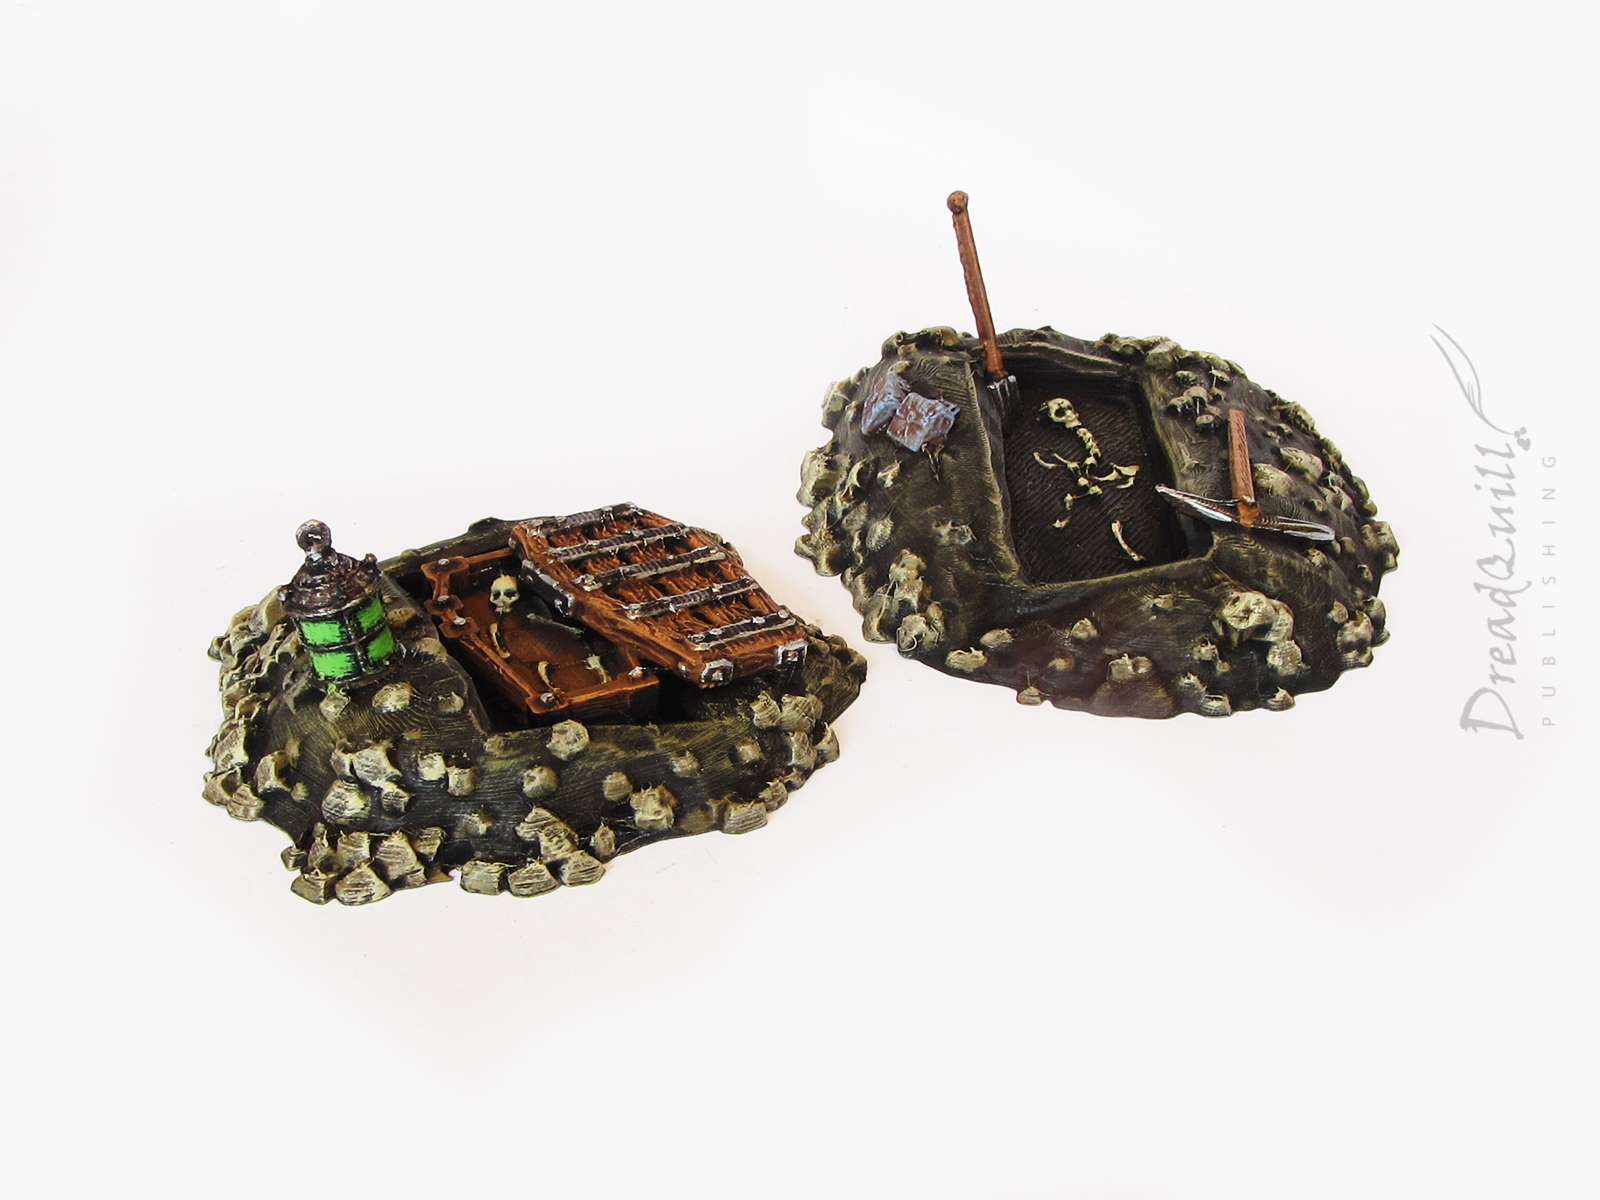
Open graves! I think I had the most fun painting these. They tell a great story and wouldn’t look out of place in just about any different setting. If I had given myself a bit more time, I would want to experiment with some water effects pooling in the open grave and making the mounds of earth around it all soggy. I mean, when else is the best time to go gravedigging if not in the rain?
Oh yes, and it has another adorable feature;
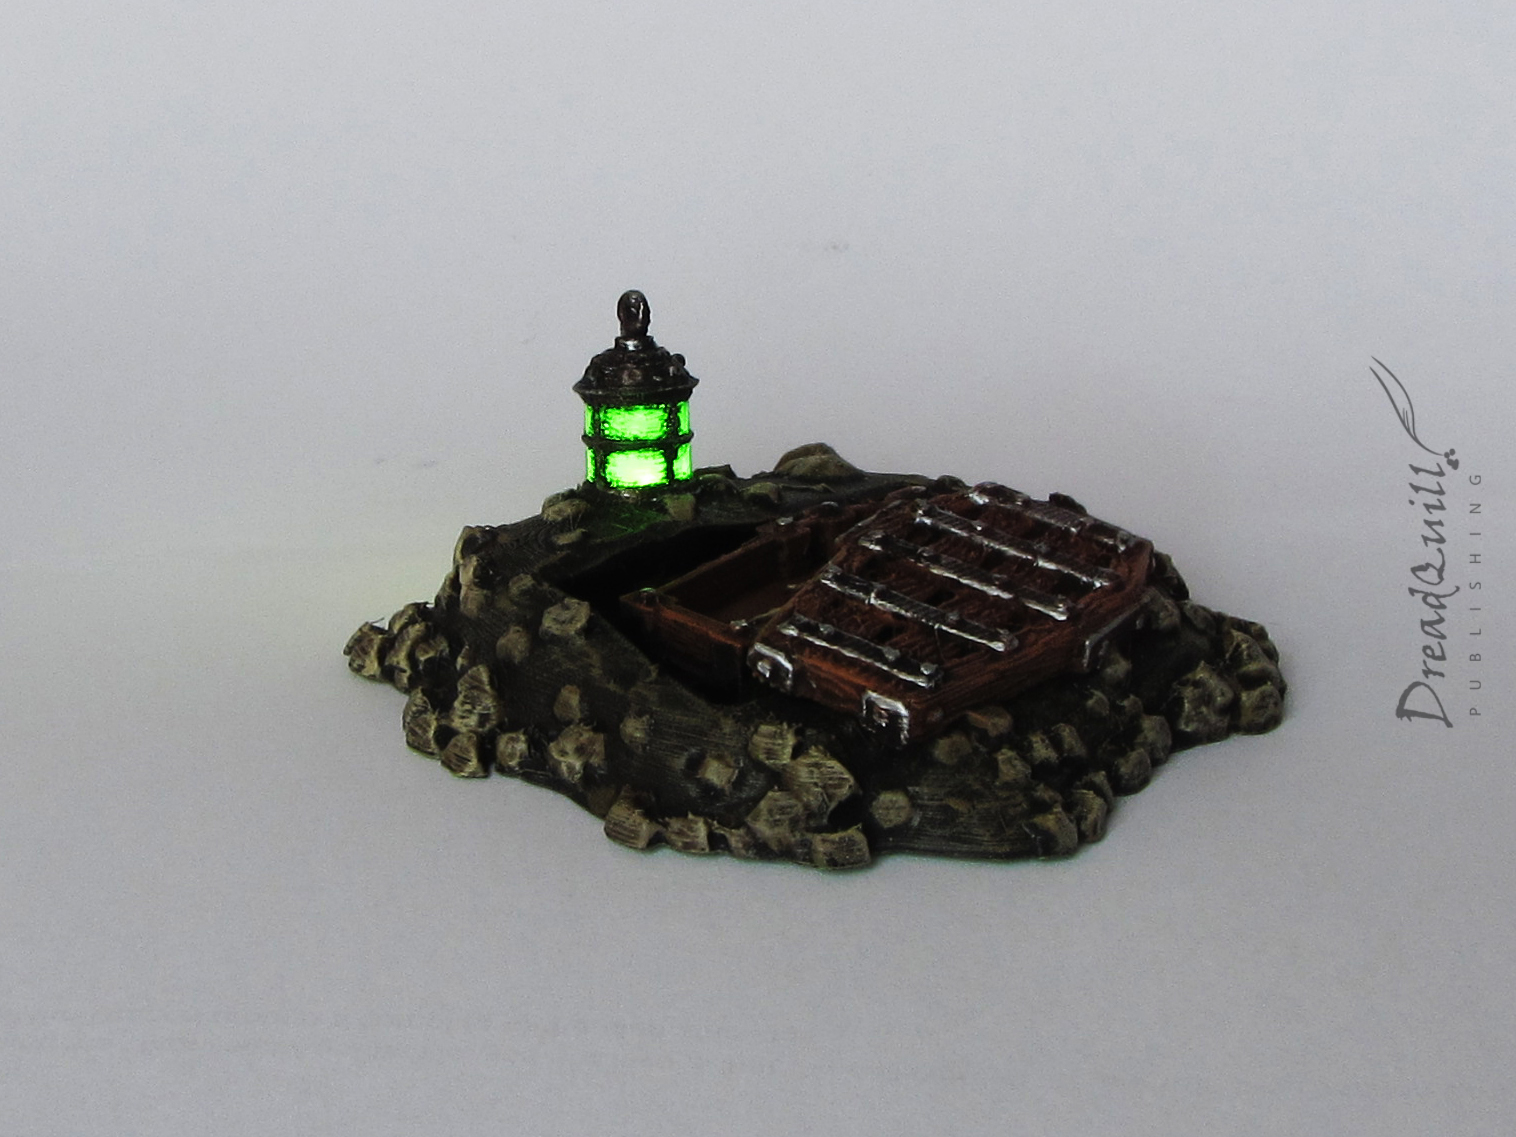
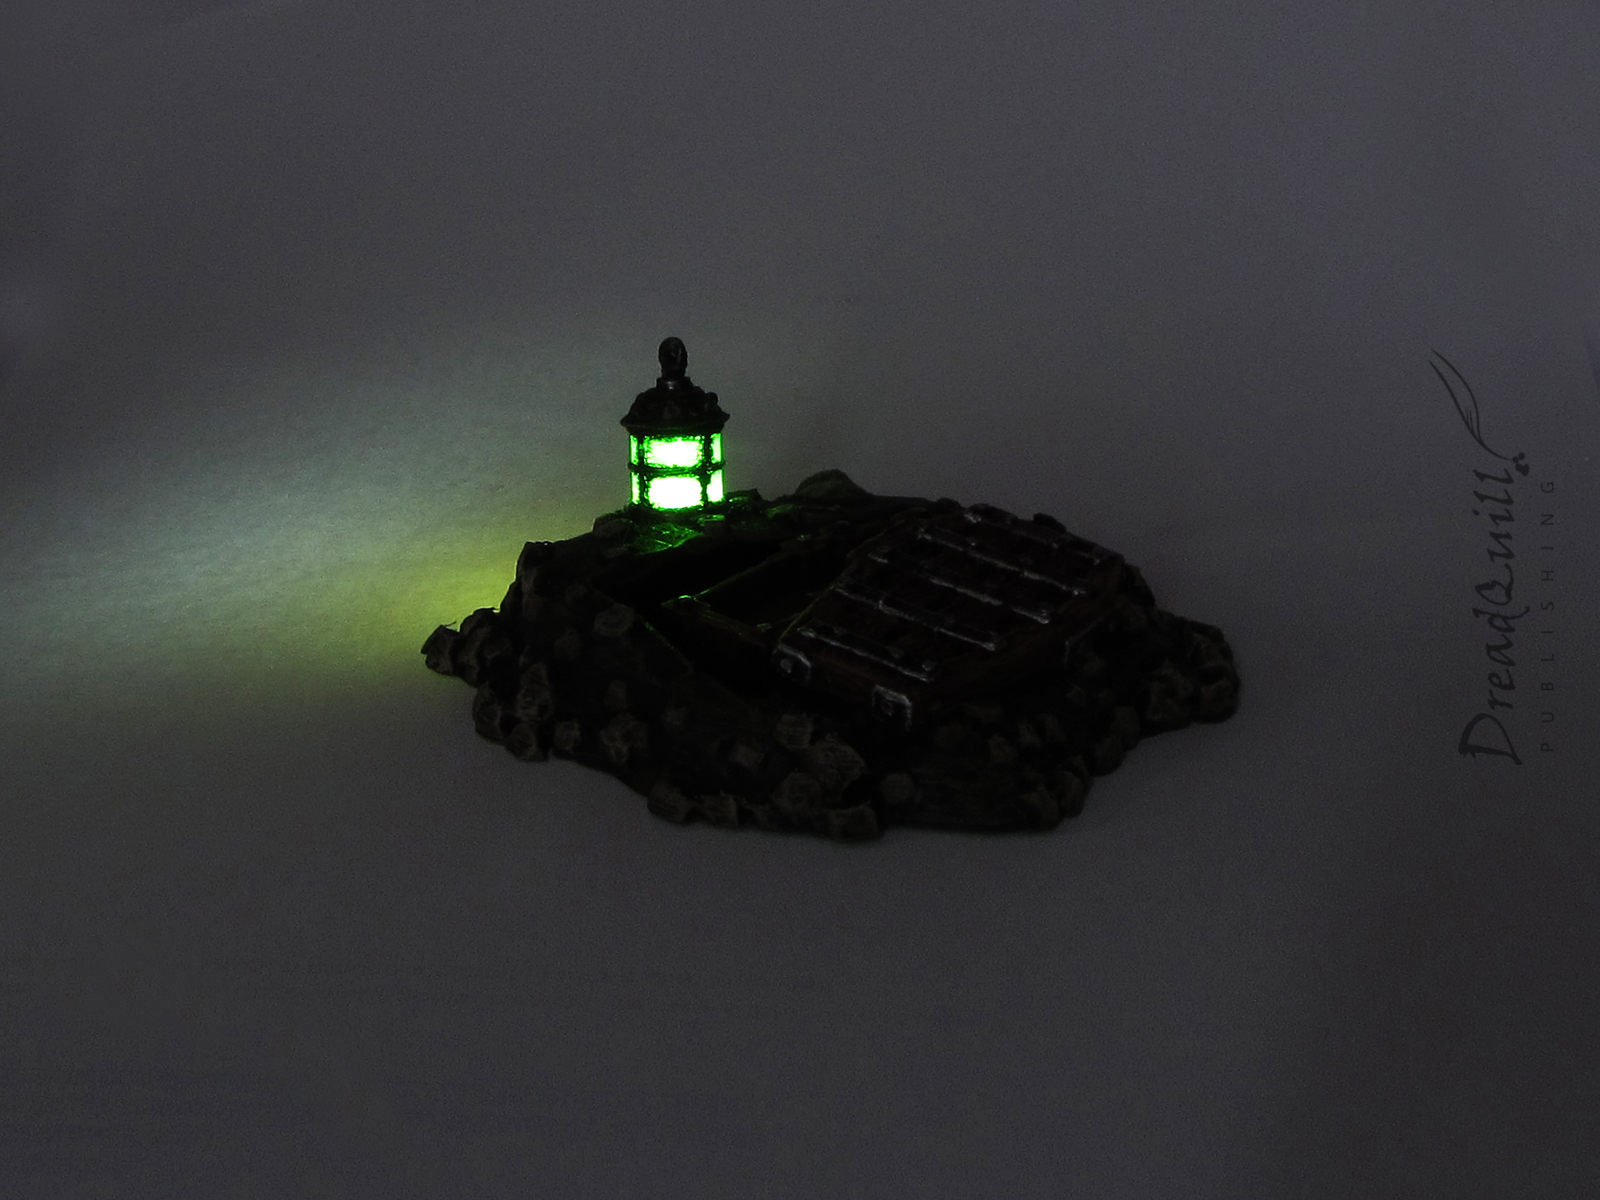
Let there be light! There’s a hollow inside the lantern for an LED and button cell for extra spoopiness, or if you’re cheap like me, a phone light concealed under a sheet of A4.
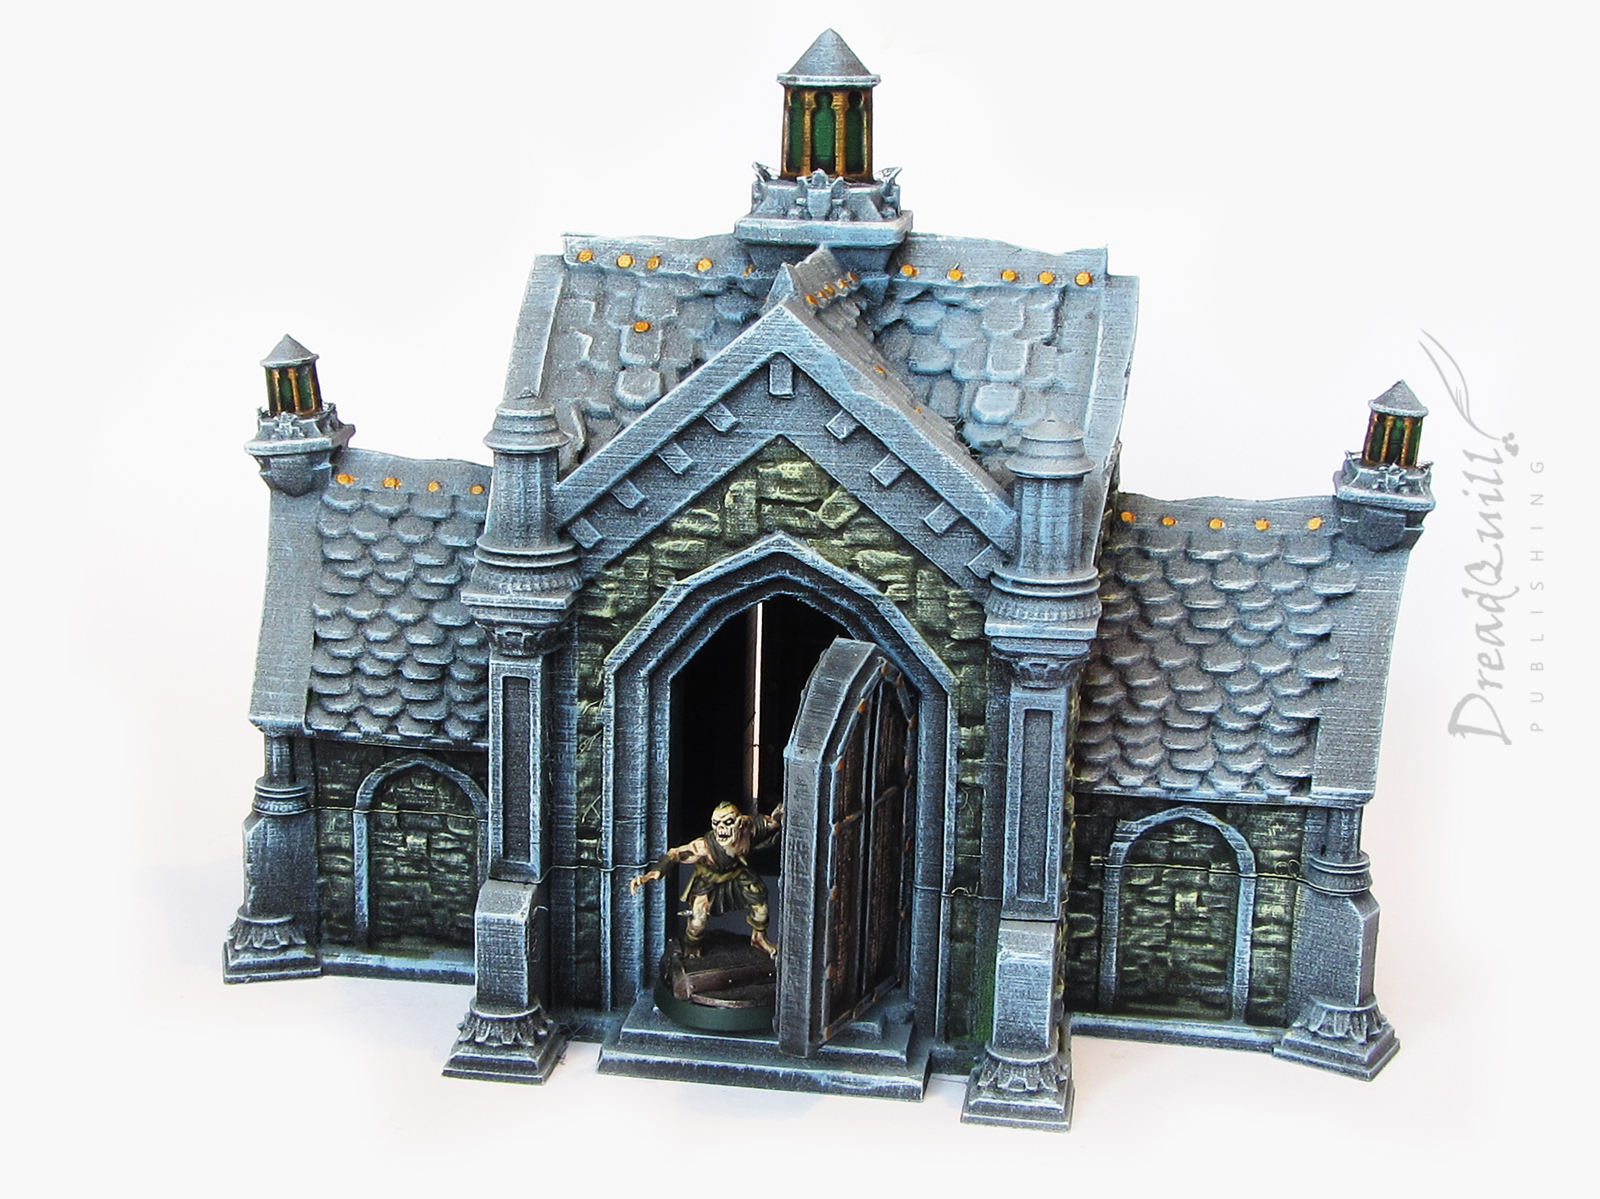
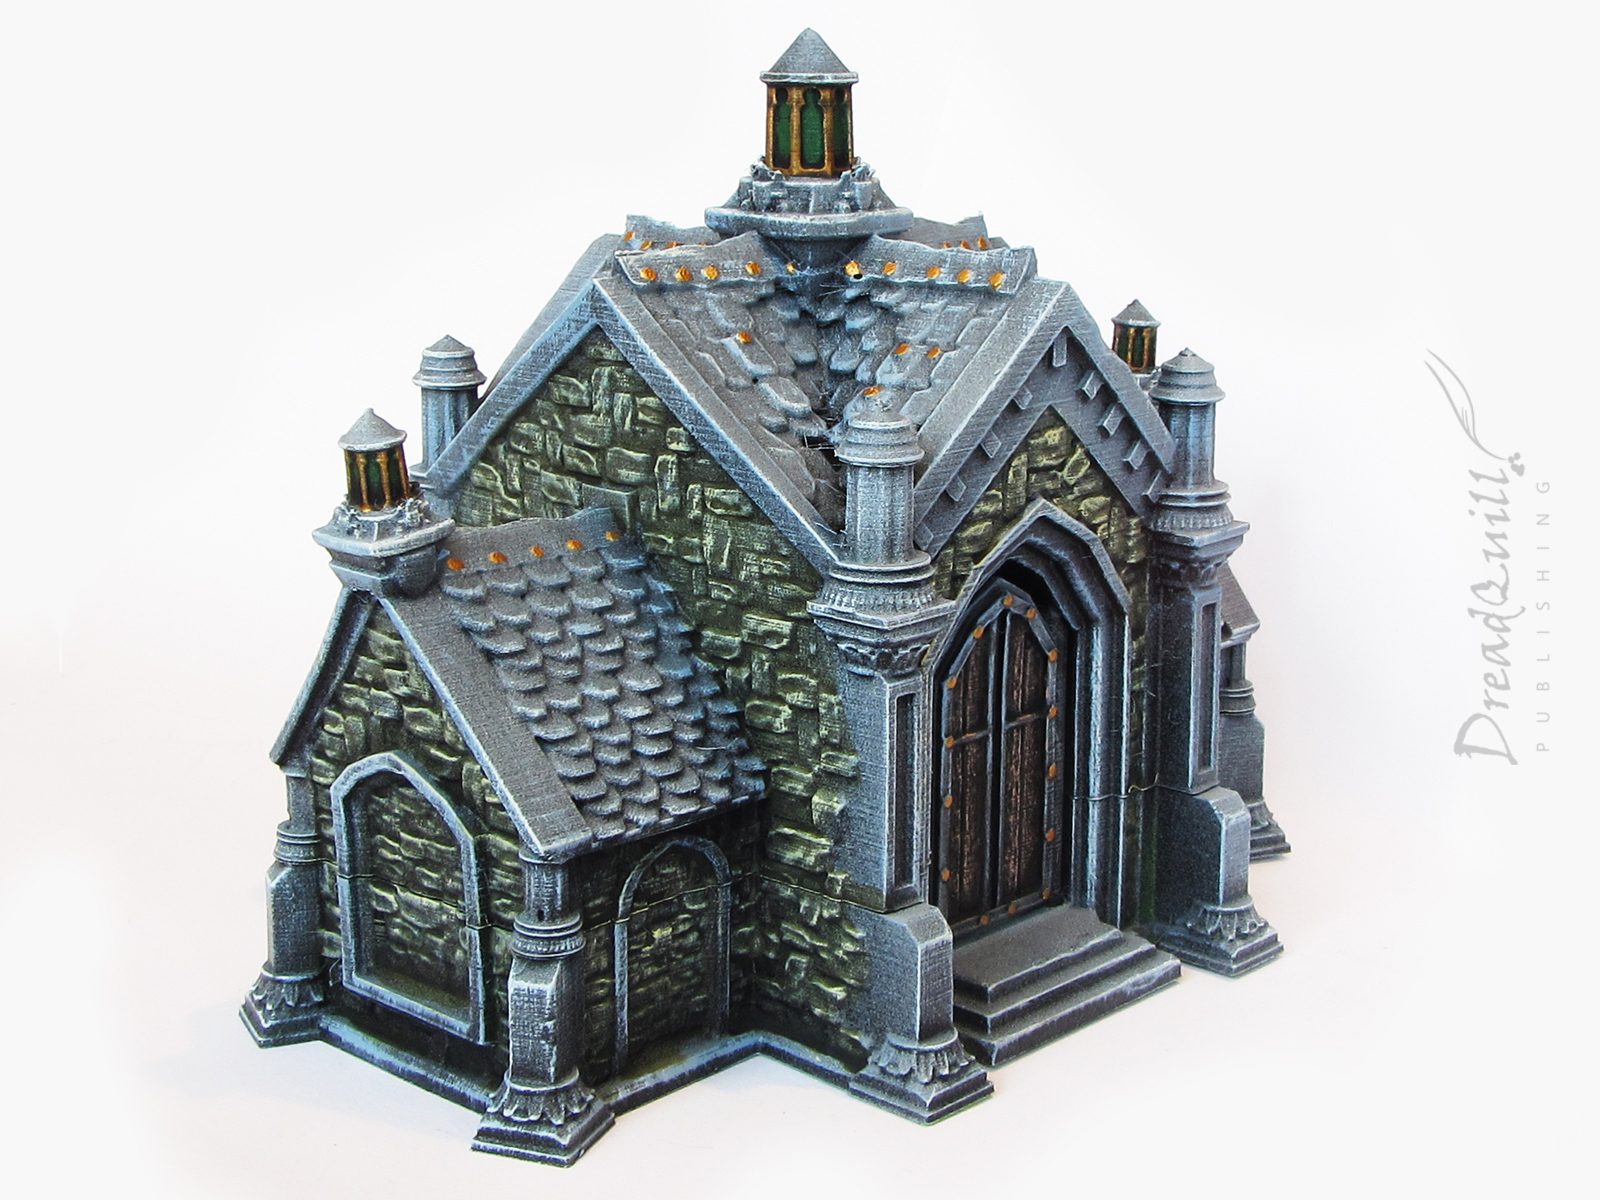
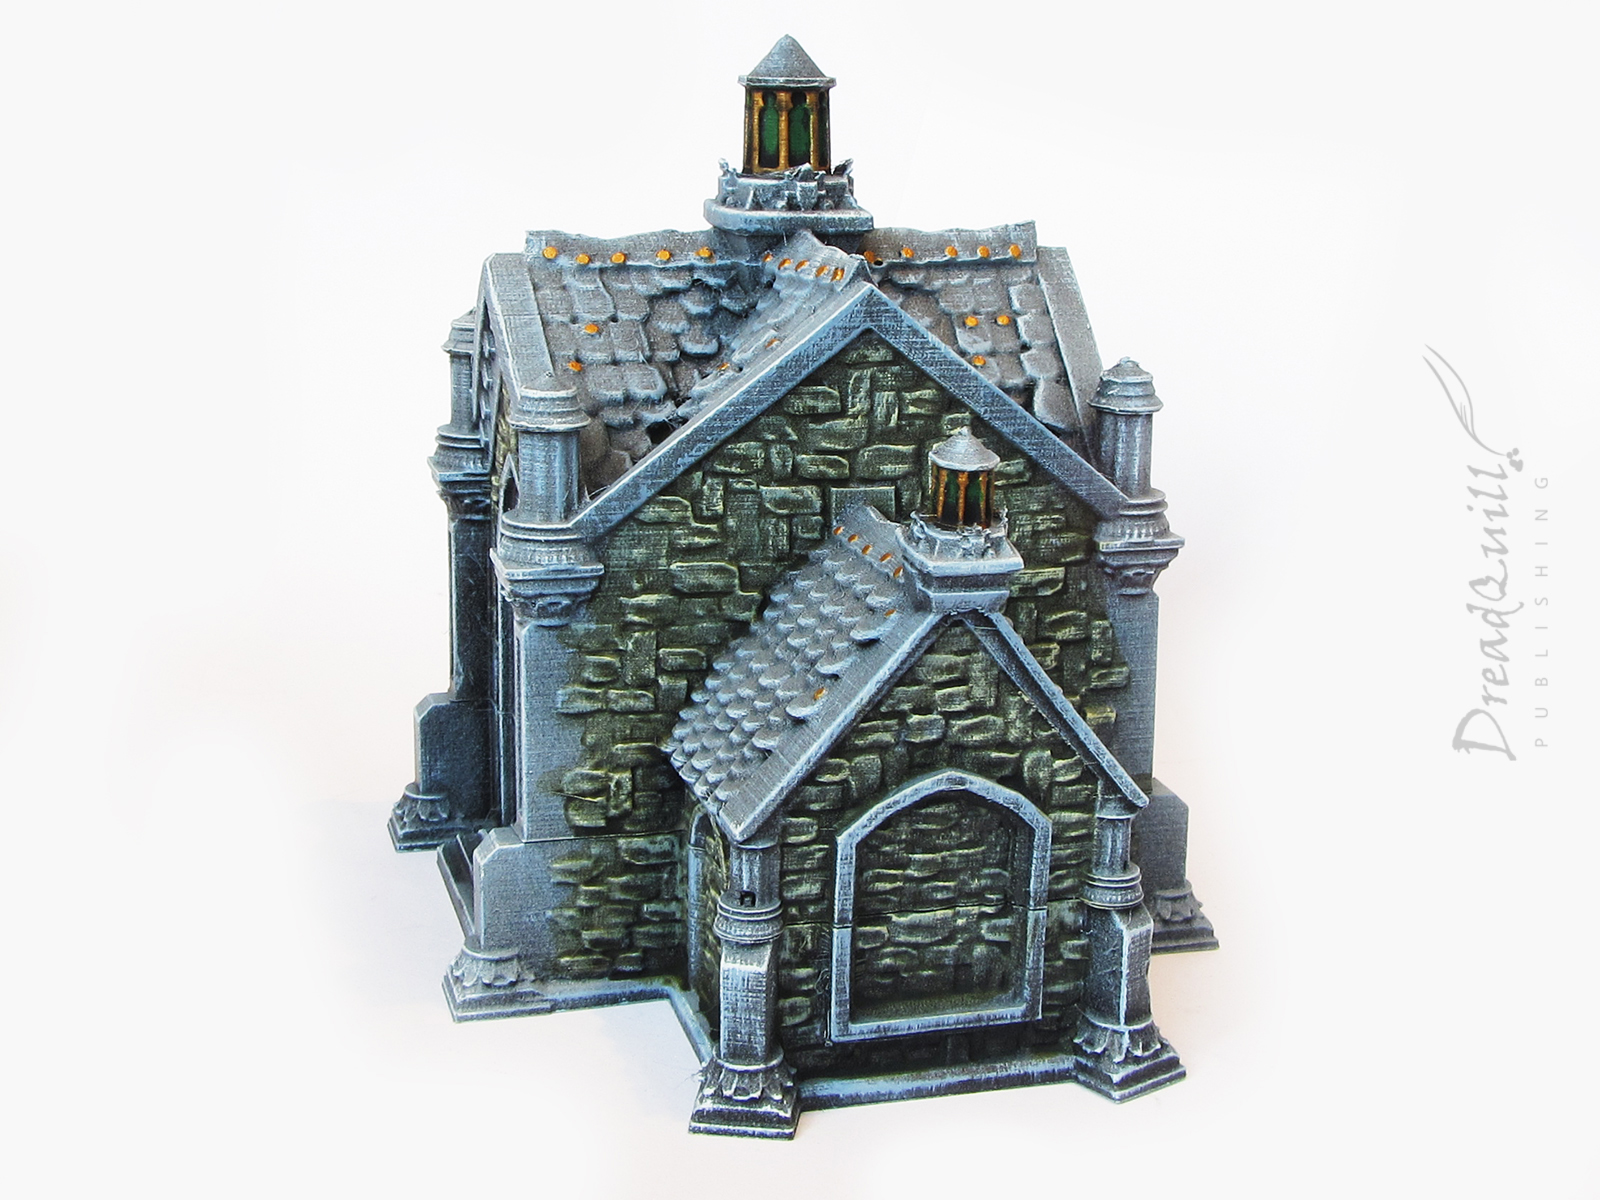
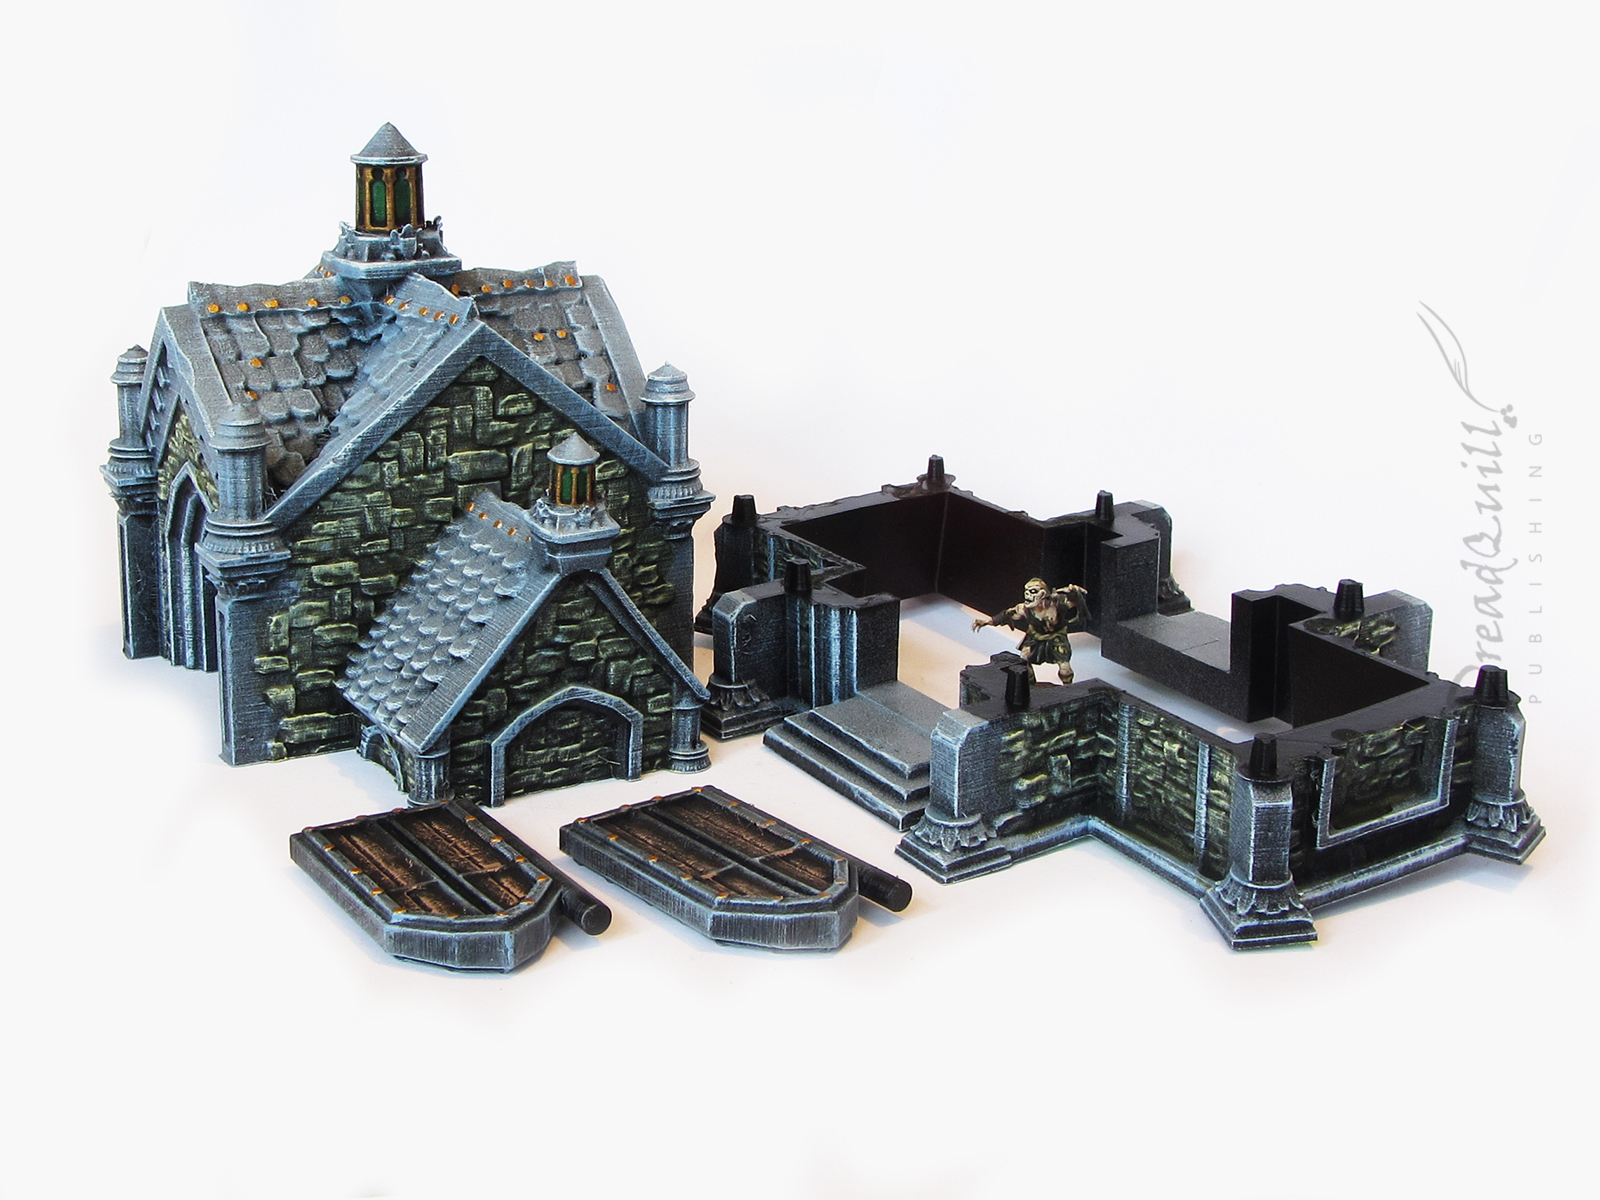
And finally the Mausoleum kit. What a piece! Any doubts I’ve had in the past about 3D printing vs injection/cast moulded pieces have been dashed apart. This is a rather excellent construction that really lends itself to the 3d printing process.
It comes six parts – an upper and lower section of the building so you can remove the top to access minis inside without disturbing your scene, two doors and two hinge pieces (not pictured because I’m a doofus and lost them). The two hinge pieces are glued to the bottom of the door when it is assembled in the building so it doesn’t fall out of its socket.
I hear tell rumours in the tavern that the team might be building an insert for this building with a hex/square grid on it for proper roleplaying compatability, so watch this space for more!
I thoroughly enjoyed painting this kit, and outside of drying times took me far less time than other kits to get tabletop ready. A few choice washes and different coloured drybrushing can go a long way into getting your spooky quota up for your games.