Oops it’s been two full years since Necromunda Ash Wastes was released and I have yet to play a single Ash Wastes game. I have, however, played dozens of games on ashen, wasted environments thanks to a bunch of terrain I created over lockdown.
I ran a successful Outlanders Necromunda campaign last year “Moon of the Mad Magos” which featured a variety of overground badlands maps, and an Inquisitor campaign “Crown of Bones” where these chimney stacks helped populate the sparser boards.
The brief
I didn’t set out to build a bunch of chimney stacks from scratch, it was an organic series of decisions as part of my pandemic project to standardise my scenery collection into ‘sets’.
I already had two of the five “stacks” built – these had been ancient pieces of terrain I’d been lugging around with me across five student houses since my days of playing Inquisitor in the family shed as a teenager. They were looking a little tired and out of place – drybrushed grey was very 2008 Cityfight, but not so much fun to look at these days.
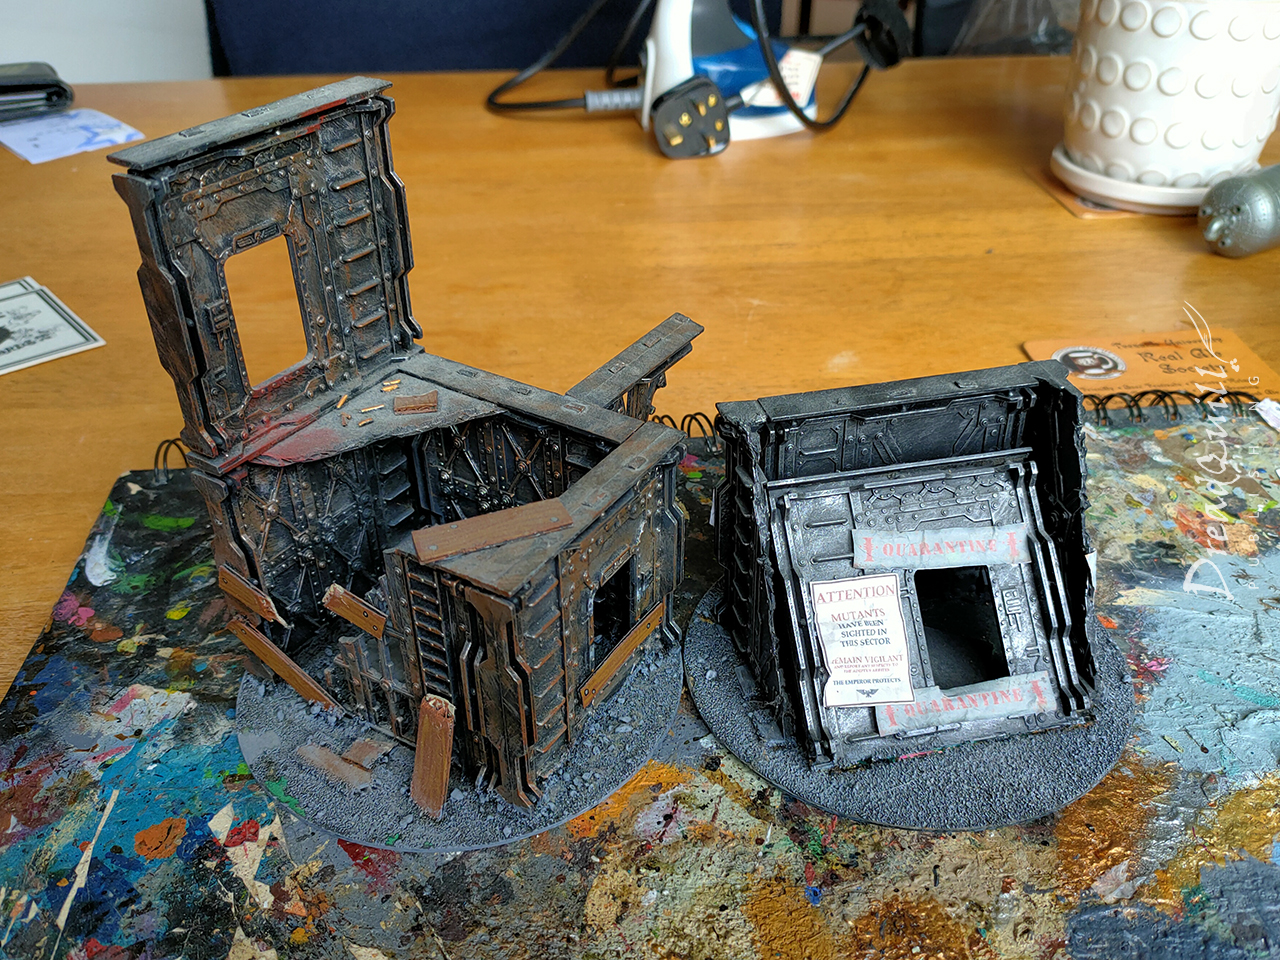
I also had two other miscellaneous ruins, also using CDs for bases, using old N95 Necromunda bulkheads as the basis for their construction. They had served me well over the years, but I never used them any more as they were always out of line with my other scenery pieces. It was time to return them to the primordial goo and see what emerged.
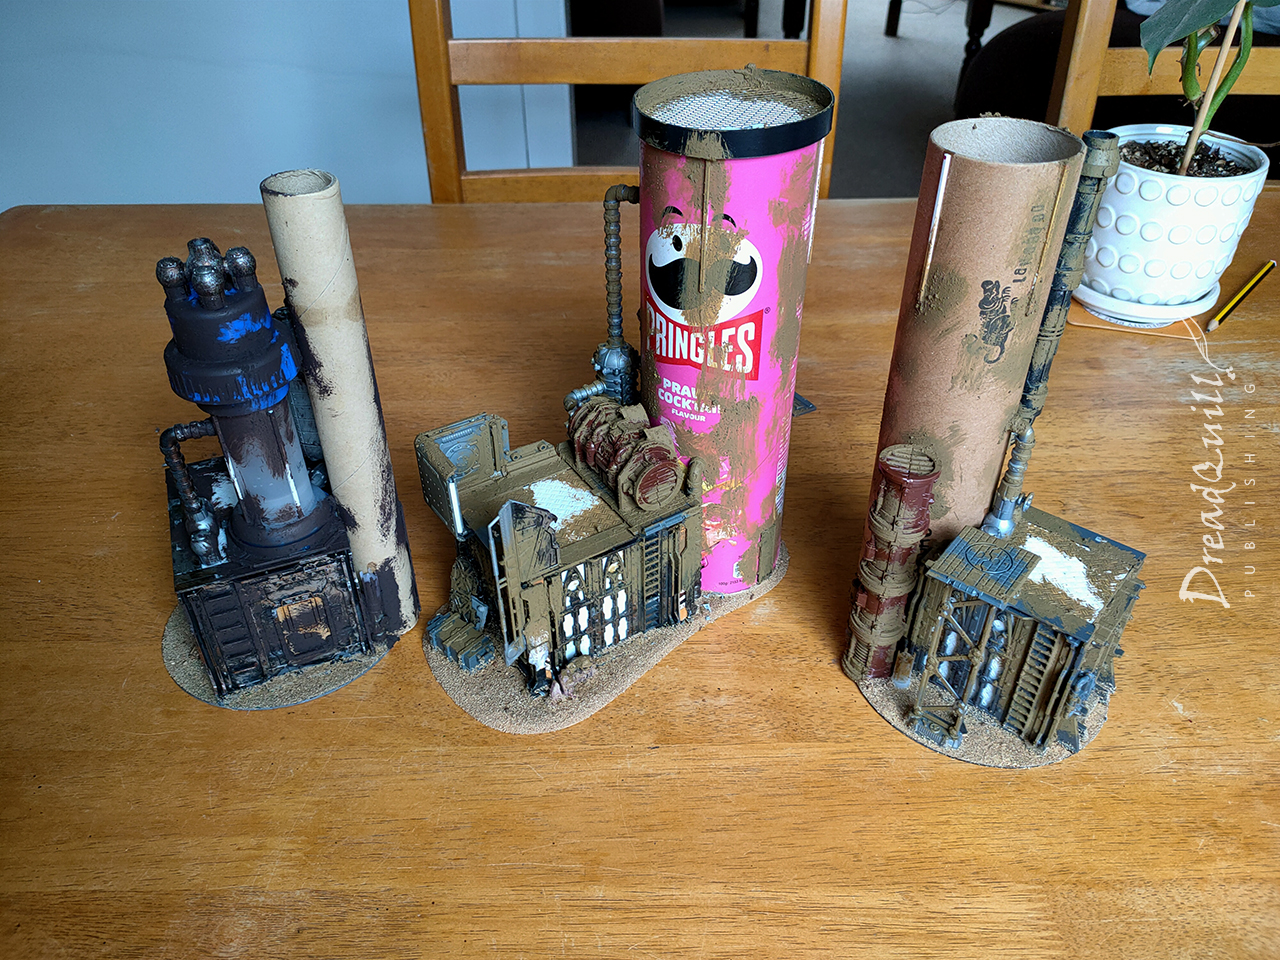
As I was sifting through my bits box, I realised I had quite a few spare bulkheads and other large industrial pieces lying around. Not enough to make a whole board out of, but enough to create a few pieces of interest.
My recyling bin during lockdown was overflowing with different sized tubes, so why not make some weird tubular structures? After all, Ash Wastes was just round the corner, and surely I’d be playing a lot of that when it came out.
Waste not
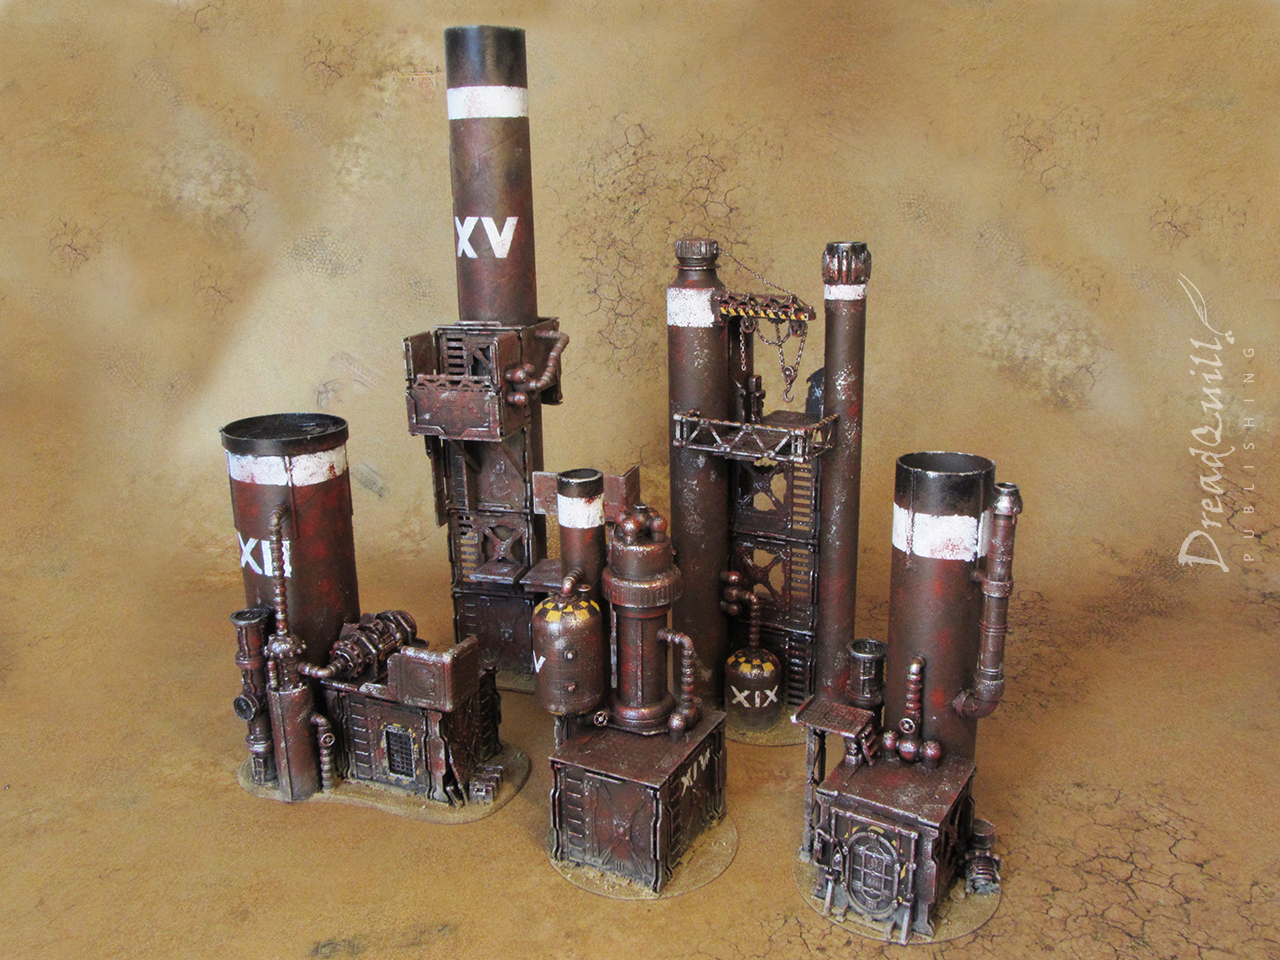
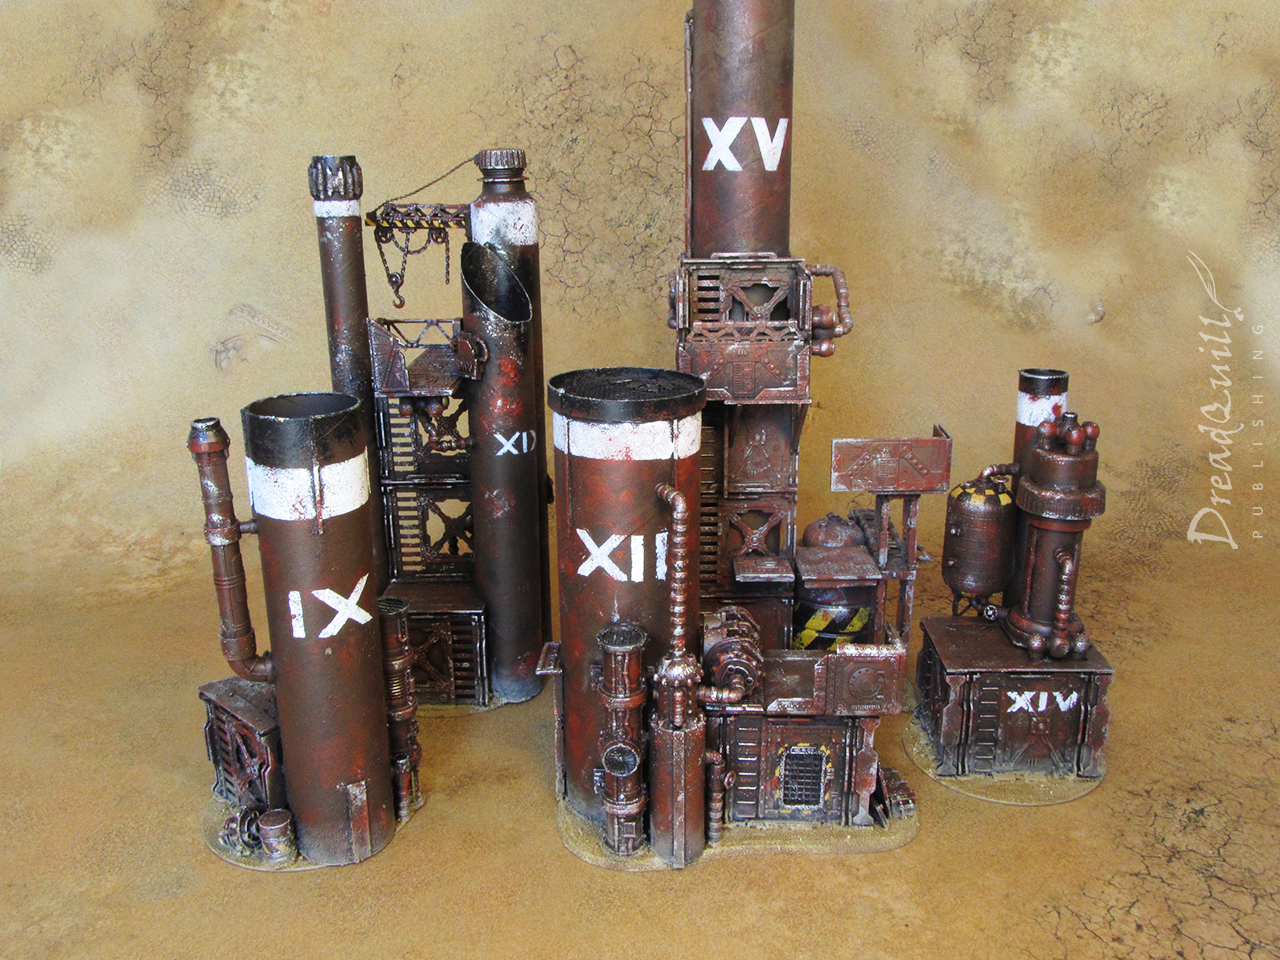
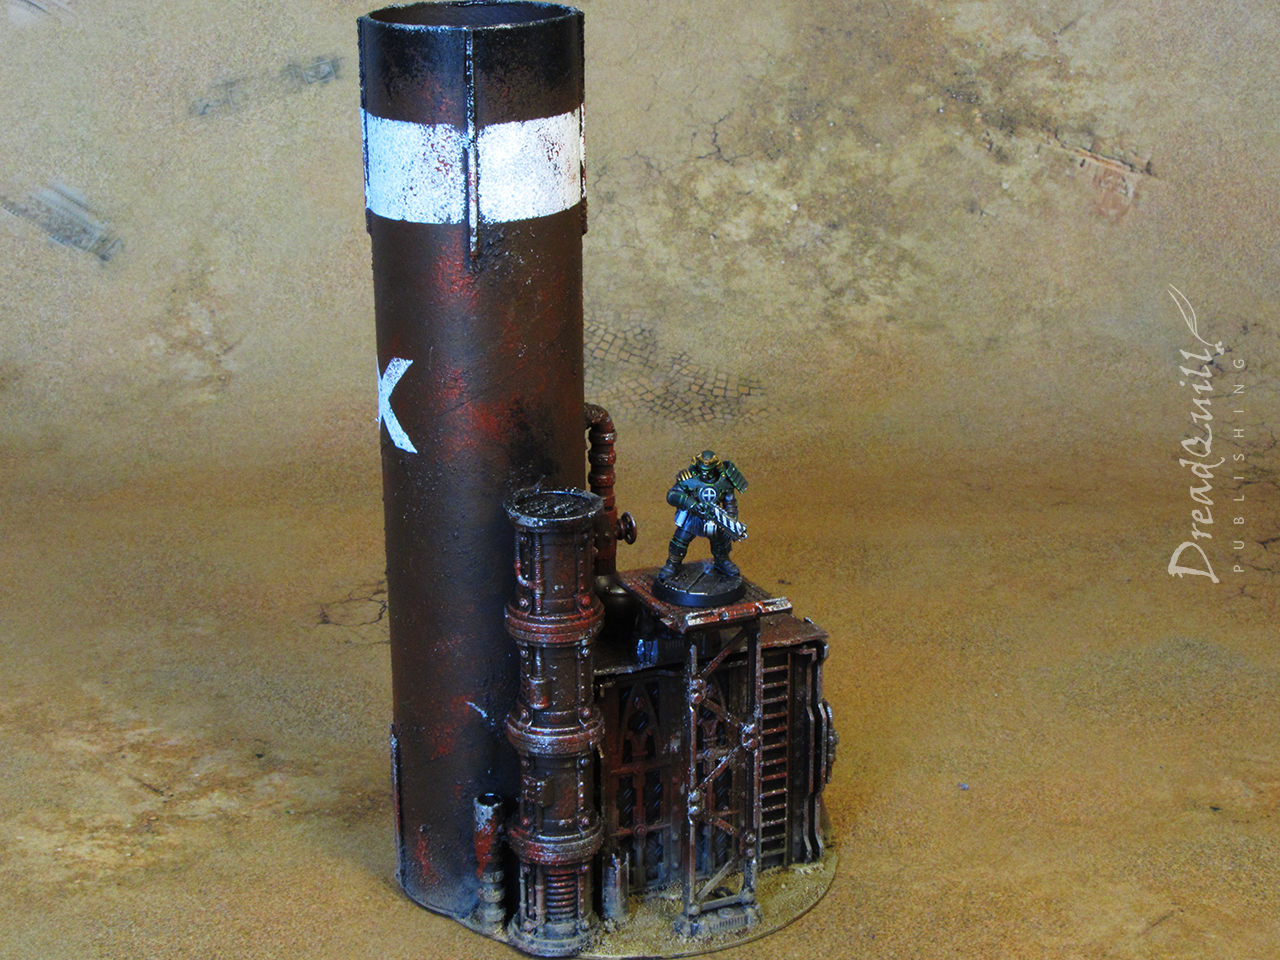
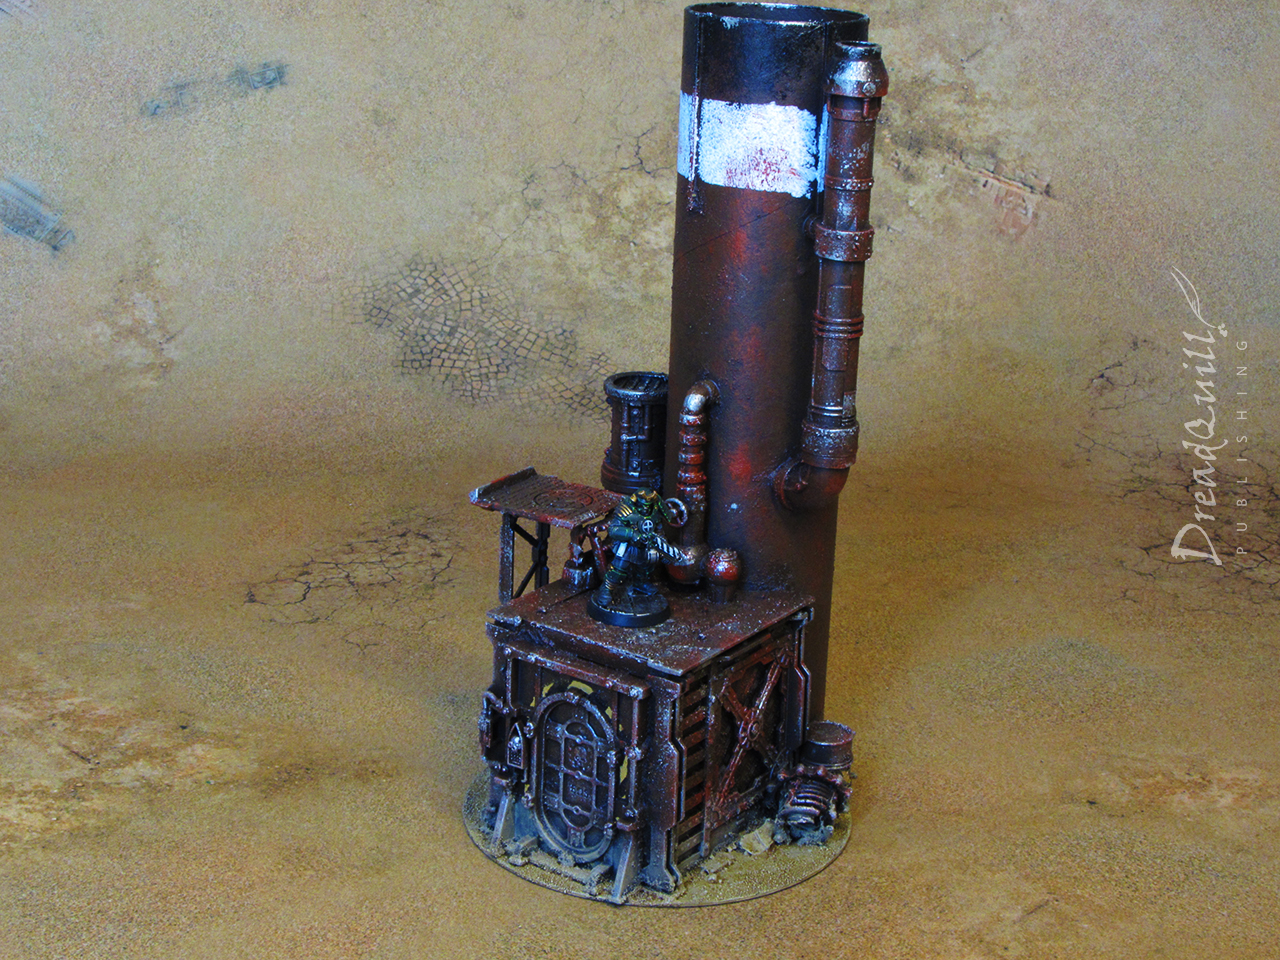
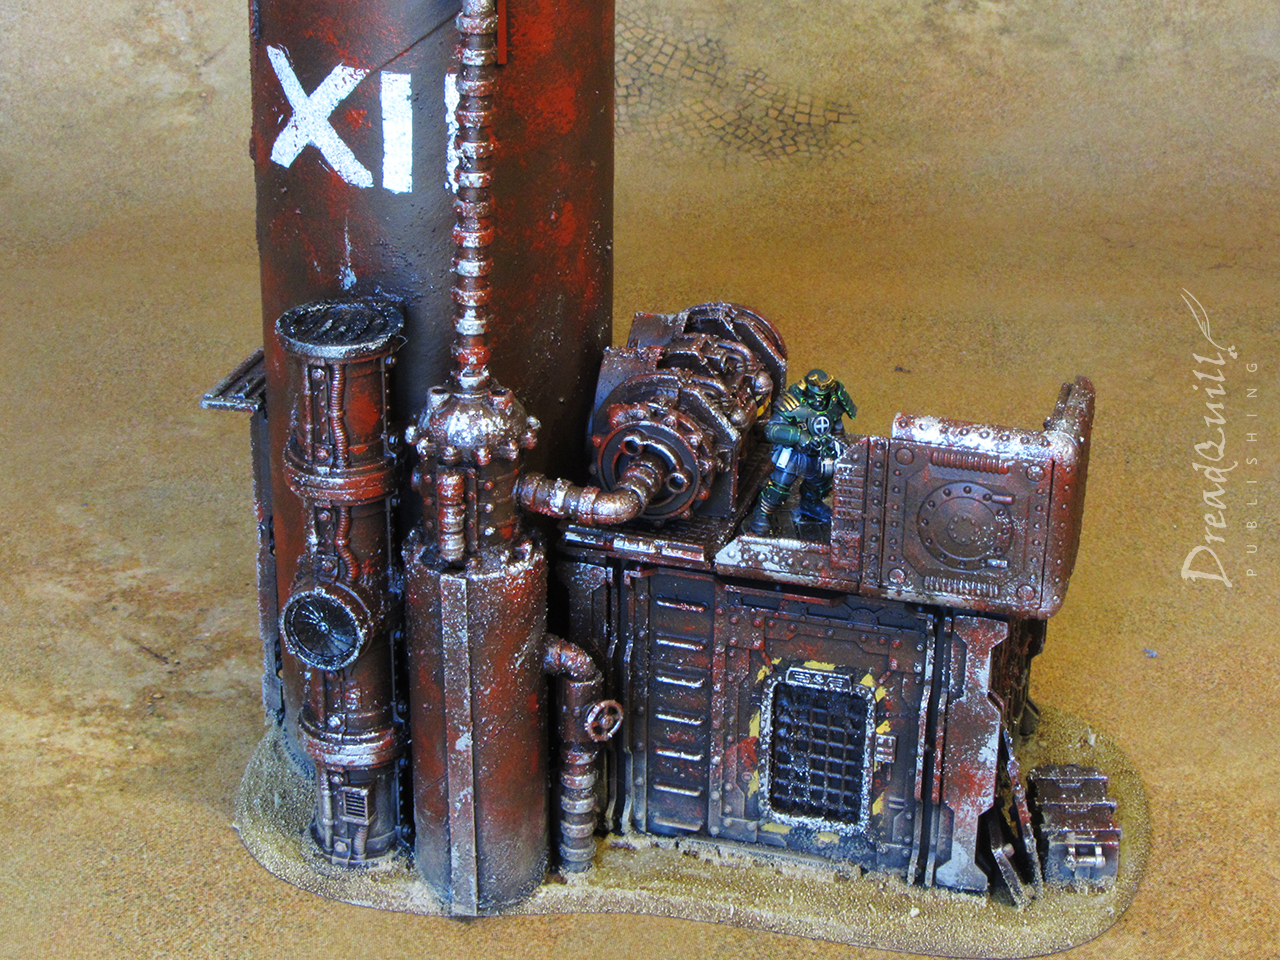
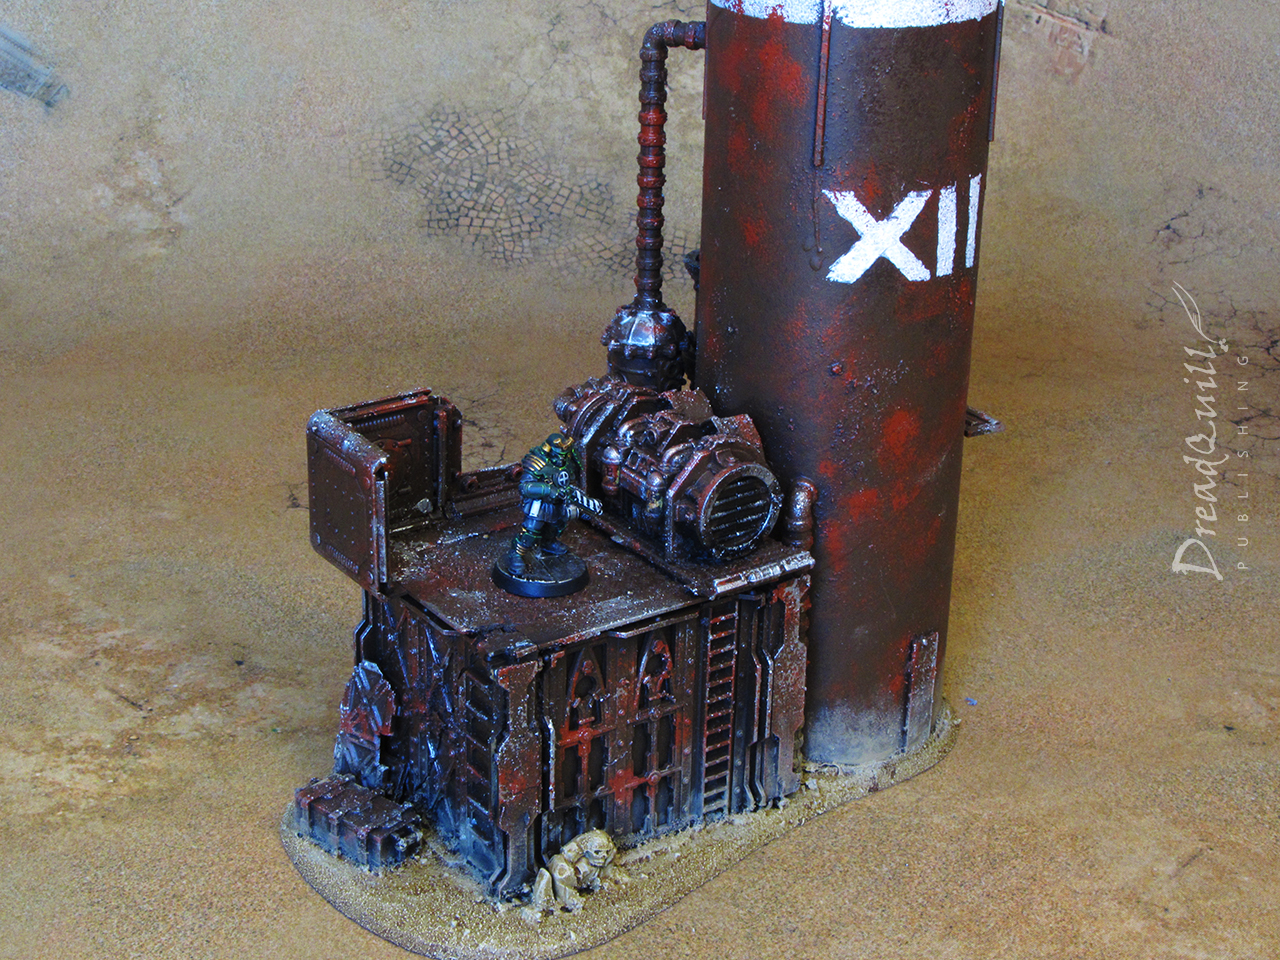
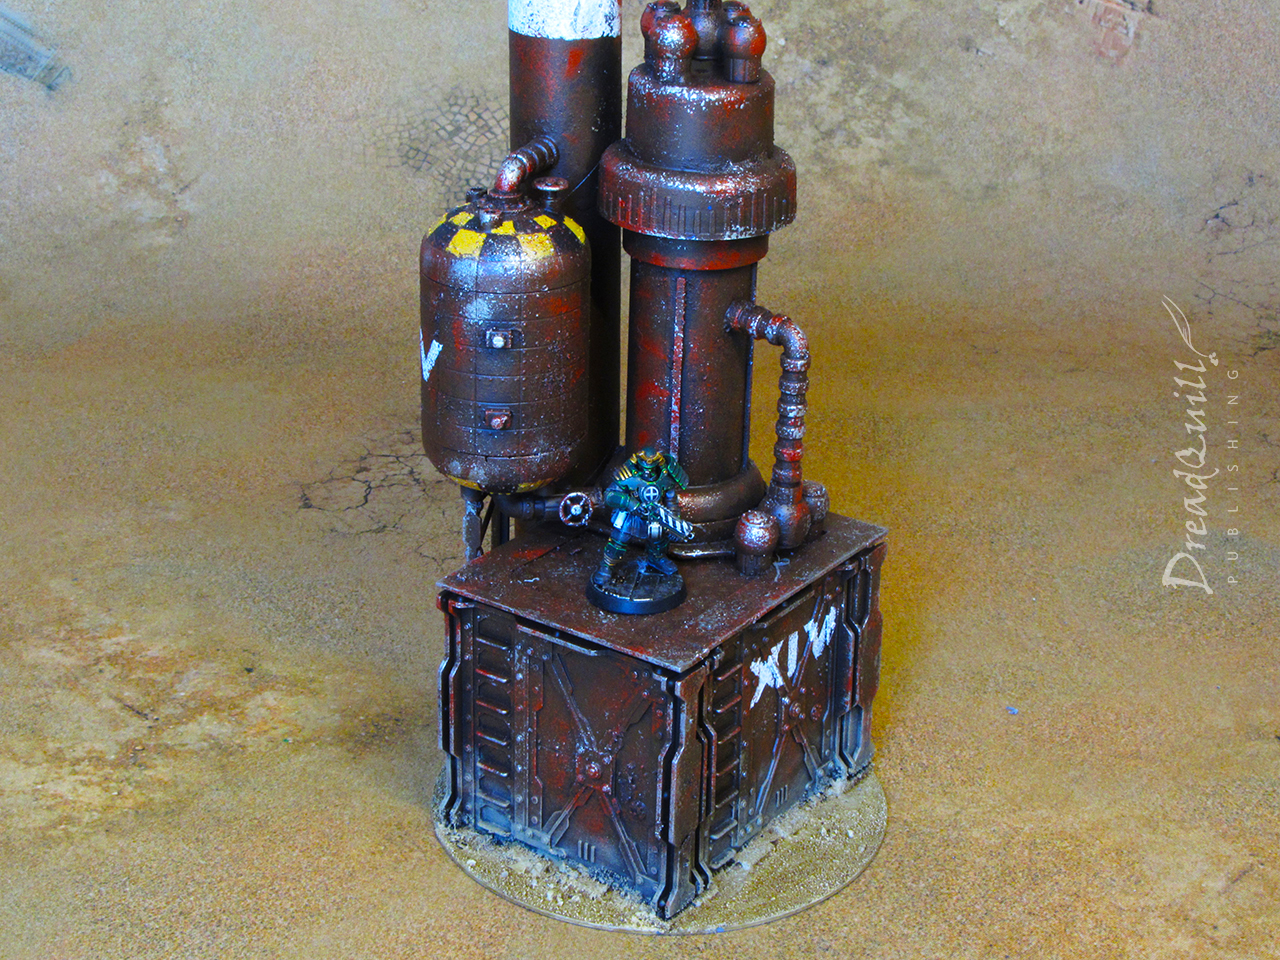
With the two tallest stacks already built, (and the XV stack was already painted) I didn’t do anything to them beyond adding a few extra details. The three new buildings had to have a cohesive look that would match each other as well as the existing two stacks.
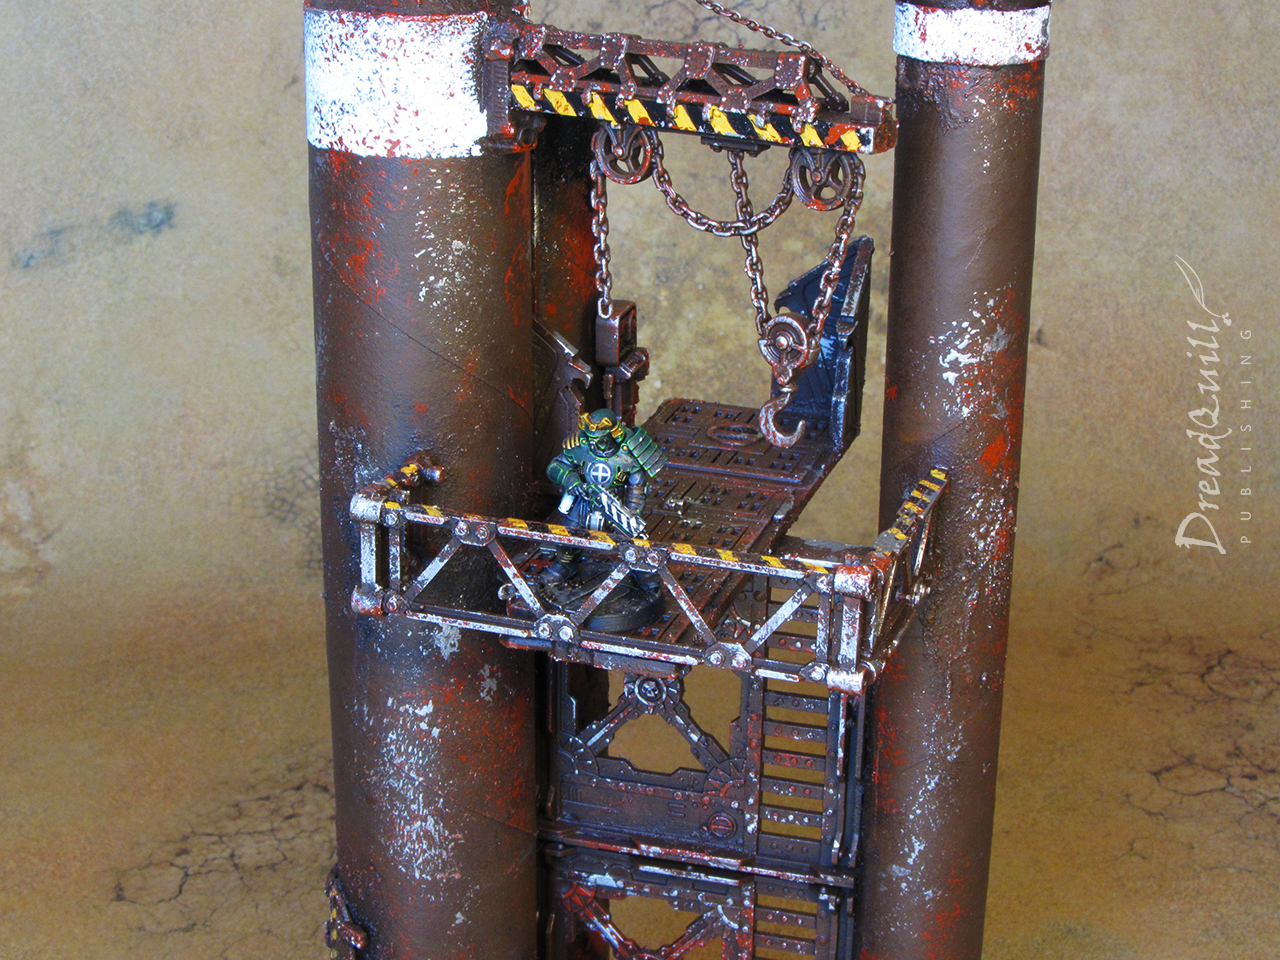
I opted for a ‘small hut attached to large tube’ design for all three, varying the size of the hut and the tube. In my hobby longbeard years I’ve become a huge fan of generic, solid pieces of terrain over more detailed specific pieces. These solid pieces would primarily function as risers to attach walkways to, so having plenty of play space on their roofs was important.
Turning the Necromunda bulkheads into solid buildings was a bit of a faff. Most of them have cut-out windows or seethrough ladders, and there are always gaps in the corners when you bump them up against each other.
I had to shave down the inside walls of the bulkheads to make a piece of plasticard sit flush against the ‘window’ sections, and used small bits of cardboard to wedge in between the corners to make a snug fit. A bit chewy to sort out, but the end result is worth it.
I have a few spare bulkheads, and I think I’ll make a few of these ‘building block’ bulkheads and cast them up in resin so I can make more of these kinds of thing without spending crazy money on more OOP plastic bulkheads.
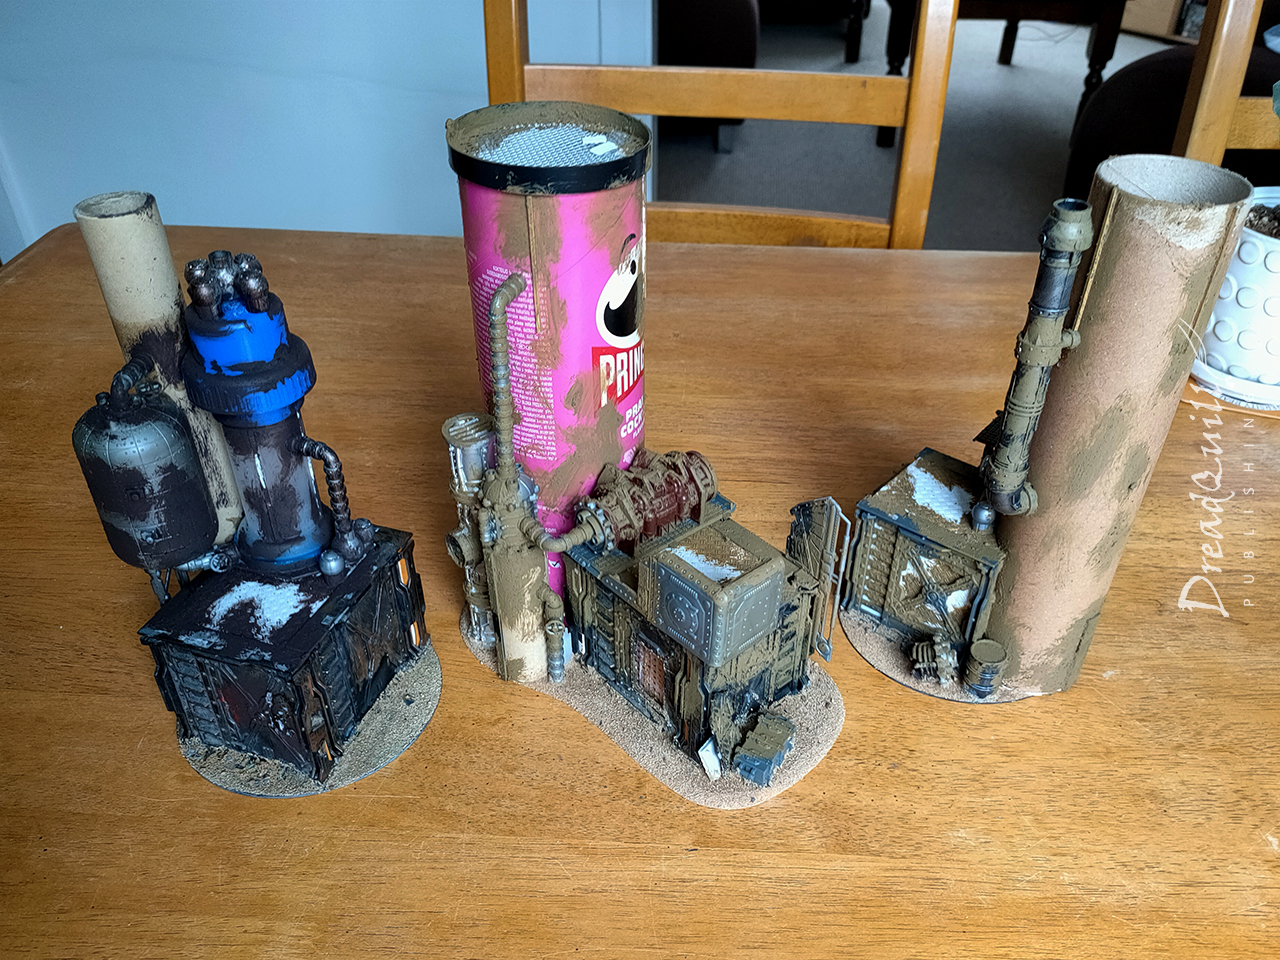
Once the huts were roughly attached to their tubes, I started detailing them with all manner of odds and ends from the bits box. A few bits of plastic crap from the recyling bin were added to lengths of industrial pipe from various editions of GW plastic pipe, with some smaller details added on the bases that can double up as cover for miniatures on the ground level.
Once everything was solid, I gave it a liberal application of my patent-pending textured paint mix: equal parts PVA glue, ready-mixed filler, and dark coloured poster paint (add basing mix as desired). The filler adds very fine grain to the mix and helps fill any unsightly gaps. Filler’s one big weakness as a hobby product is that it’s naturally very brittle and crumbly, so the PVA counteracts this by binding to and hardening the filler. The dark paint means you can slop it around in the dark recesses and not worry about white filler peeking through your undercoat.
stacking them up
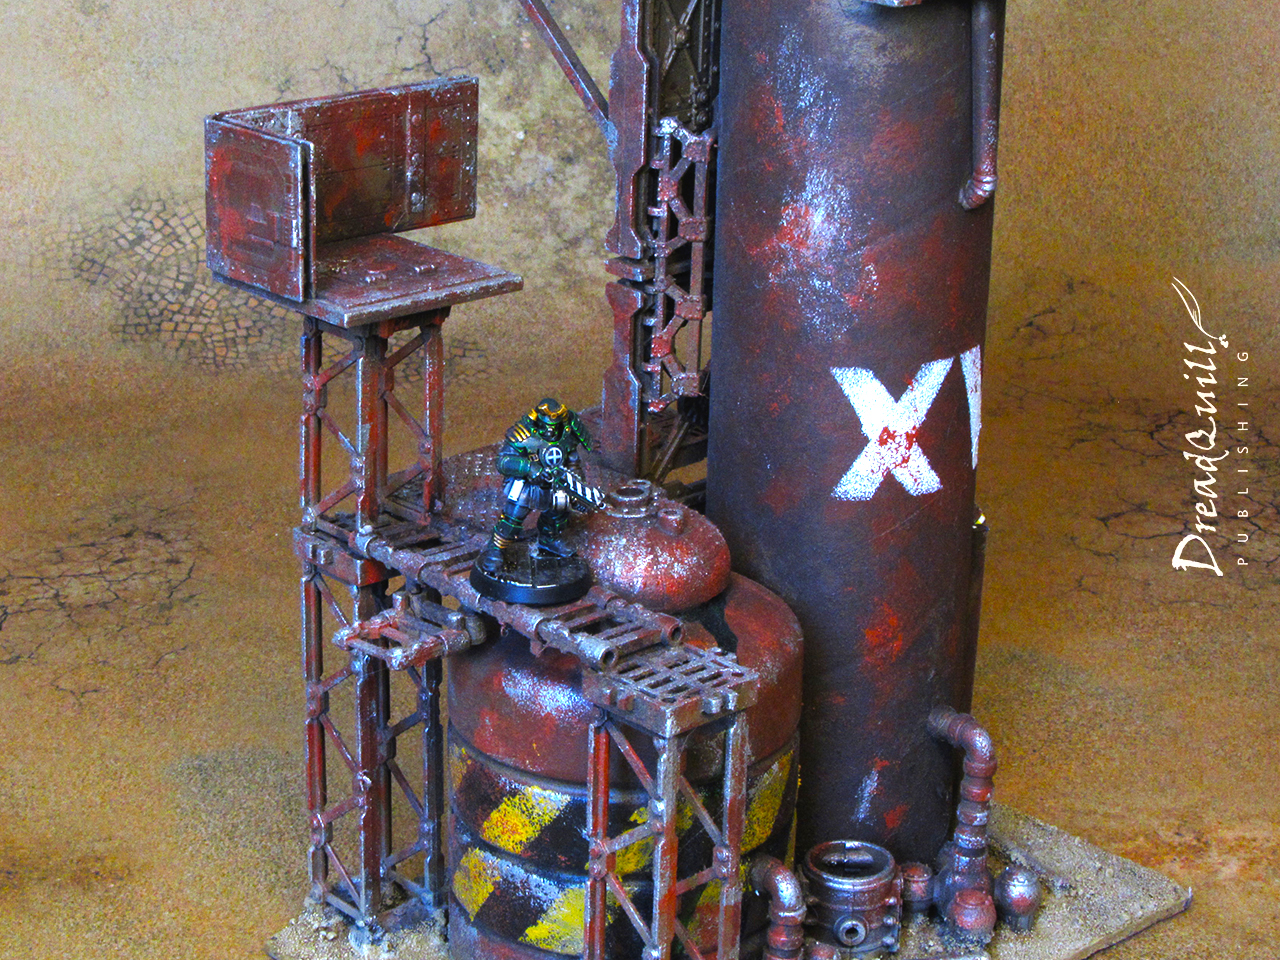
Painting these pieces was an absolute delight. I had already developed a colour scheme with the tallest XV stack, I just had to recreate the browns I had used since the place I bought the paints from had now sadly gone bust (RIP Wilko).
Firstly, everything gets hit with a healthy coat or two of matt black rattle can. My go-to is Autotek cheap car primer, which you can get for around £6 a can if you buy online in packs of 4 or more. Absolutely worth it when you’re doing scenery – you don’t want to scrimp on your undercoat.
If you’re running low on other colours you can usually stretch them further without sacrificing the overall look of the piece, but if you run out of undercoat you’re buggered from the start.
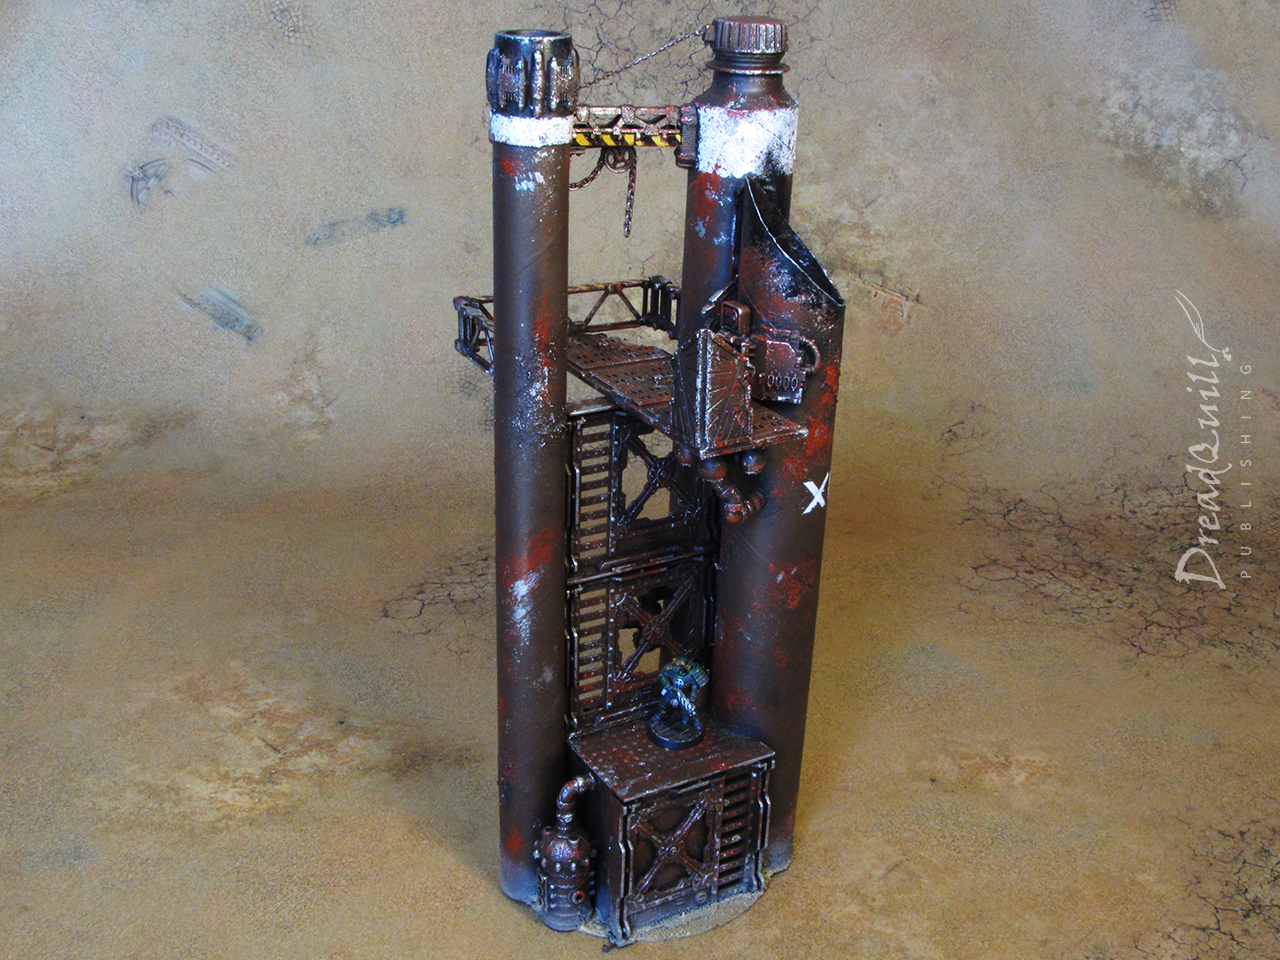
Everything then got a liberal sponging of dark brown. You’re not looking for a solid covering, just enough to give everything an uneven, patchy appearance, and to leave some black in the deepest recesses of the model
Once the base brown was on, it was time to stentil on the details. Every step after this would be weathering, and those are always best applied over the top of block colours, so I had to crack out the masking tape.
I wanted something simple and eye catching, reminiscent of the original battle reports from early ’00s White Dwarf. Big blocks of colour with random numeral markings give generic industrial vibes, and having similar markings across each terrain piece would help tie them visually together.
I masked out the areas I wanted to be white, hand cutting some stencils for the roman numerals. I mostly picked roman numerals because they’re all straight lines and I didn’t have to cut out any round characters. The white was sponged over the top.
Hazard stripes were hand painted, not overly concerning myself with being too neat as they were going to get weathered to high heaven anyway.
Once the block colours were on, it was time for the weathering. For all my larger ash waste pieces I went for big bold colours without worrying about any of the details. Although their designs are very detailed, I didn’t want them to detract from any of the models or centrepieces on the board, so they needed to blend into the background.
With that in mind, all the weathering was done with a torn up bit of sponge so I could cover lots of ground and not get lost in the detail.
The first round of weathering was with a lighter, more reddish orange to suggest rusted patches on the metal work.
The second round of weathering was a silvery metal, concentrated on edges, corners, or anywhere that might see heavy traffic from vehicles, hands, or feet.
The final step was to paint the base to match the battle mat I owned. It took a bit of trial and error to come up with something that was close enough while being easy to replicate, and your version will look something quite different.
- Fully cover with Zandri Dust, followed by a Ushabti Bone drybrush
- Give it a light wash with Seraphim Sepia
- Apply a final light drybrush of Ushabti Bone to the most prominent raised areas
The final step was to blend the model into the base by giving it a dusty coating around the bottom. This sells the idea of the ground being covered in very fine, clingy dust, and (more importantly) covers up any mistakes I made while drybrushing the base.
And they were finished!
I’m over the moon with how they came out. Many projects I work on have lulls in interest for me, as certain sections I can find difficult or tedious to complete, but not on this project. Every stage was a joy to complete – from stripping down old unused terrain, to assembling new buildings from odds and ends, to painting them quickly and effectively with a big bit of sponge. The end result speaks for itself!
I’ll be replicating the painting technique across the ash wastes box set I have, and combine it with some hills I have planned. Watch this space…