MOTB: War Pig WIP

“Generals gathered in their masses…”

In a previous episode of our long-running Rogue Trader game our plucky band of privileged plunderers stumbled across a custom Taurox, left behind by the previous noble inhabitants. The inhabitants were in no real position to refute the claim of its new owners, and the Orthesian Dynasty rode off into the sunset with their brand new whip, quickly dubbed ‘War Pig’ after shooting a palace in half with its main guns.

“It would be terrible if they got into a combat situation and I didn’t have a suitable proxy model for it” I chanted in my head as I handed over my cash at my local game store.

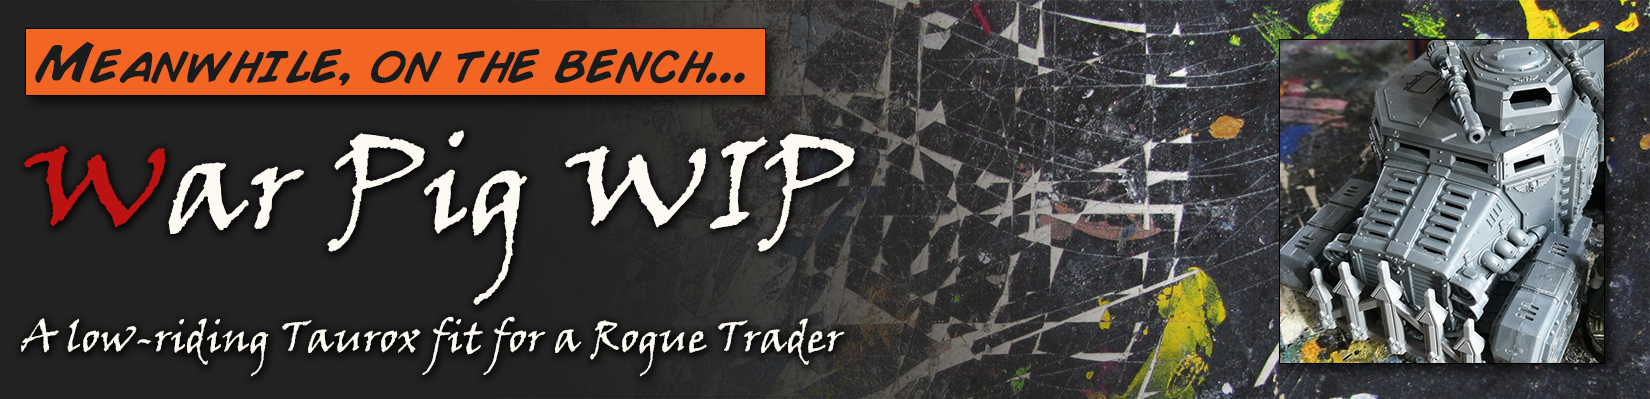
So I was the owner of a brand new Taurox, and the first vehicle I have painted in almost half a decade.

One in the pink

I wanted to do something fancy with it. I mentioned it was a converted Taurox, the original owners modifying it to protect them from the peasantry and look hashtag lit while doing it, so it needed something a little different to make it look less military.

I came across this super cool Taurox from Mr Pink’s instagram while aggressively googling Taurox conversion ideas. Couldn’t be that hard right?

Inspiration from Mr Pink!
Low ride

So I was going to lower my Taurox, keeping it looking butch but with a slight hint of roadster. Time to begin assembling the chassis.

The first thing that had to go was the mudguards. No combination of dry fitting was going to work – there was no wiggle room at all for raising the wheel height and lowering the chassis while they were still attached.

Otherwise, nothing else at this stage looked like it needed work doing to it. It still needed the carry capacity so i wasn’t about to trim its booty down any, and there were no real alternate assembly options, so it was time to crack on with attaching the wheels.

I couldn’t find any guide to help me with this, so I ploughed ahead with the most powerful tool at my disposal – optimistic guesswork.

These little sluts attach the inside of the wheels to the bottom of the chassis. The chassis practically touched the floor already, so it was going to need a fair bit of work to lower it (or give it the illusion of being lowered) without it scraping the floor.

Normally this three-striped part sits vertically, locking the t-shaped wheel legs onto the chassis and giving it plenty of surface area to glue to. I opted to ignore this and create my own bastard child.

Spinning it 90 degrees gave me a little bit of extra height and the much missing extension away from the body – the wheels simply couldn’t be lowered any more without being further away.

The wheel legs (that’s what I’m calling them now, get with it) were rotated 180 degrees in their sockets. This gave me a lot of dip and sufficiently lowered the frame, but presented a complicated problem for attaching it to the chassis. I hacked away a wedge at the end of each leg to make them sit more flush with their new position.

A perfect fit! It protrudes a good centimetre out from either side and glued to the weird sideways plate without much hassle. It was at this point I also realised there was a slight miscast on one of my track parts, but at 1am I couldn’t really be bothered putting in a request for a new piece and was just gonna fill it in later with weathering.

And a view from the front, it’s a pretty good fit! I’ll go back and fill in all the gaps later, but nobody is all that bothered about the underneath of a vehicle anyway. Time for the back wheels.

These suckers were a bit more problematic. There was less room at the back for wheels to be flush with the bodywork (the Taurox has a big ol’ booty) to they needed padding to extend far enough out from the connection point on the chassis. Some knackered bits of sprue will help here!

Fits very pleasingly! Sure the join isn’t super flash but who cares? The only time people will be looking at this is when it’s in a smoking heap on the floor because the Voidmaster took it off one ramp too many.

I was very happy with the overall silhouette. Crouched low to the ground, ready to pounce. To me it looks more maneuverable as well, giving those wheels extra room to move around. Time to weaponise it!

It had already been written in with autocannons, and there’s a pleasingly brutal fancy to them that the other weapon options didn’t really tickle. I tinkered with having a ‘none’ weapon options hatch, perhaps with some observation equipment, but nothing really came of my bits bashing.

Who’s driving this thing

I assembled the rear of the vehicle and worked out how I was going to populate the driver’s seat. It was almost inevitable that one of the PCs was going to be driving it, but the model didn’t seem right without a driver, so out came the bits to see what options I had.

The combination of Bretonnian heads and sci-fi bodies was becoming ubiquitous in my Orthesian conversions. I figured the drivers/pilots probably had a little more high-tech jackets than the armsmen, so I opted for one from the Genestealer Cult Neophytes kit.

His arm and hip joins needed shaving down to fit the flat-sided parts of the original driver, but that wasn’t an issue with a sharp craft knife.

Noot noot! With the driver in place, I was happy I didn’t need a gunner – he was all the scale that was necessary.

finishing the pig

The only part that I had still to decide on was the front grille. The kit comes with a very cool grille that I desperately wanted to use, but no longer fitted the silhouette of the vehicle any more. I also wanted to affix lights to it, but with the mudguards gone I couldn’t fit them on top of the wheels any longer. They needed to go somewhere else…

With a bit of shaving I discovered they fitted perfectly around the outside of the nose of the vehicle; they couldn’t look any more like porcine nostrils if they tried. After digging around in my bits box I also stumbled across a set of spikes from the front of an old Sisters of Battle Rhino, and their Gothic-But-Chunky appearance (title of your sex tape) gave me the perfect flare I was looking for.

And it was finished! I’m very happy with how it came out, and unfortunately I’ve found myself in a position where I need to actually paint the bugger now. I’m still not happy with the amount of flare on it – I’d like a few more gothic stylings, perhaps some railings across the top of the wheel covers, or some kind of gargoyles to break up the flat surfaces. I do have a few gothic buttresses from a recent project


MOTB: Hab Block part 1

(Semi) finished product first!

A long time ago I found myself with a HMRC-related windfall which coincided with the release of a neat-looking kickstarter for a modular mdf terrain system. I was very taken with it, especially with the Gothic Upgrade pack making it look like the creepy hive city hab block from my dreams. I dropped some cash on the project and forgot about it for a year.

Fast forward past a house move and some postage misadventures and this (very) heavy box was sitting on my proverbial bench.

What’s in the box?!
Unpack the block

I don’t know why it surprises me how much mdf weighs whenever it arrives. I had a hundred and one other things that needed to be done that day, so I of course cancelled all my plans and tore into the package.

A tight fit

Lovely packaging, barely an inch of wasted space. It began to dawn on me how much assembling I was going to have to do.

Freebies!
an inelegant start

I can’t talk about the kit without mentioning the elephant in the room when it comes to MAD gaming – there were a lot of problems with the Kickstarter. They raised money in orders of magnitude greater than they (apparently) planned for, which caused massive backlogs of production. Their expected delivery time went up from one month to another month, to next month, to the month after…

I stopped following after the first few months – there was only so many times I could read “Hey so we’re delayed again because of [some other reason] sorry backers” before I got bored of checking in. They were on Pledge level 2 after the first few months, I was waiting for Pledge 6.

There were some issues with postage and an ill-conceived attempt to plug the next Kickstarter before they’d finished delivering on their already super-late current Kickstarter. If the product wasn’t great, I’d find it difficult to recommend MAD Gaming Terrain.

As it stands though, the product is well-made and extremely well engineered. I found myself genuinely daunted at the prospect of assembling it from the sheer volume of options available. As of right now, most of this stuff is also available to purchase from their local supplier too, and depending on how this assembly goes I may well be picking more up in the future.

If regular online shopping goes well, I will be back to recommend them whole-heartedly!

So many parts

There were a lot of sprues, many of which I couldn’t work out the utility of. The assembly instructions were very useful, but when it came to optional parts the rules were “Go nuts” or “Check out our videos on Youtube for ideas”.

I am unreasonably angry by such blatant abuse of hy-phens

I am loathe to watch construction videos – I don’t like scrolling through a 15 minute video of people talking about their product to get a grainy 480p flyby of the thing I’m looking for. Give me a big picture to pore over or give me death.

It’ll look pretty when it’s done!

I began to unpack in earnest, trying to work out the best way to approach the project. After several hours I came to the conclusion that there was no best way – I was just going to chunk through random sprues and pray it worked out.

Got Wood ™

I picked things that had instructions – namely the base hab blocks and the walkways. It was all straight forward and well-documented – I had no issues following the base instructions that came with the kits.

In fact, the only problem I encountered was boredom after assembling my millionth walkway – which I only have myself to blame for trying to build everything in an afternoon (and for ordering so much damn wood).

I had to enlist a few extra pairs of hands
Coming together

I love building complicated kits, and although they are a ballache or tedious (or both) to assemble, the finished article is very impressive. I’m a huge fan of kits that have enough detail on them that makes painting easier, as applying colour is something I find particularly difficult. These kits look like they’ll take a few rattlecans very nicely, and after they’ve been tickled with a drybrush and had a few details picked out, they’ll look amazing on the tabletop.

It’s starting to look like a block of habs

I also had an experiment with the Gothic upgrade sprues. I remember adding a few of them to my Kickstarter, as I’d prefer to have too many than not enough. I was endlessly impressed by the modular nature of the whole kit – everything can be attached basically anywhere, which is a nightmare for someone who hates having too many options.

I compromised by adding a few gothic buttresses and lights to a roof and one of the bases just to see how the kits worked. I was very impressed by how well they all stacked up on top of each other.

It was starting to take shape, and the prospect of making harder decisions with the resources I had was daunting. I also wasn’t sure I had enough magnets to see me through the magnetisation process, and I didn’t want to be caught short.

The plan of attack for this building session was to get all the core stuff assembled – let’s see how tall I can make this sucker.

“Citizens of Peach Trees…”

Turns out, quite tall. I already began visualising some daft things I could do with magnetised walkways coiling round the outside of this. It’s a terrible design for playing in, but it looks cool!

I was impressed with how well it all slotted together considering how slap-dash I was in assembly. I’m looking forward to having the whole kit together.

to be continued

This is where everything was left – all the hab pieces assembled with a couple of experimental Gothic parts added. Most of the walkways are tucked away waiting to have magnets added once I build up the courage to take them out of their box again.

The full spread

Overall I’m very impressed with the kit. I can easily populate a board with them in ‘unstacked’ mode, but it remains to be seen how much I can cover once I start layering them up. As of a week or two ago, MAD have started selling the individual habs on their store, so depending on how it looks like when I’m finished, it’s nice to know I can always pick up a few extras to round off my collection.

As for construction, perhaps Christmas will have a few spare days for me to bite the bullet and finish the project off. Watch this space!