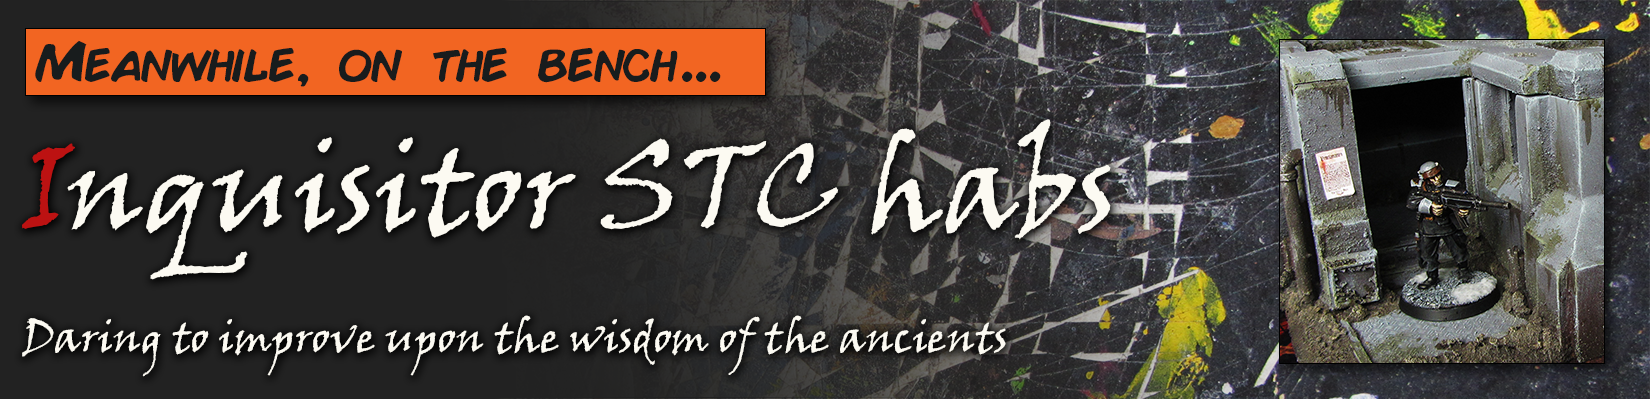
I’ve been on an Inquisitor kick recently, working on finishing some bits for an upcoming campaign with some chums. I’ve been finishing ancient WIP projects like Archmagos Quinne or Von Koppola, as well as building new pieces to furnish future battlegrounds.
This time I turned my hand to something different – building something new out of something old.
Standard Template Construct
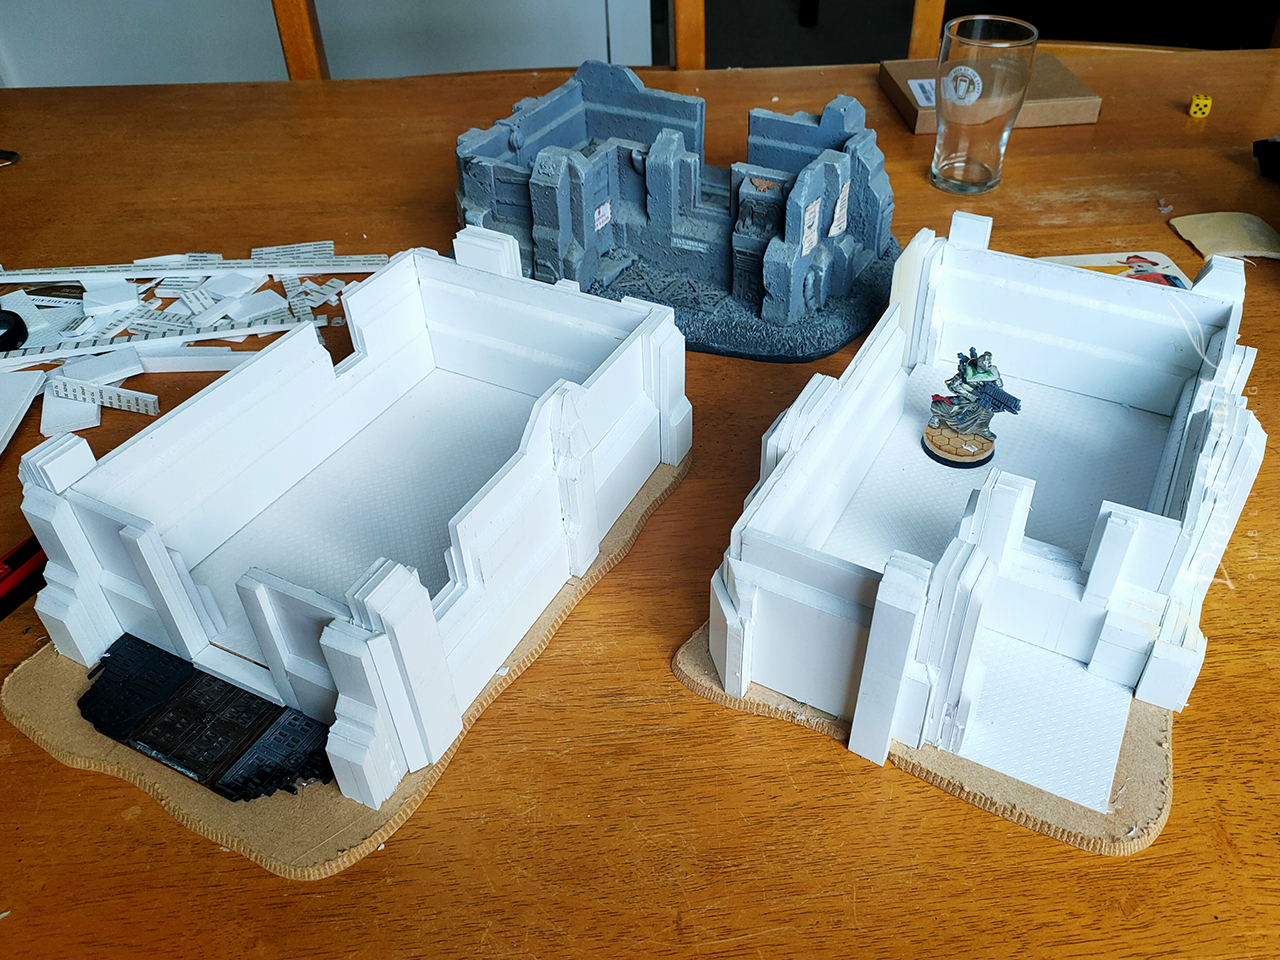
Very few “official” pieces of Inquisitor scenery exist from the early noughties – just a handful of (absurdly priced) gothic resin scatter from Forgeworld and the iconic STC Hab, a single piece cast from hard foam.
It had seen hundreds of hours of tabletop use, usually representing settlements or frontiers, but its loneliness never sat right with me. I toyed with the idea of buying several more pieces off ebay to create a small town, but it was prohibitively expensive and I’d end up having to hack them apart to make them look different, which felt like sacrelige. What if I made my own?
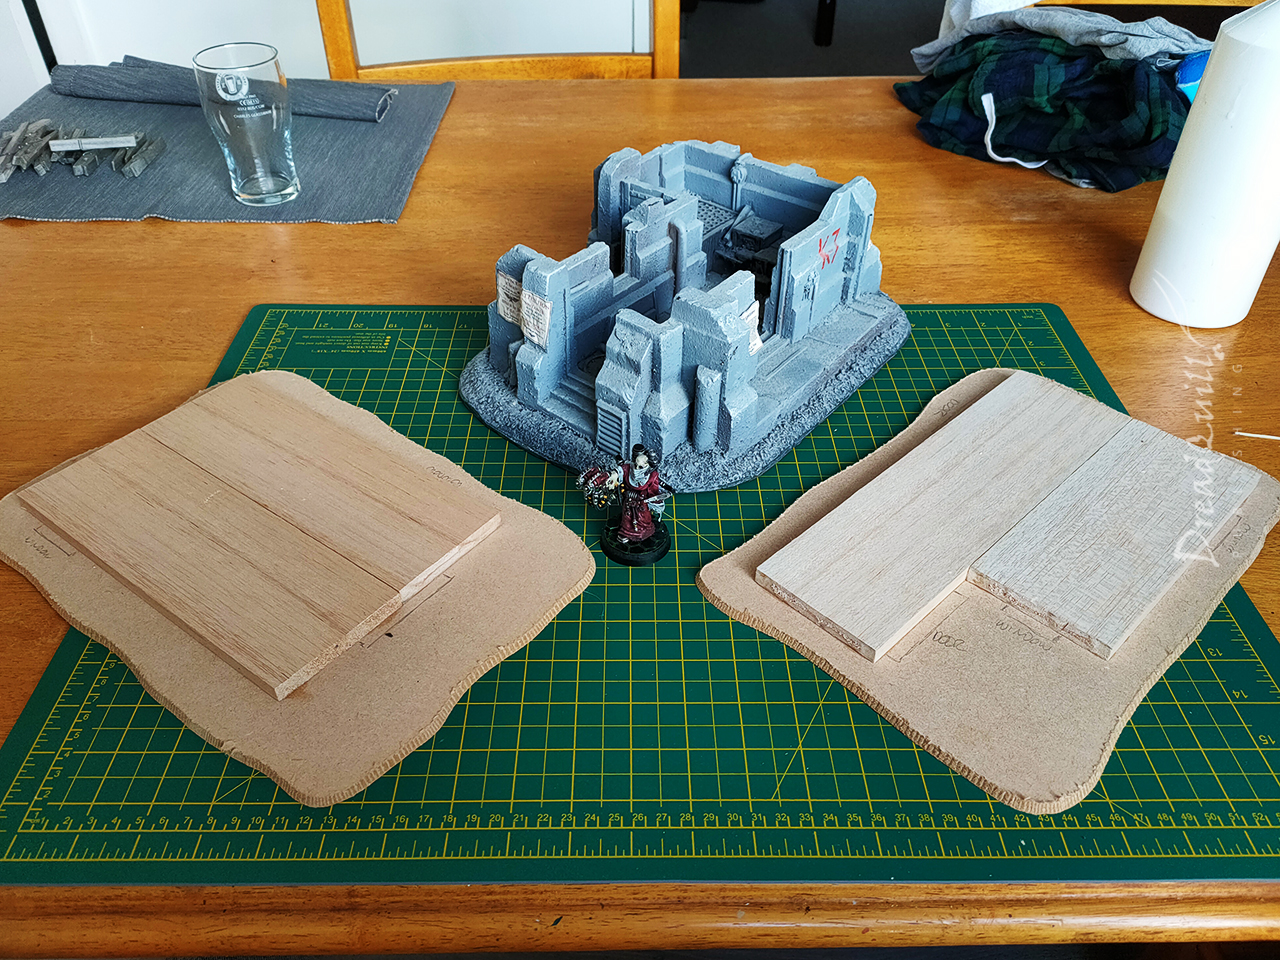
With some bevelled MDF bases from ebay and some chunks of balsa wood to make the base, I had my foundations laid. My primary material would be foamboard – a material I’d never used before – as I’d pinched a load of off-cuts from work. It also was a landmark moment for me as it necessitated the purchase of a cutting mat.
For the first time in almost 20 years, I finally acquired a different hobby surface than my old high school sketch book.
A sticky(back) situation
The foamboard was 5mm thick, making it easy to roughly work out how many sheets I’d need to make walls different thicknesses. What wasn’t easy was realising I’d assembled a bunch of walls using sticky-back foam board without peeling the protective paper off. I had to pull it apart and start again.
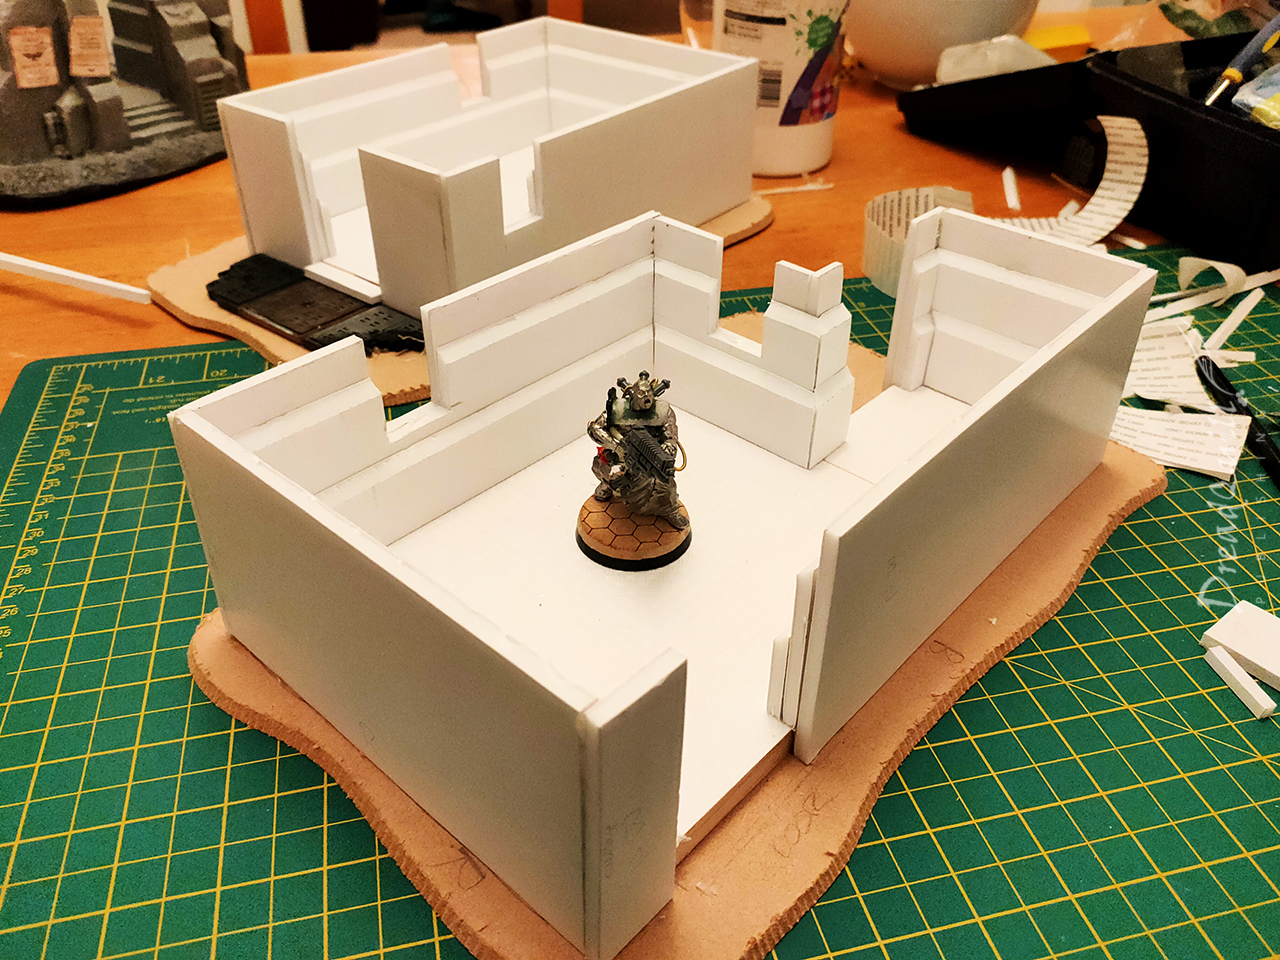
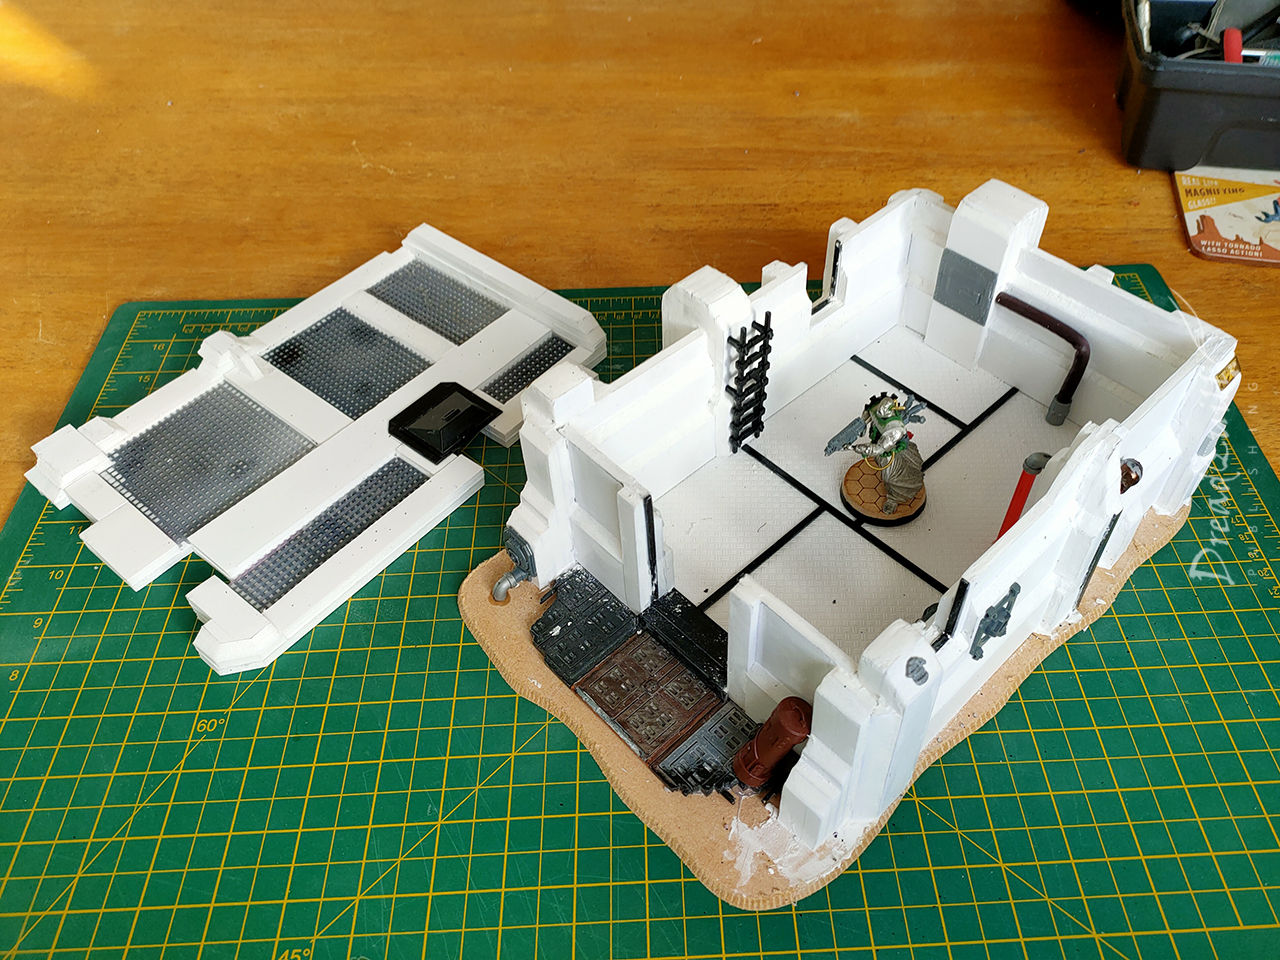
I had two goals. Firstly to replicate the look and feel of the original design, and secondly to make a large playable space inside the buildings. As much as I love the original piece, you can barely fit three miniatures in there, not to mention plot maguffins. The new ones would need to have nice wide interiors.
Buttress on both sides of the bread
On the subject of the original design, the more I studied it, the more I realised there was none. It was a scenery designer cutting cool shapes out of I presume pink foam and gluing them together in a cohesive piece.
There are no rules or repeat patterns, very few standard shapes, and very little logic apparent in its construction. It is very warhammer in that respect, but that makes it very frustrating to copy.
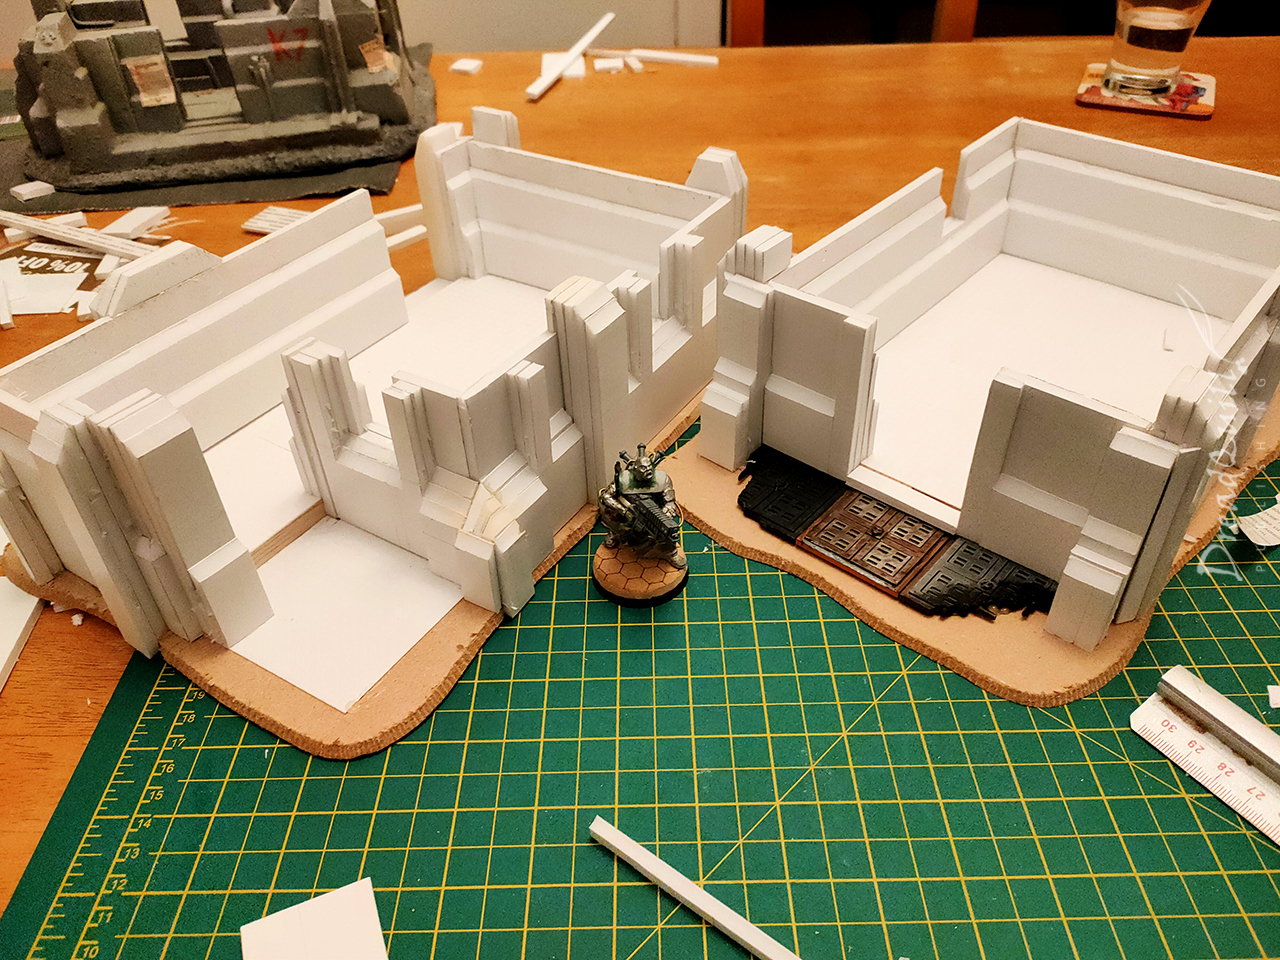
I picked out a few designs I liked and replicated them around the buildings. Buttresses came in two widths – thick (20mm) and thin (15mm), and would vary evenly in height. Some touched the top of the wall, some exceeded it.
By this point I had got exceptionally good at hand-bevelling, as any sloped edges are at a constant 0.5mm depth.
Some corners were gien buttresses, some were left bare, and some were given 45 degree slabs to round them off a bit. I tried not to have any repeating patterns – the original doesn’t have a single corner the same as another.
The only exception is perhaps the larger square building with its uniform front. I wanted it to be more like an operational or commercial building (I had code named it ‘town hall’ in m head) so needed a slightly more impressive entrance.
I had thought about taking measurements to turn into a 3D model or used as a template for other people to follow, but honestly it would be almost as much work again. Every section had to be painfully measured, cut, re-cut, shaved down, wiggled round etc just to fit. If someone wants to pay me to produce a template though, I’m all ears!
Filler? I hardly knew ‘er
Foamboard is a great construction material – cheap, lightweight, holds its shape perfectly, but isn’t without its downsides. It has exposed polystyrene edges, which will melt if you apply superglue/poly cement or hit it with a spray can. Also, no matter how careful you are, several bits of foamboard stacked up will never have a flat edge – they’ll always appear like three little sandwhiches. I needed to fill the sides.

Enter the all-purpose filler, increasingly becoming one of my favourite hobby materials alongside PVA glue.
After adding a few strips of thick plasticard around the windows and doors help define them a bit, all the exposed edges got a thick covering of filler, applied generously with an old Tesco clubcard, and kept very wet throughout to help shape it.
I wasn’t worried about the look at this point, only for coverage. Once it dried I hit it with the sandpaper to define some of those corners and smooth the edges. The biggest downside to filler is that it’s porous and incredibly powedery when it dries, making it not ideal for regular tabletop use.
Luckily its porous nature makes it perfect for my other favourite building material – PVA glue (aka white glue, school glue, etc). Give it a very generous coating over the filler it sucks up the glue like a sponge and dries rock hard. I was shocked how well it worked even after one coat, I was expecting to have to do several to see any benefit at all.
On with the detailing!
Raising the roof
I raided my bits box for various plastic gubbins to break up the flat shapes of the walls. Many of the original greebling is lost to time, although I could definitely ID a few bits here and there, including parts from ancient space marine tanks and some classic warhammer Orc shield designs. The chances of me getting those were slim, so I improvised.
Random bits were applied all over, with vague and indistinct shapes to suggest function without particularly describing it. I tried to follow the original’s intent, even if I couldn’t copy the design.
Once all the plastic had gone on (and I’d figured out where my ladders were going), I started to shape the roofs.
This was about as unscientific as you could imagine. I roughly measured where certain buttresses would be that I’d have to cut out allowances for, but due to all the extra filler and creative placement of features, it ended up being far easier just turning the whole thing upside down and tracing the shape onto the foamboard, with extra fine-tuning to make it fit.
Ultimate heresy
I dared to believe I could improve upon the wisdom of the ancients. Once I’d figured out my roofing system, I applied that to the original STC hab and was a) surprised at how well it worked and b) felt a strange string of emotions as I changed the shape and silhuoette of something that has been in my life for almost 20 years.
And yet in all those years, I never once imagined what the roof would look like. This felt right.
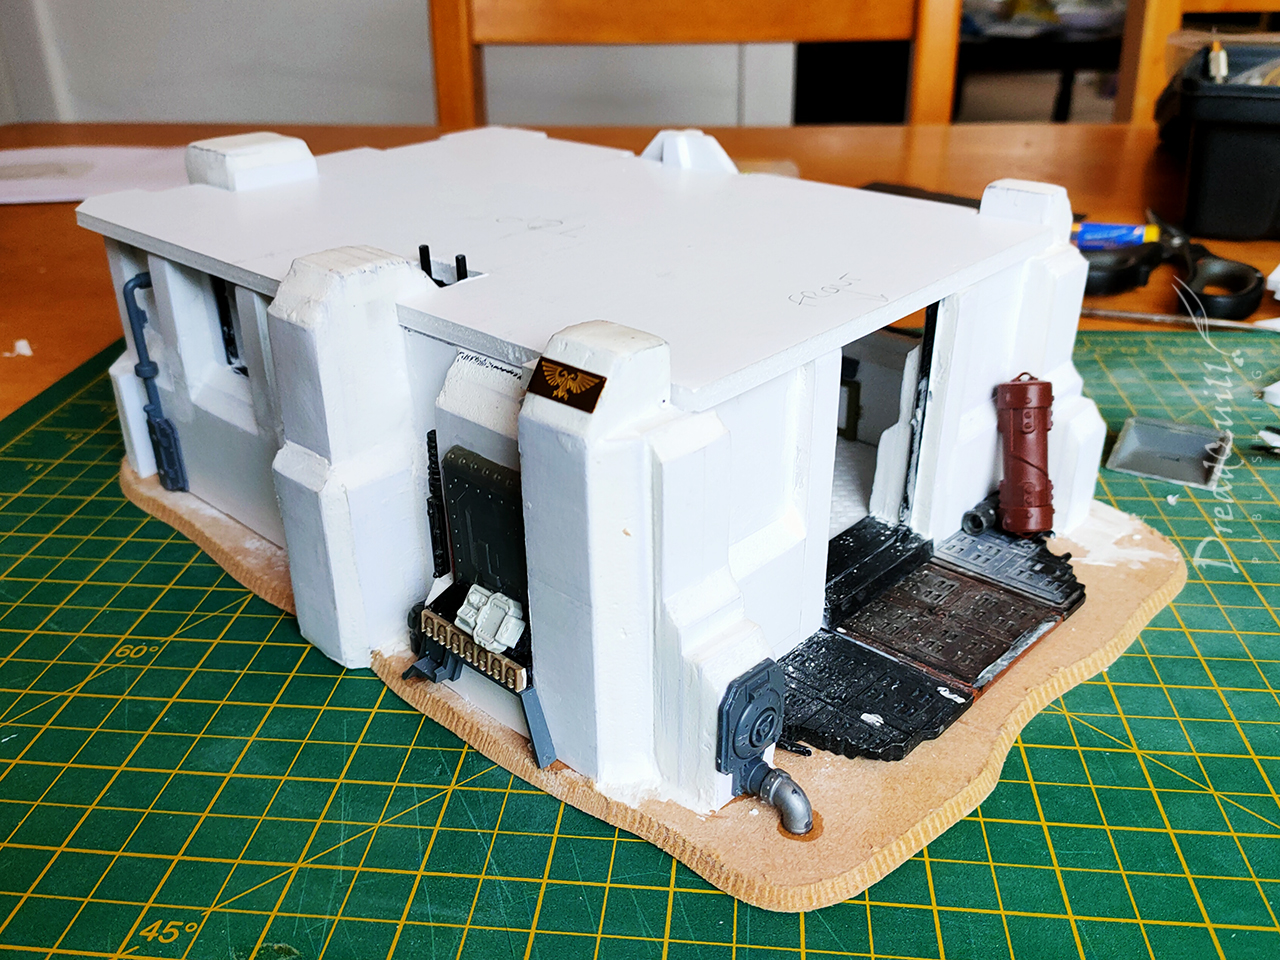
The other roofs were similarly patterned. A second round of foamboard on top vaguely followed the flow of the walls and buttresses. This created natural empty spaces that I filled with plastic embroidery sheeting, or ‘granny mat’, a super-cheap material that works wonders as industrial flooring.
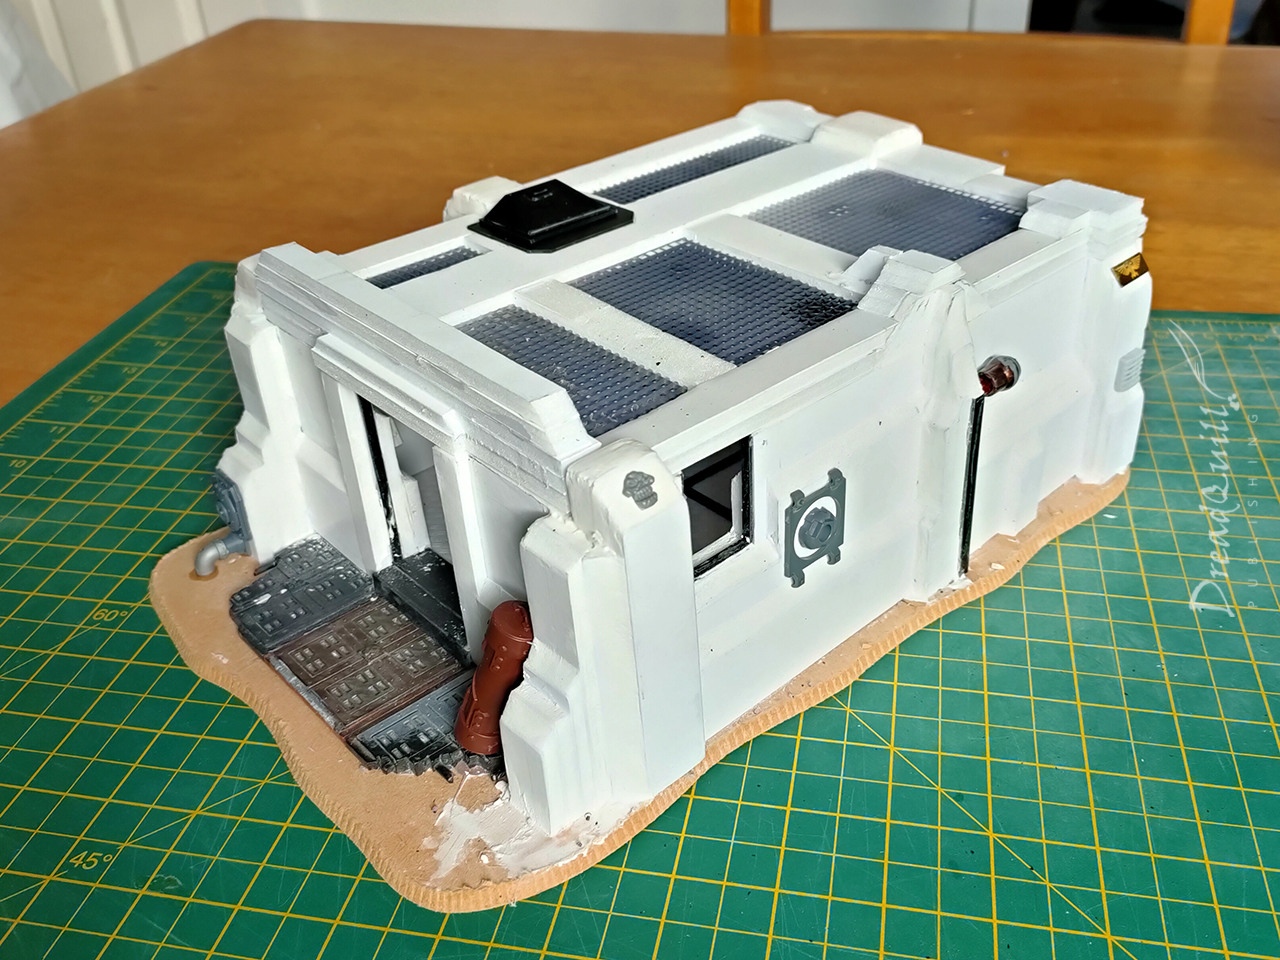
The roofs were given the same treatment of filler > sanding > PVA to smooth down the edges, and by the time that was complete they fit very snugly onto their relevant bottom halfs.
Some details I made sure to add was the long ammunition cylinder from the OG crates and tank traps sprue (still in production today!), as the original had a few of those crates stacked up at the far end, and I picked out a Warhammer Orc shield design to add to one of the buttresses like a weird gargoyle. Both buildings got ladders on them too, much like the original had.
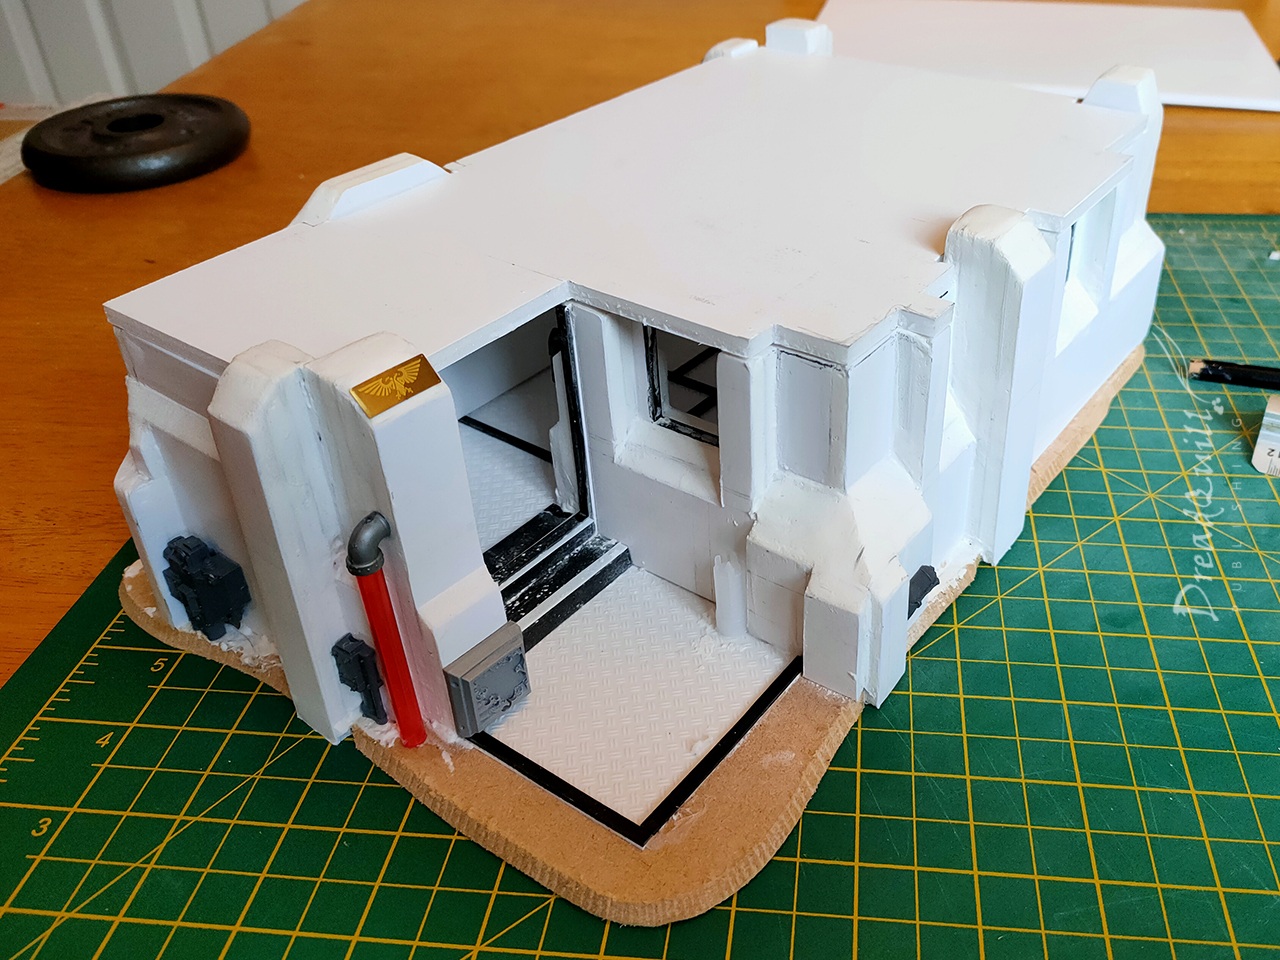
The interior of the habs was covered in plasticard in an embossed treadplate design, and broken up with strips of flat plasticard to emulate the floor of the original hab.
Final details done, it was time to get messy.
True Grit
Everything got a healthy dollop of my homemade recipe for textured paint. Equal parts PVA glue, filler, modelling sand, and poster paint for colour. The colour isn’t particularly important but it is necessary – the darker, the better. As this mixture is getting poked into the deepest recesses of the model, it’s better to have it a similar colour to how you intend to have the whole model undercoated.
Spray paint inevitably misses some bits or fails to get into troublesome nooks, so having a dark neutral colour in the gaps as part of your pre-undercoating process helps cover up a whole heap of sins down the line.
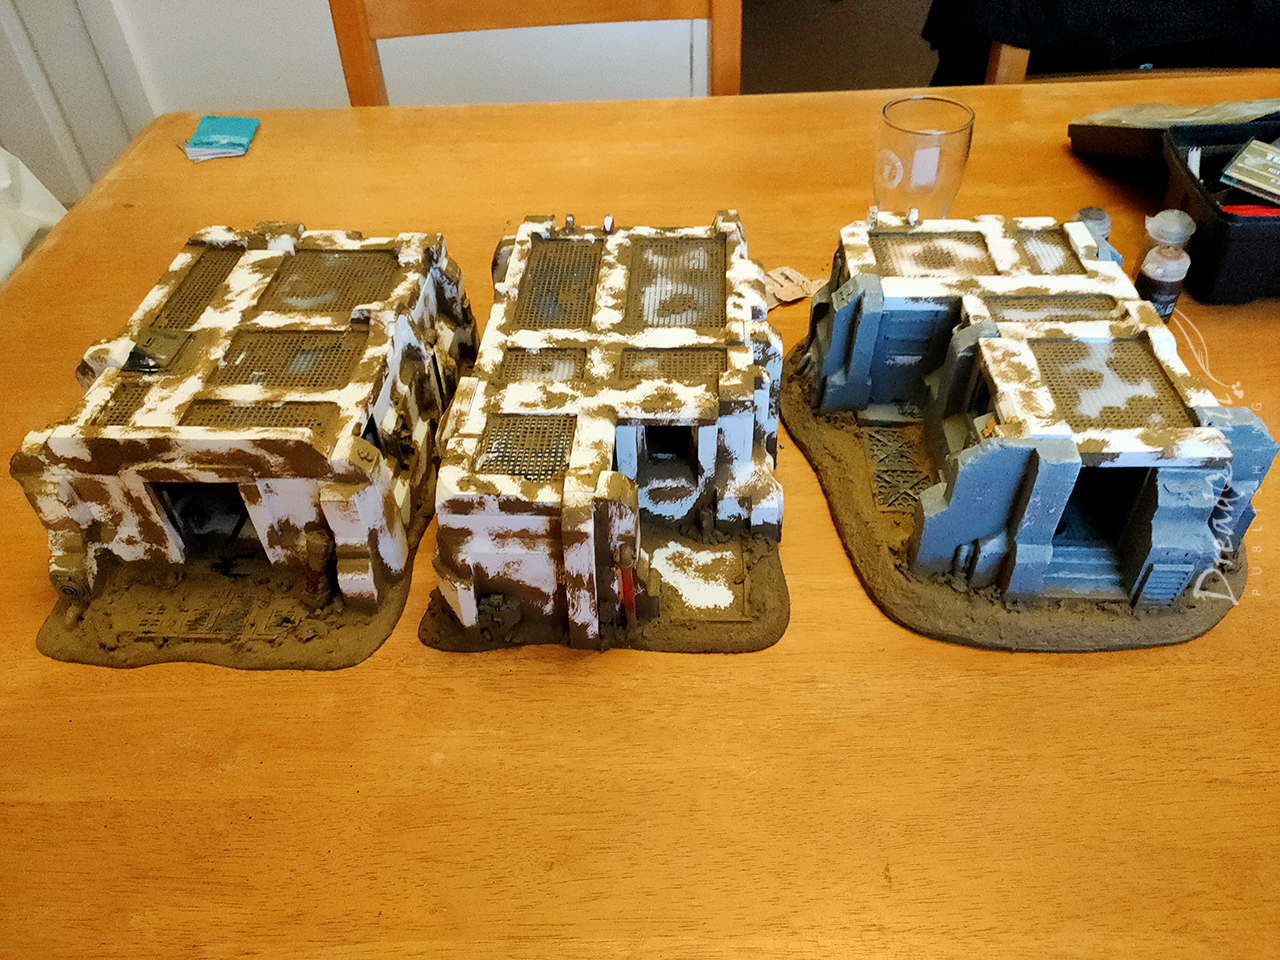
Let us spray
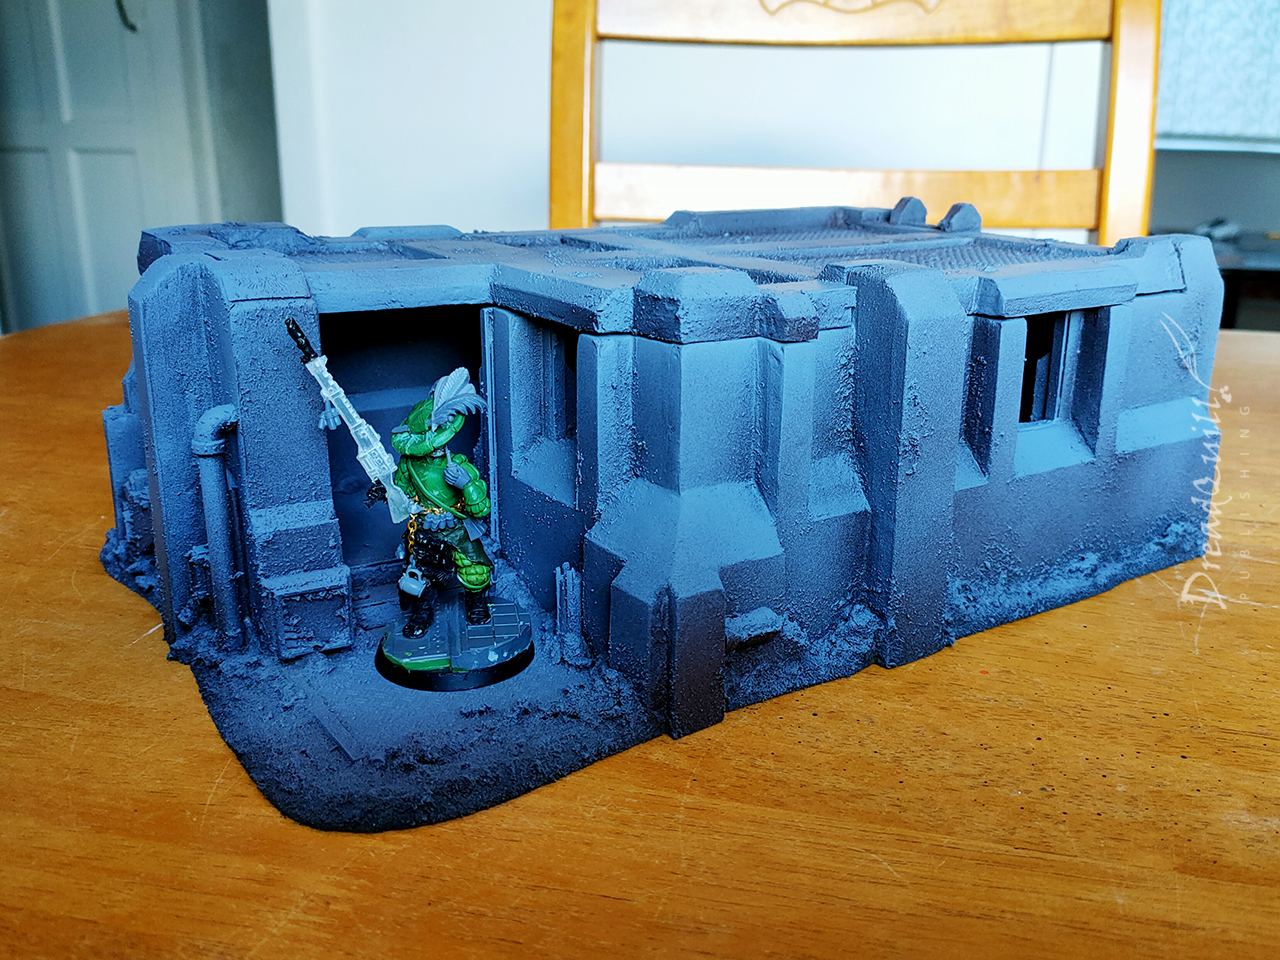
Everything was given a couple of healthy coats of matt black undercoat, with a health checkup halfway through to ensure the paint wasn’t eating through the foamboard.
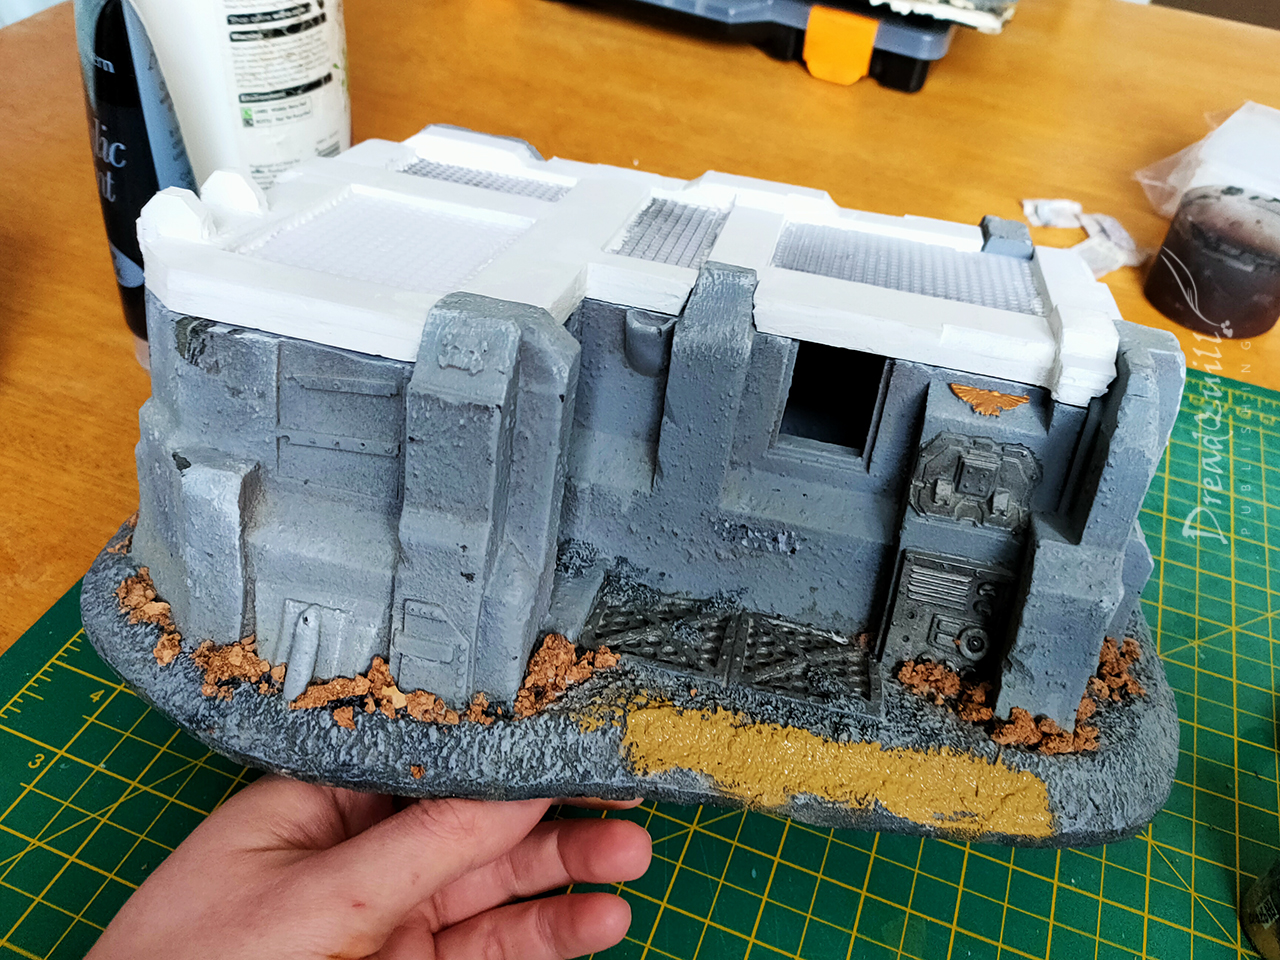
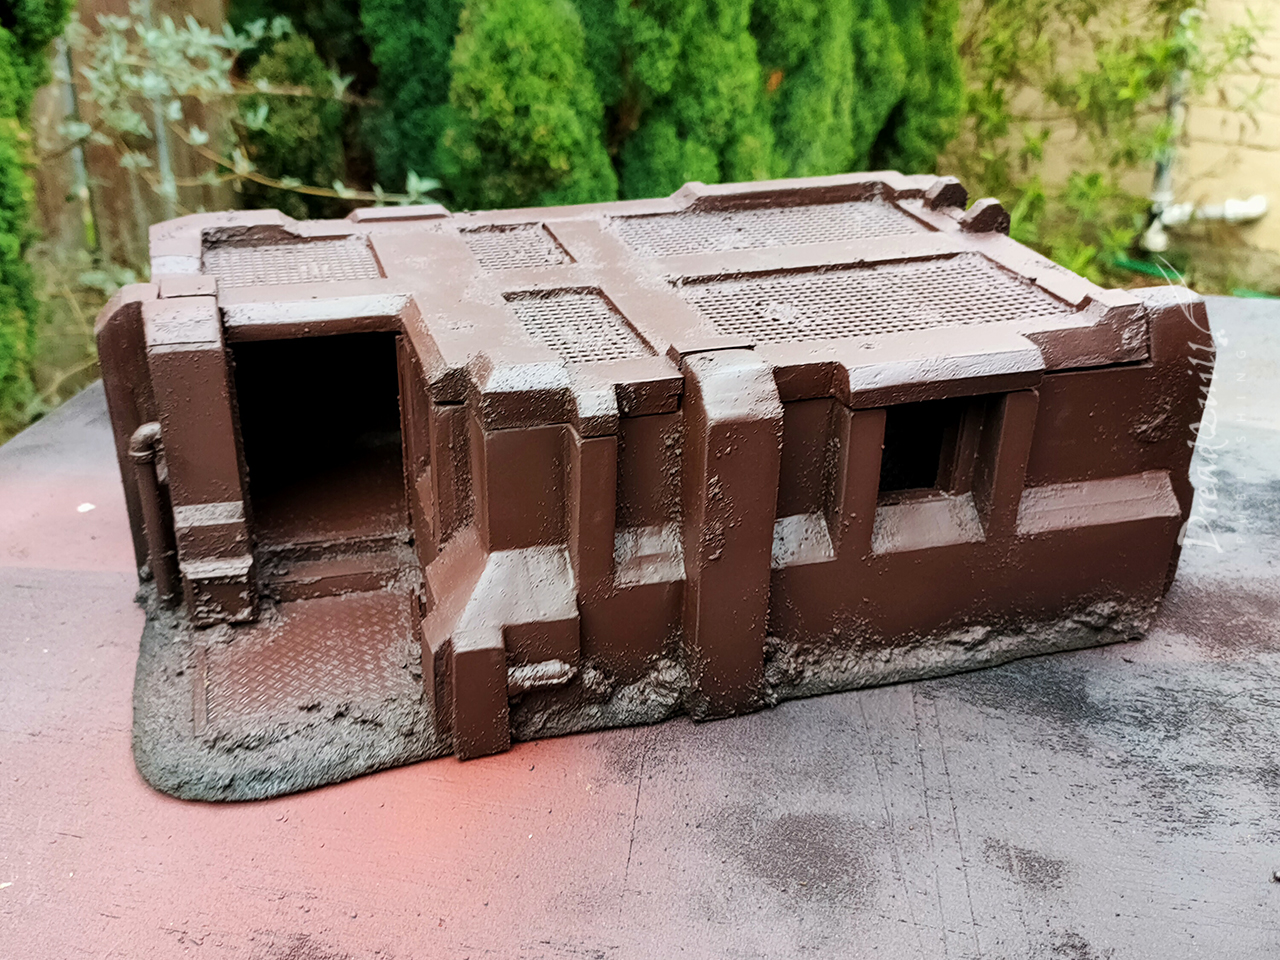
Satisfied my PVA trick was working, I gave them a coat of TTCombat’s laser cut brown spray. As a side note, as much as I like having access to affordable coloured sprays, they do have an annoyingly glossy finish.
A final zenithal coat of grey spray paint was applied, leaving plenty of brown in the cracks and crevices.
Changing rooms
Painting these big boys was a matter of drybrushing and washing. I didn’t want to do any detail work as I didn’t want to distract from the big vague shapes (and I’d spent enough time bevelling foamboard, I just wanted to get them done).
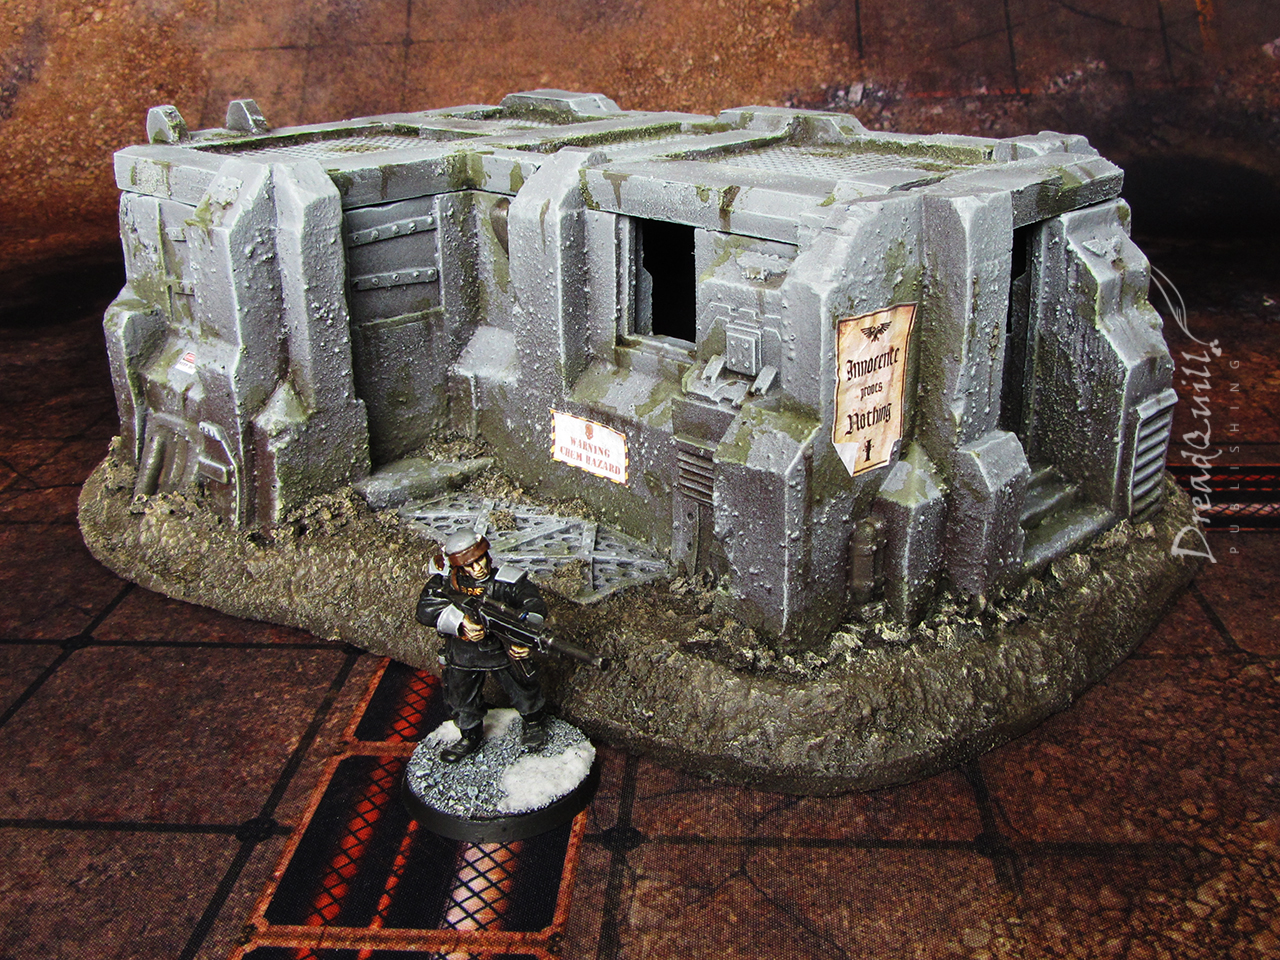
- The habs were given a drybrush of light grey to pick out the textures and edges
- Athonian Camoshade and Agrax Earthshade were sponged on, largely in corners were rot might gather, but also applied as drips of muck.
- The dirt was given a coat of brown paint, then lightly drybrushed. Agrax went over the top, with another even lighter drybrush to pick out the larger rocks.
- For metal parts, these were given a flat coat of Typhus Corrosion with a light drybrush of metal picking out key details
- The finishing touch was adding some posters I found on the internet (and some I’d made mself), printing them out and roughing them up a bit before attaching them with PVA.

They were simple to paint, with just a handful of colours applied in interesting ways. There’s not much else to add about that part, so on with the show!
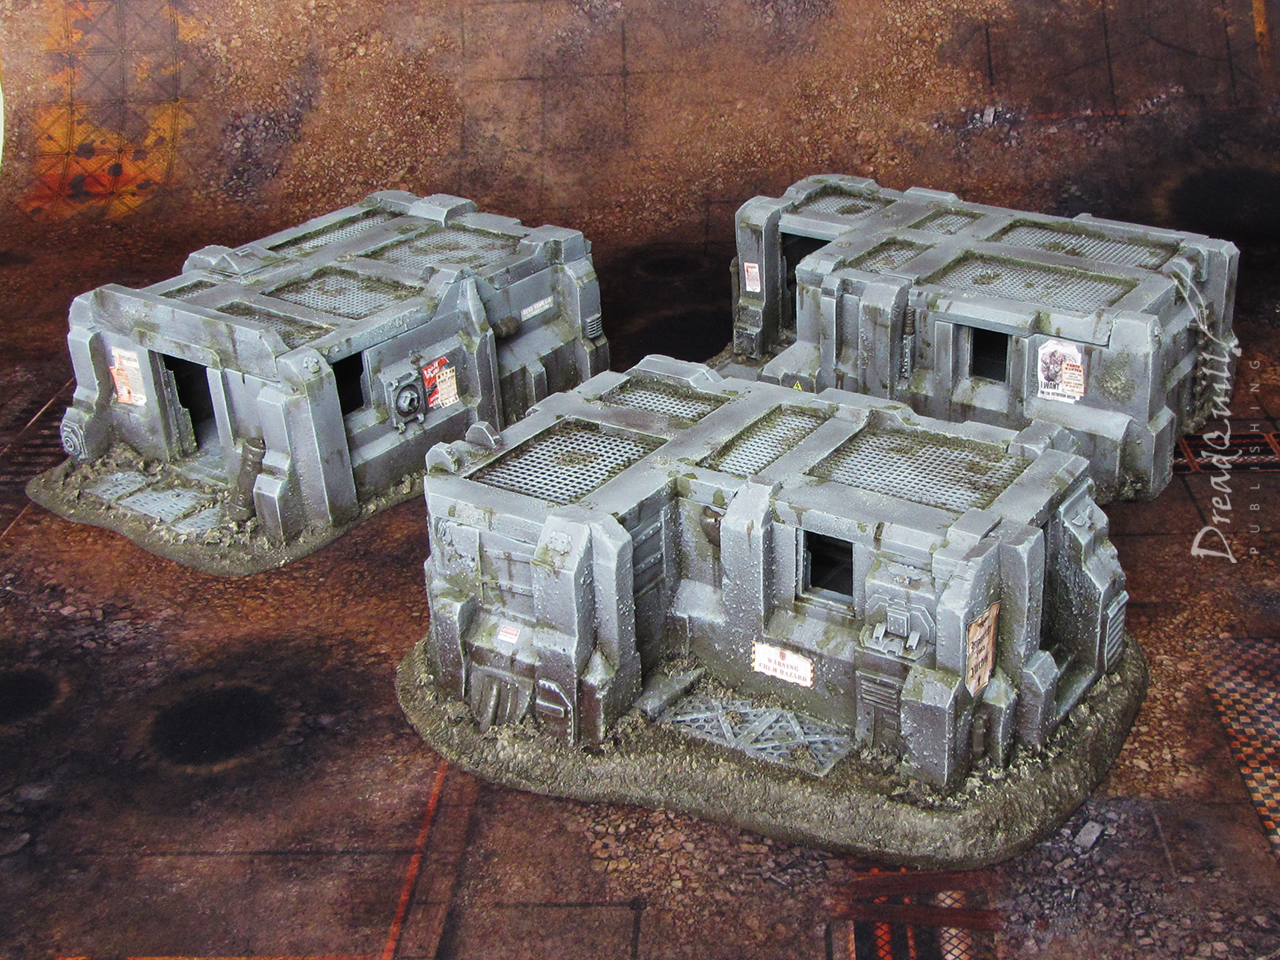
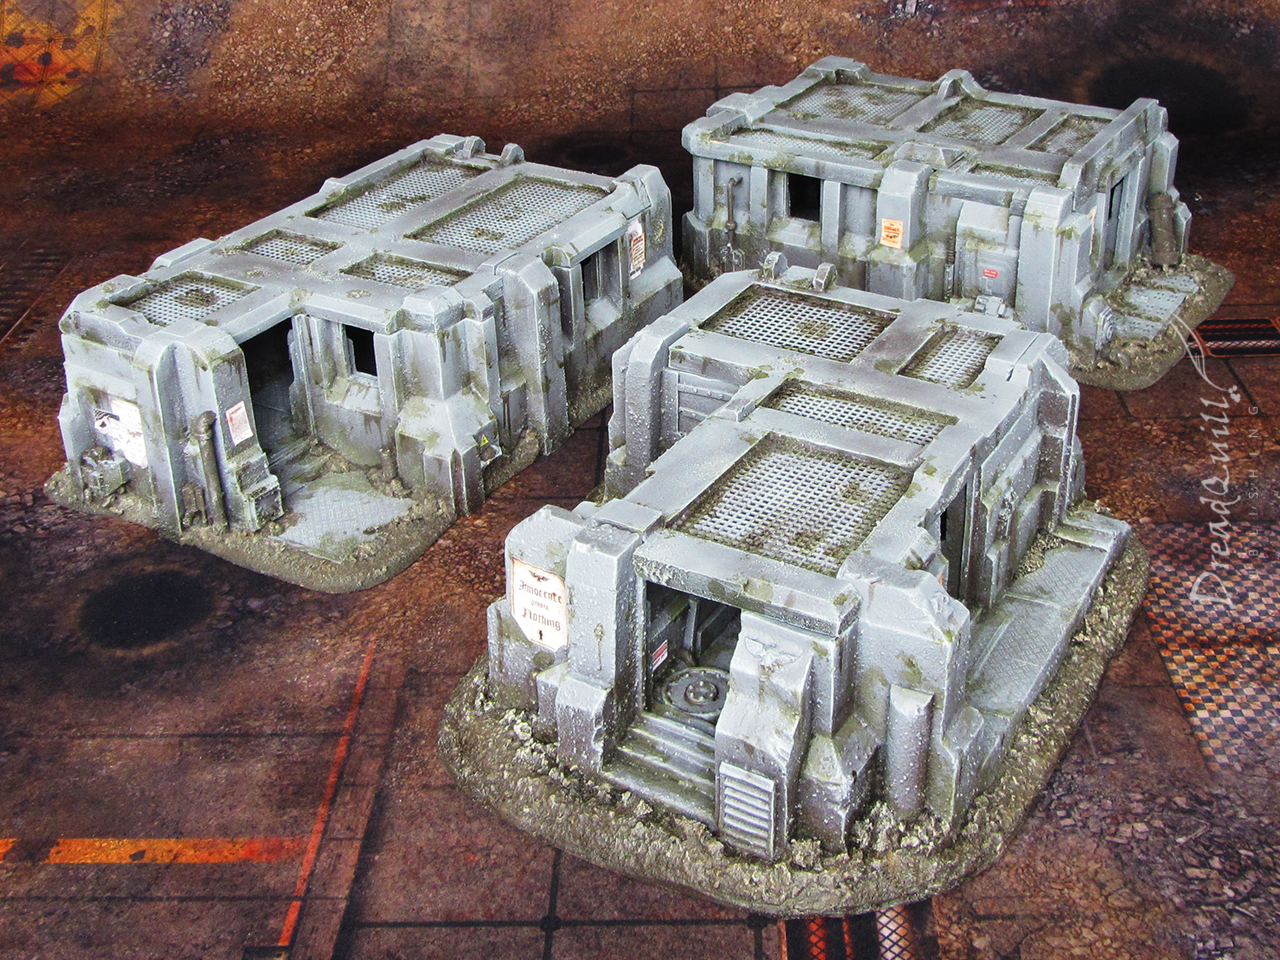
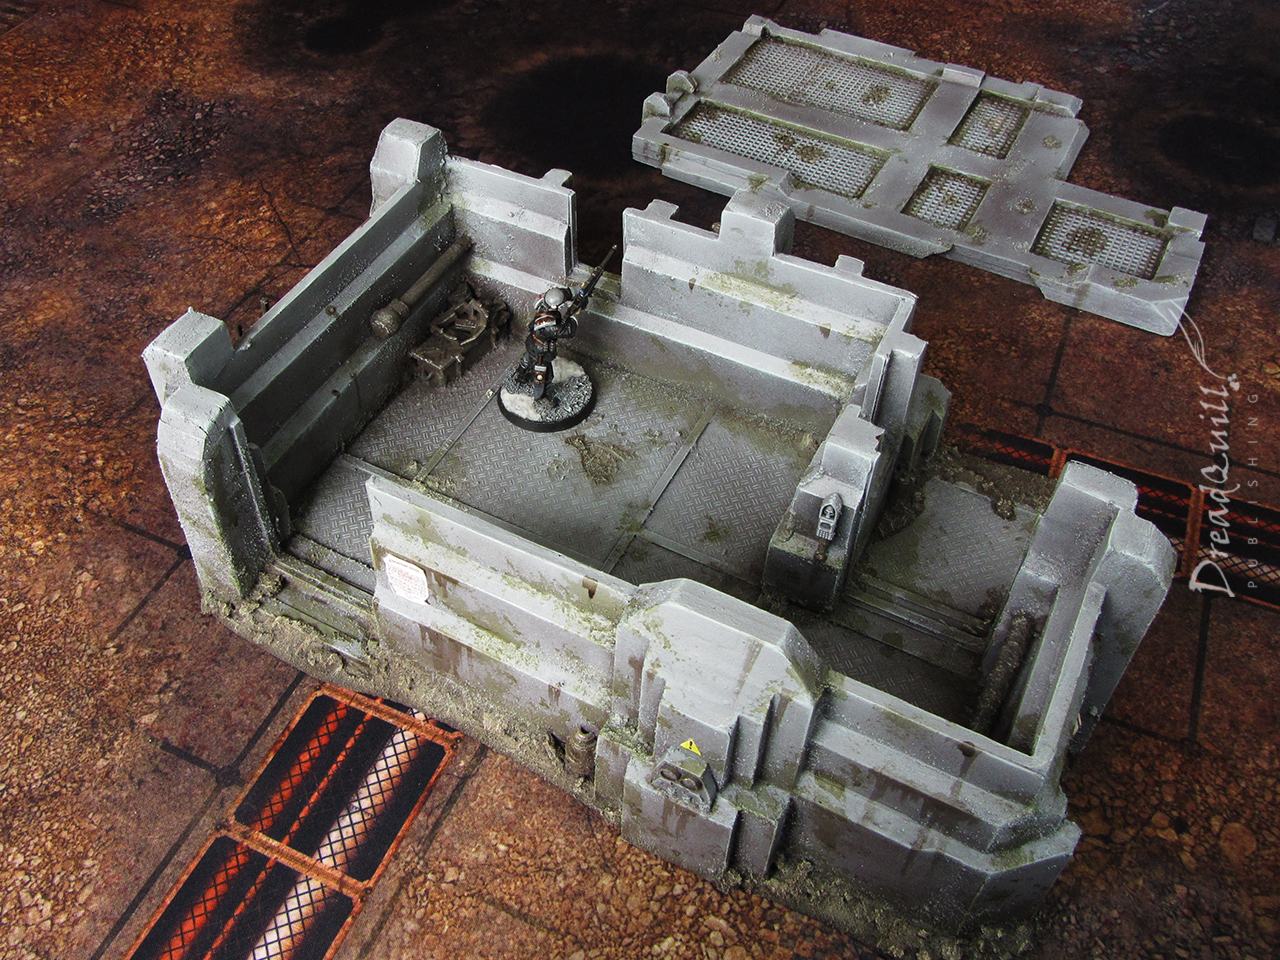
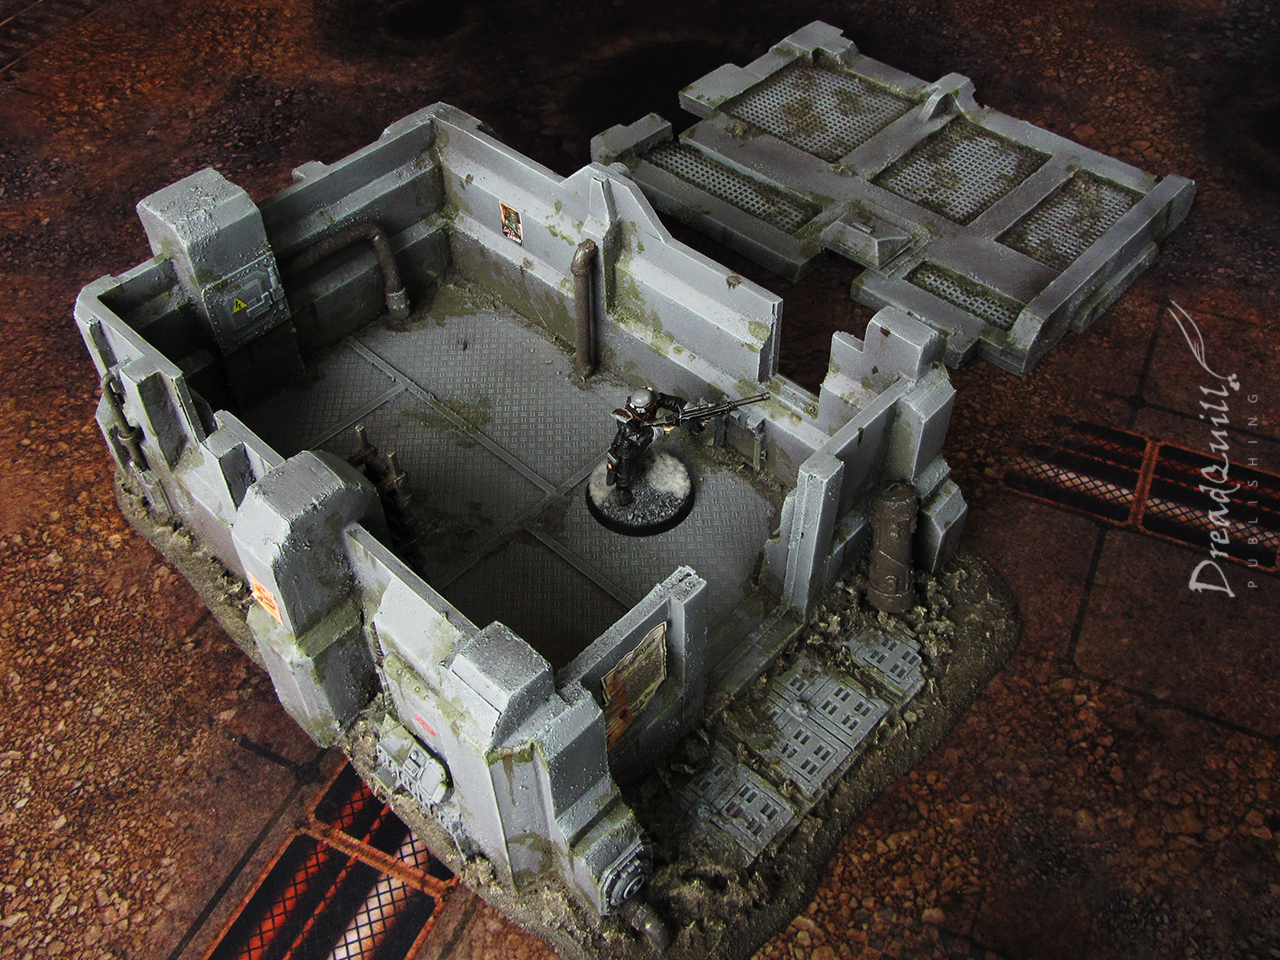
The S-shaped one

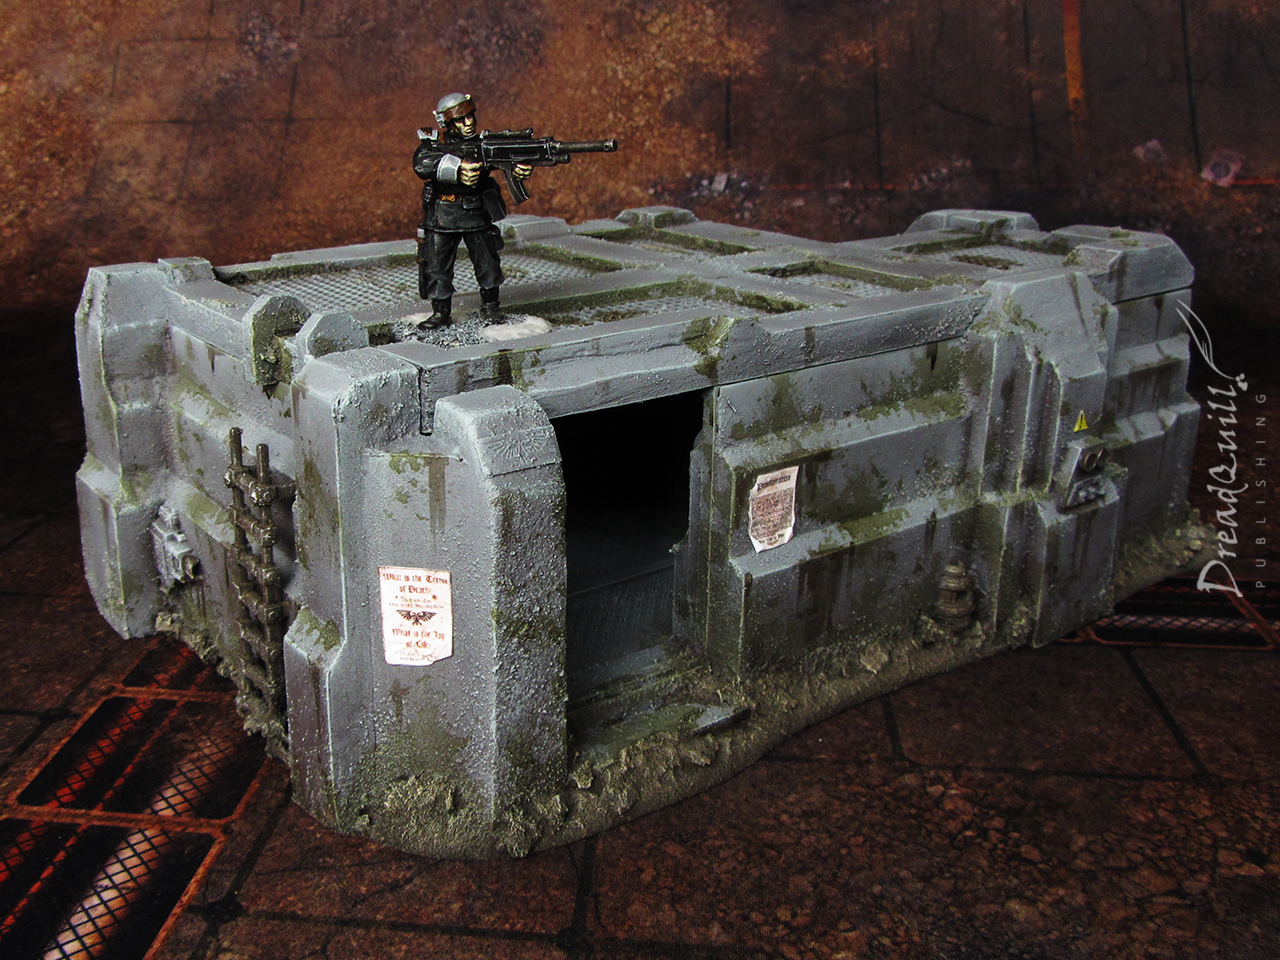
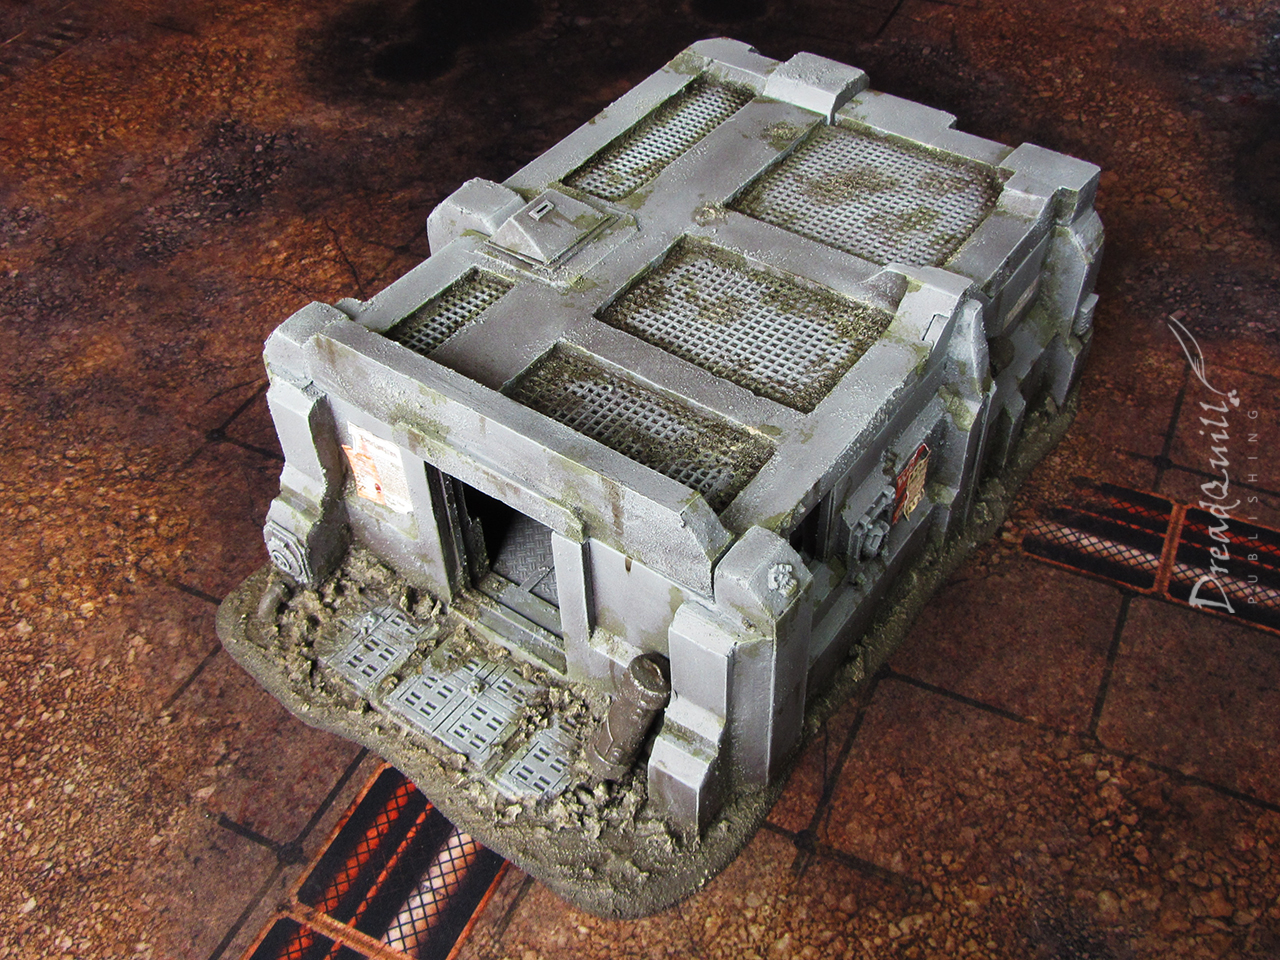
The Town Hall one
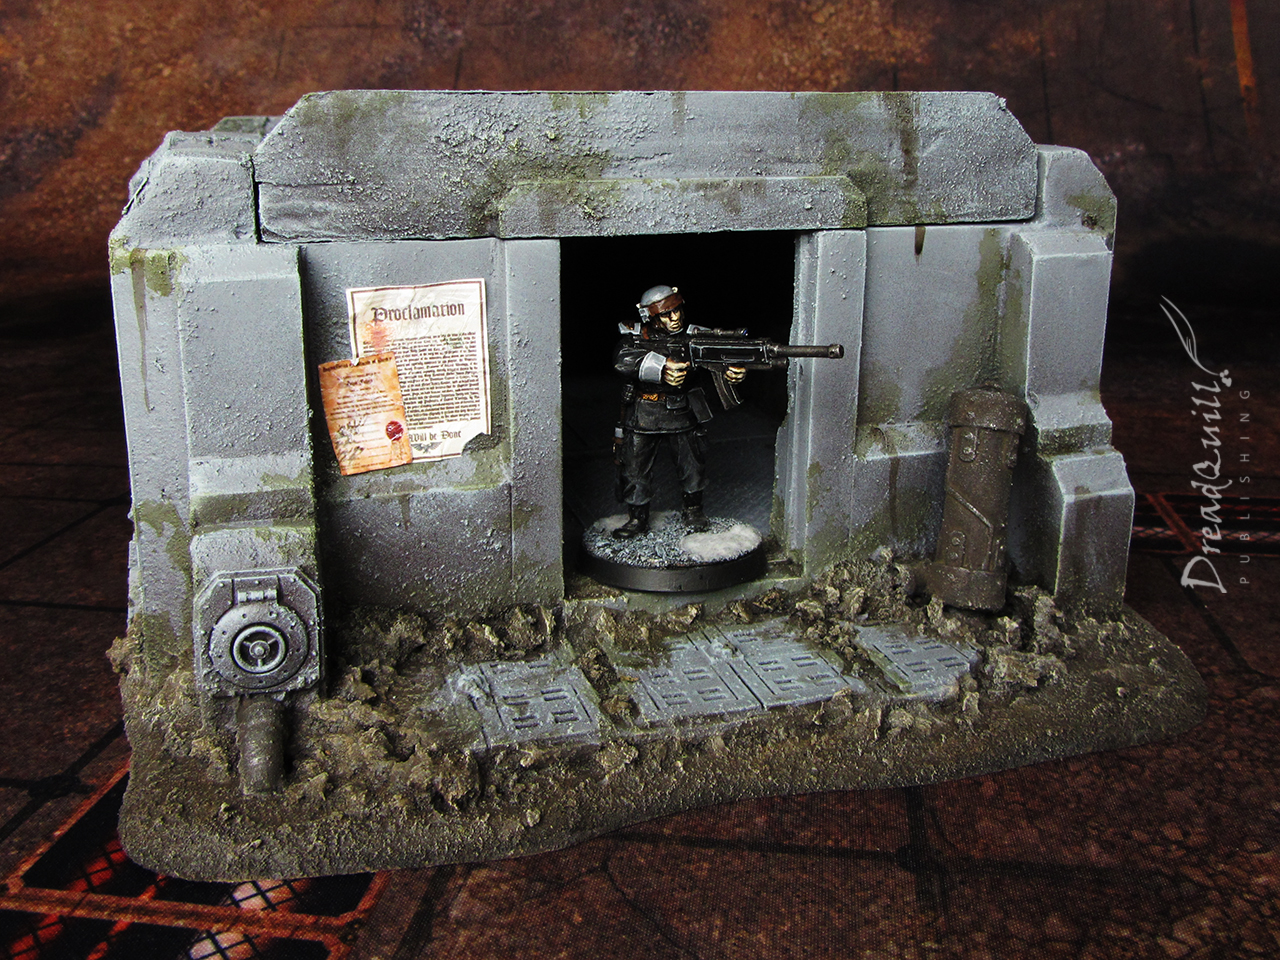
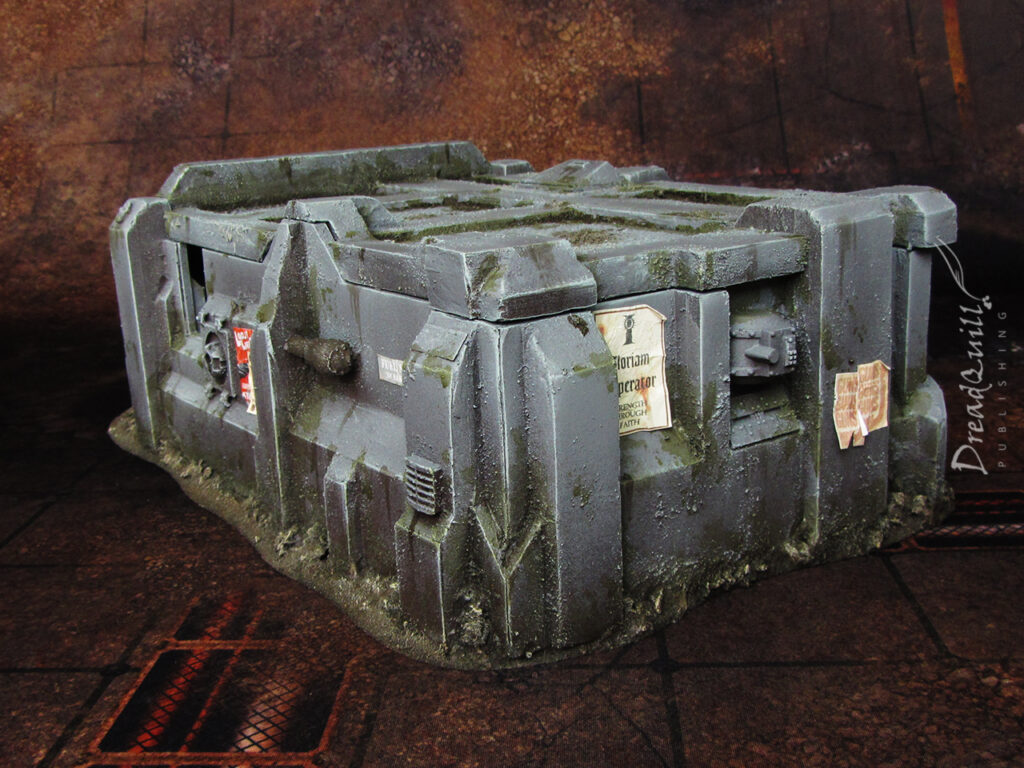
I’m overjoyed with how well they came out. The only thing I’d change is perhaps go a little lighter on the weathering so they’re not so green, but otherwise I’m really happy with them!
I wasn’t sure it would be possible to create convincing replicas of an ancient kit with no instructions or design logic, but it was! I’m thrilled to bits with how they came out, and I can’t wait to put them on a tabletop and live out my sci-fi spaghetti western dreams.
Let’s just not talk about why they don’t have any doors, eh?